Will Spider Mites Spread to Other Plants?
If you’re anything like me, you probably pay close attention to your plants, especially if you’re growing everything in the confines of your backyard. And I’m guessing there’s a good chance you’ve dealt with your fair share of spider mite problems since, as I’ve noted in this article on how spider mites spread, they can be found practically everywhere on Earth.
(So if you’re one of the few who’ve never had spider mite problems in your garden, lucky you!).
When I first noticed the early signs of a spider mite infestation this spring, I decided to do something I’ve never done before: I did nothing.
I did nothing for one major reason. For beginning gardeners out there, I wanted to answer the question “Will spider mites spread to other plants?” with up-close, personal observations.
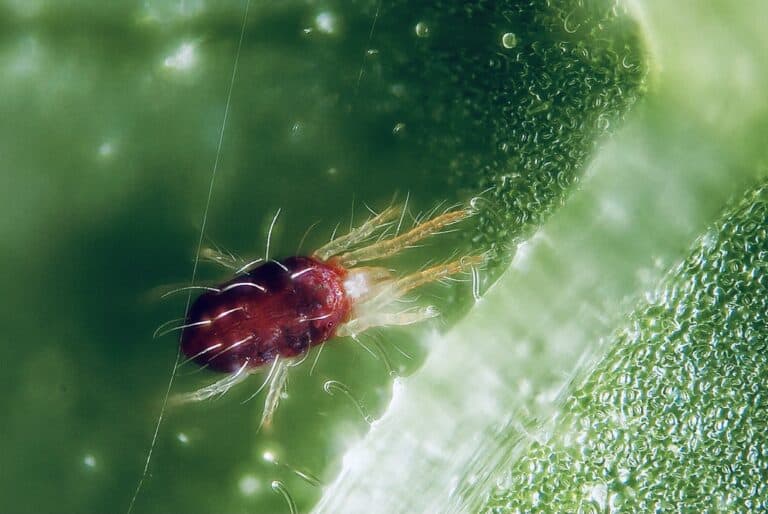
Although small in size (typically .1mm to .5mm), spider mites will easily spread to other plants. Female spider mites can lay anywhere from 8 to 20 eggs per day, which means that a small, localized infestation will expand quickly to other plants if left unchecked.
My experiment was a success in that I learned a great deal about how spider mites spread–and how to keep them from spreading further–but it was also a failure in that I lost far more plants than I had originally anticipated due to the exponential growth and extensive damage inflicted by the spider mites.
Long story short: Don’t do nothing when it comes to spider mites. As soon as you see signs of spider mite activity, act quickly to keep them from spreading across your property (and beyond).
My (Failed) Spider Mite Experiment
Like many gardeners, I don’t have an enormous property, so I’ve got to get creative with what I’ve got, which means that I’ve learned to make the most of my backyard over the years.
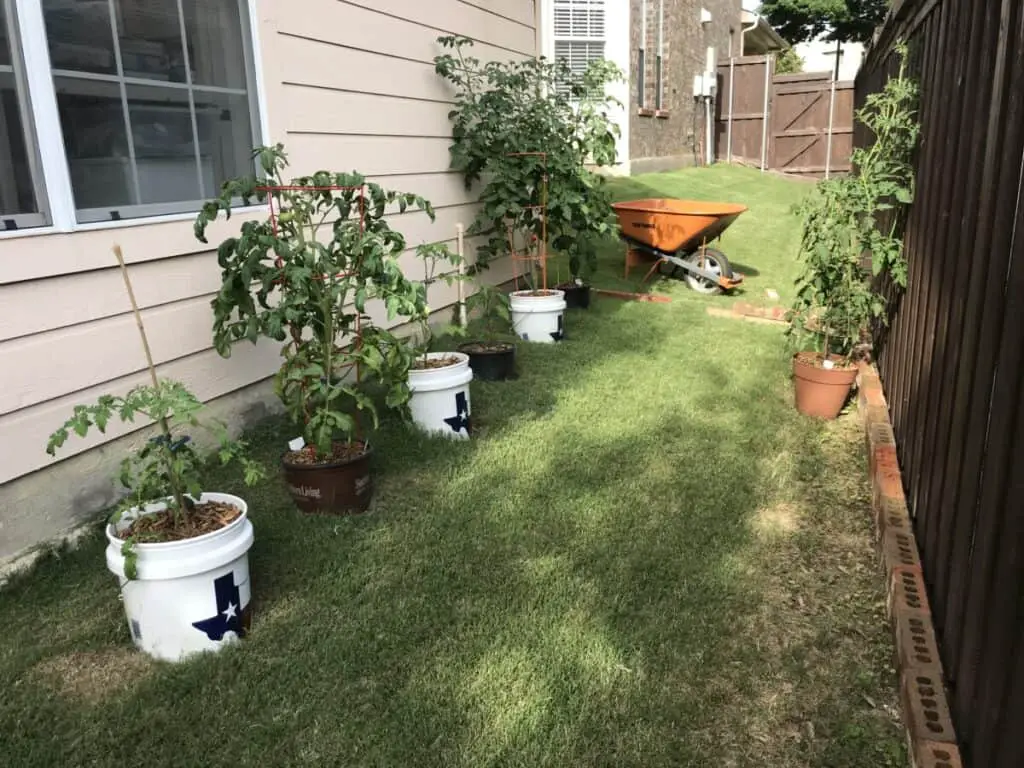
Behind my garage, I have a small strip of land that measures 7 feet wide and 25 feet long. Despite having a fence on one side and a garage on the other, this area gets approximately 7-8 hours of sunlight per day throughout the spring and summer because it faces east-west. I decided to grow tomatoes and peppers behind the garage, and I ended up with 14 total plants back there (12 tomato and 2 pepper plants).
My decision to conduct a spider mite experiment was something of an accident. I was working in that part of my garden one day, making sure my tomatoes were supported with cages, bamboo poles, and twine, when I noticed that my Purple Russian tomato plant had early signs of a spider mite infestation.
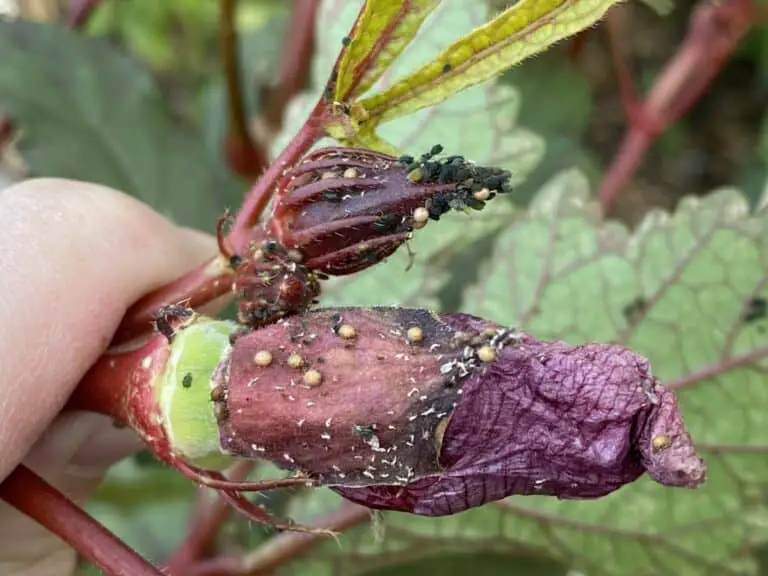
(If you’re not 100% sure you know what an early spider mite infestation looks like, check out my article on identifying early and late stage spider mite infestations.)
I didn’t see any signs of spider mites on nearby plants, so I wondered how quickly they’d spread if I did nothing. I realized that the strip of property behind my garage provided the perfect place to figure out what would happen. I had 14 plants planted there, and they were set apart from the rest of my garden, which was on the other side of my backyard (and separated by a detached garage).
I thought it’d be interesting to calculate how long it took for the spider mites to spread across a single plant–and maybe to a nearby plant or two–before I took action to stop their spread.
What I didn’t realize at the time–and the reason why I’m writing this article–is that the spider mites spread much faster than I had originally anticipated. Within just a few weeks, they had overtaken the Purple Russian host plant and had spread to all other tomato plants in that part of my property and even to a few plants that weren’t anywhere near the experimental group.
What began as a casual experiment in a remote corner of my backyard turned into a one-man race to stop spider mites from spreading to the rest of my property.
How Quickly Do Spider Mites Spread?
Before I provide a detailed overview of what happened, here’s what I learned from the experiment:
Despite their small size, spider mites will spread quickly. In 2 weeks, they can take over a single plant. In 3-4 weeks, they can spread from the initial site of infestation and affect potentially dozens of nearby plants.
Once you notice an early spider infestation, you have roughly 12-14 days before your plant is covered in spider mites. You then have approximately 1-2 more week or so before the spider mites have damaged the initial plant and spread to most (or all) of the susceptible surrounding plants.
(Thankfully, elsewhere in my garden, I had intermixed plant varieties that spider mites like alongside those they dislike, so those plants did much better overall than the ones I planted behind my garage. I’ve discussed this process in articles about plants that spider mites like, plants that resist and repel spider mites, and plants that serve as decoys or traps.)
Long story short, I’ve written extensively about spider mites because I want to help other gardeners understand what they look like, where they come from, and how to identify them before they destroy your plants the way they destroyed mine.
Here’s a quick overview of what happened during my experiment. Below the chart, you’ll find a more detailed description of what took place as well as photos documenting the process.
| Day | Infested Plants | Damage |
| May 22 | 0 | No signs of infestation. |
| May 26 | 1 | 4 leaves with visible stippling. |
| May 29 | 1 | 2 branches with stippled leaves. |
| June 1 | 1 | 5 branches with stippled leaves. |
| June 3 | 1 | 50% of 1 plant lightly to moderately infested. |
| June 6 | 3 | 1 plant heavily infested. 2 plants lightly infested. |
| June 9 | 6 | 1 plant with foliage decay. 2 plants moderately infested. 3 plants lightly infested. |
| June 12 | 8 | 1 plant with extensive foliage decay. 2 plants heavily infested. 5 plants lightly to moderately infested. |
| June 16 | 15 | 1 plant practically dead. 4 plants with extensive foliage decay. 7 plants lightly to moderately infested. Early signs of infestation on 3 additional plants. Experiment abruptly concluded. |
May 22: I decided to re-home several of my container plants to the side of my yard behind my detached garage. I was tied up at work most days, so some plants remained in their original containers while I buried a few others with areas of the containers removed to allow their roots to penetrate into the native soil.
At this point in time, the Purple Russian tomato plant was huge. It had healthy foliage and was producing beautiful clusters of fruit, which I had been harvesting for several weeks. I had noticed a few early tomatoes with blossom end rot, but otherwise, the plant was doing just fine.

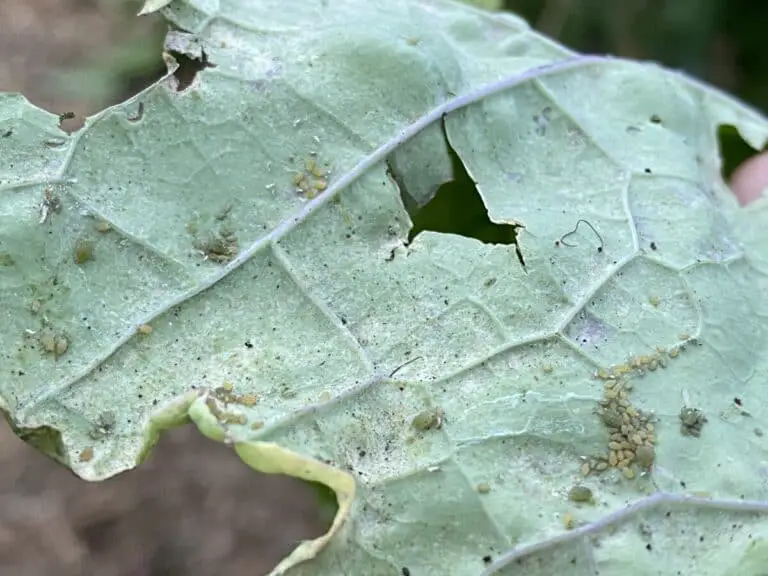
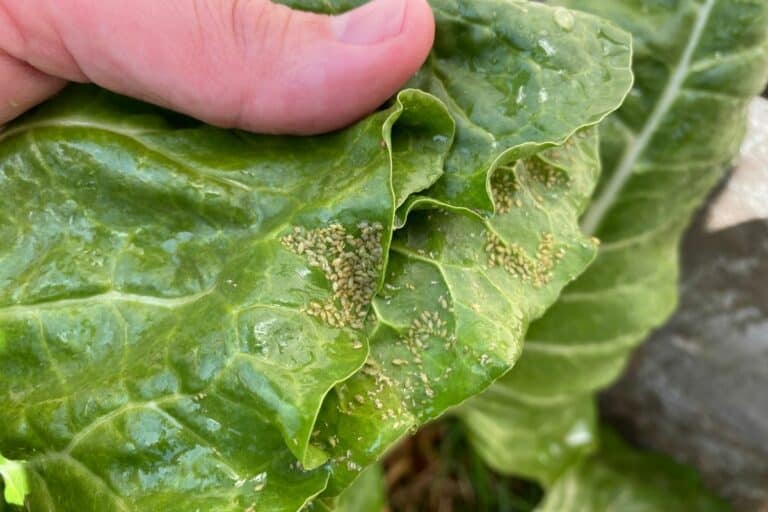
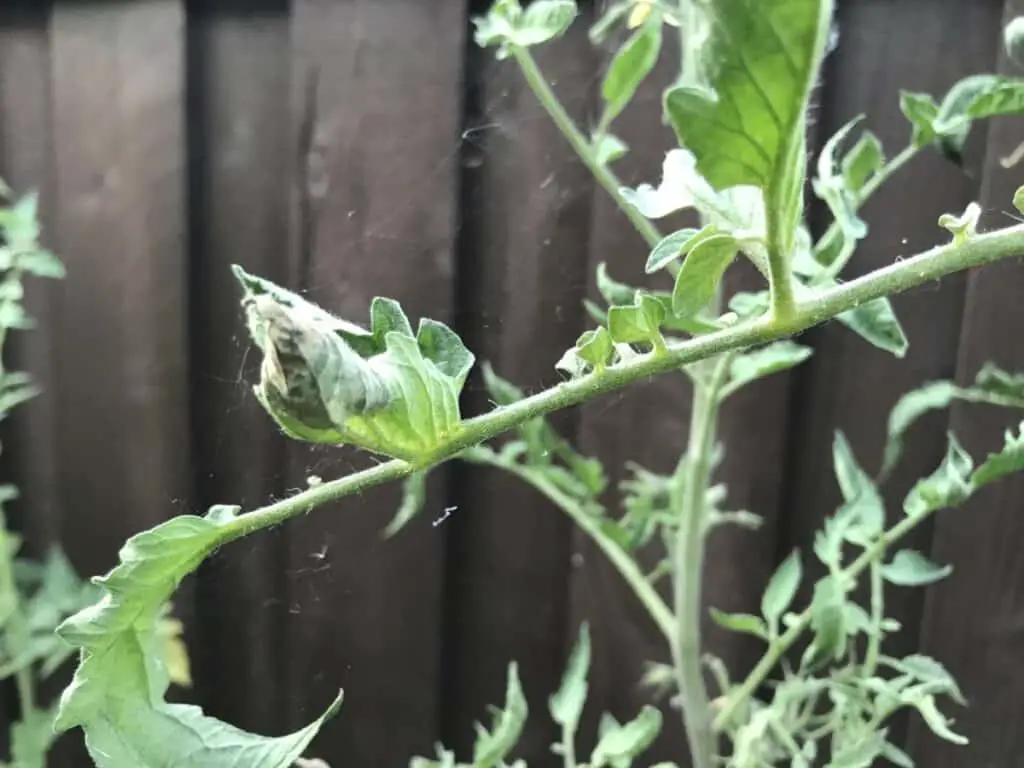
May 26: While watering that morning, I noticed the first signs of spider mites on my otherwise healthy Purple Russian tomato plant: several stippled leaves on a single large branch. I decided on a whim to conduct an experiment to track how quickly spider mites would spread across its foliage, so instead of treating the spider mites, I let them be.
May 29: I meant to keep tabs on my experiment every two days, but work kept me pretty busy during this time. Three days after my last examination, I noticed that the spider mites had spread beyond the first branch. The stippling effect appeared across two branches, visible on numerous leaves. It was clear that the spider mites were reproducing at a quick pace, but I had committed to the experiment, so I decided to see if through.
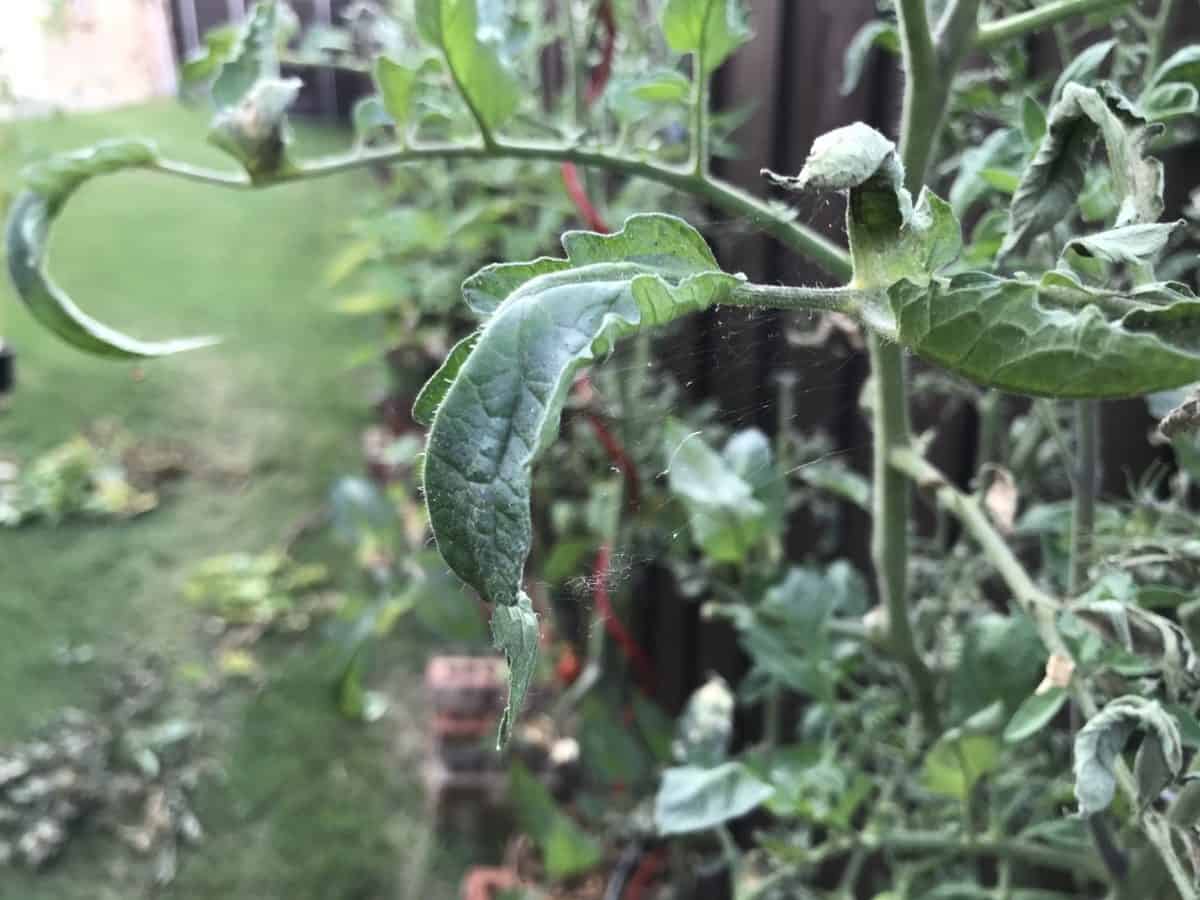
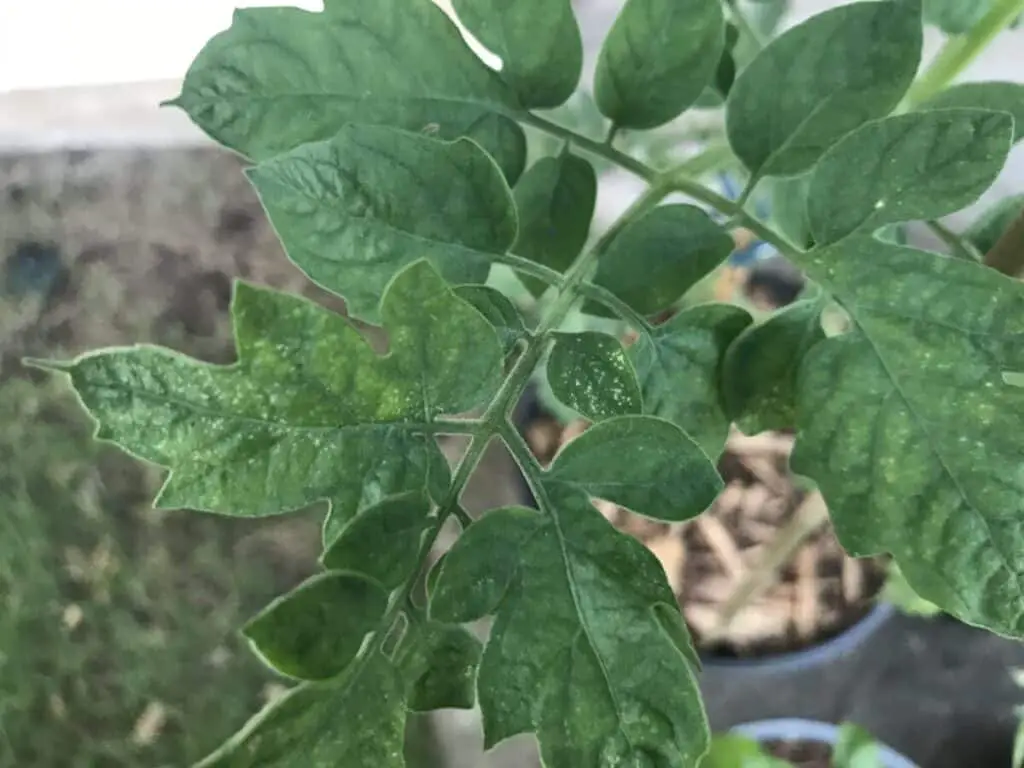
June 1: Three days later, I noticed spider mite damage on 5 branches, along with patchy decaying spots that had appeared on the original branch due to extensive stippling. The tomato plant’s leaves had begun to curl, signaling that it was under pest-induced stress. I was still curious about the infestation’s rapid progression and not yet concerned.
June 3: The spider mites were visible on roughly 50% of the Purple Russian’s foliage. They appeared to be moving up the plant, from the lower older branches to the younger ones above. The lower branches showed signs of extensive leaf curl and decay; the upper branches showed signs of stippling. I recognized for the first time that my plant might not survive this experiment, but I’d already harvested numerous fruits, so I was willing to let that happen in order to see how the infestation progressed in real time.
June 6: I had to wait until the weekend to continue the experiment. I noticed leaf curl across the lower half of the Purple Russian plant. Patchy areas had appeared on multiple branches, and the stippling effect was now apparent on most of the plant’s foliage. Of more concern was the fact that the stipples had appeared on two adjacent tomato plants, signaling to me that the spider mites had successfully migrated from the host plant to others in the nearby vicinity. At that time, I was a bit concerned about the progression of the infestation, but it was still localized, so I wasn’t yet worried.
June 9: I saw decayed foliage across much of the Purple Russian plant as the stippling effect gave way to patchy brown spots on most of the plant’s foliage. For the first time, I saw wispy webs on a few branches, and I noticed that numerous leaves were beginning to shrivel up and die. The two closest plants showed moderate signs of spider mite infestation–stipples on multiple branches along with some decayed brown spots. Three other plants showed signs of spider mite stippling.
At this point, I grew concerned that my ad hoc experiment might endanger the rest of my garden. I decided to end the experiment in 1 week if the infestation continues to spread.
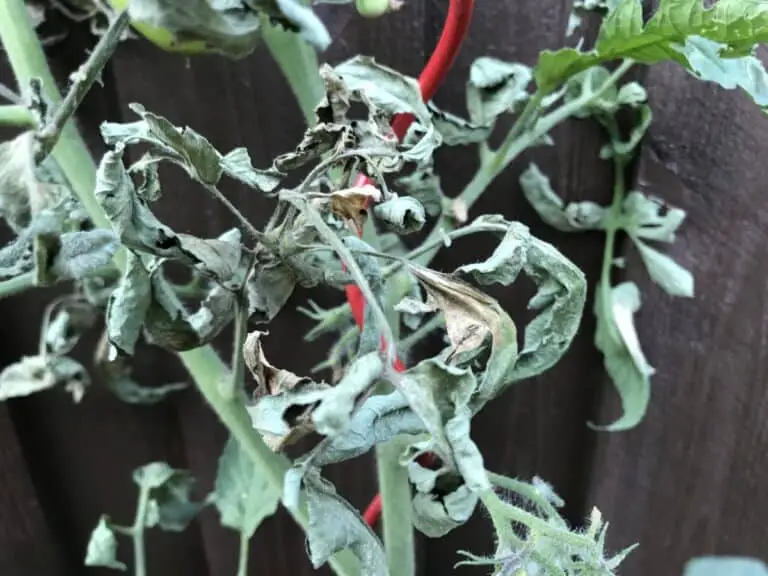
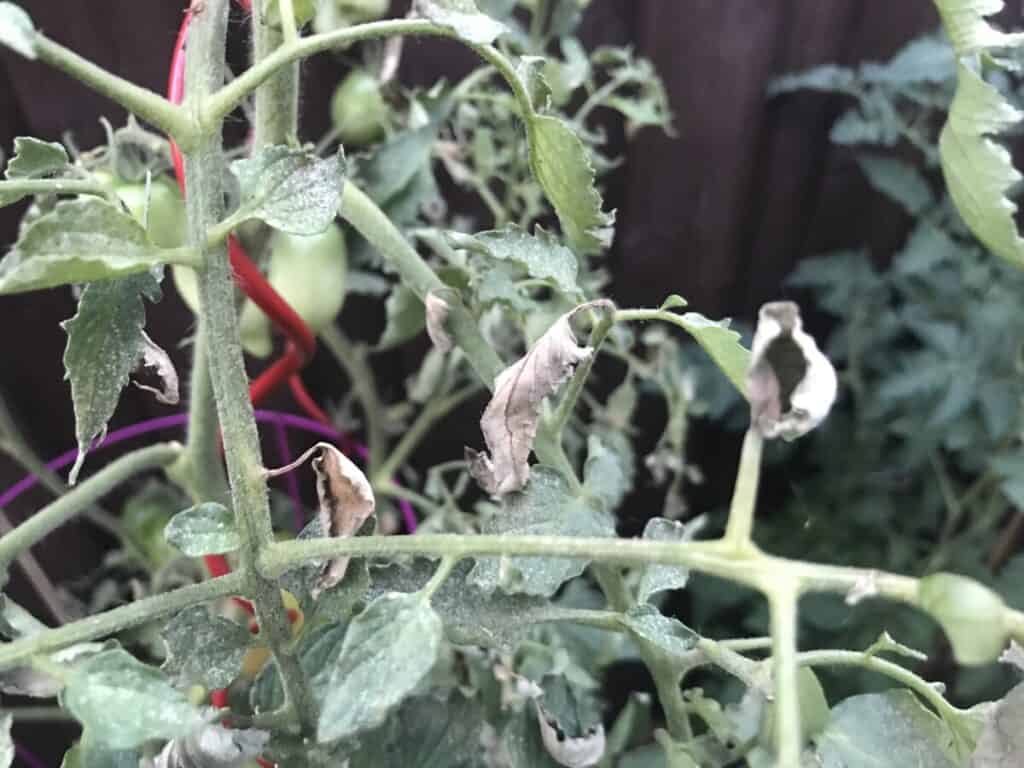
June 12: Three days after my last observation, I noticed that entire branches on the Purple Russian were showing signs of extensive decay. More webbing was visible across the plant, while patchy spots and leaf curl were visible on the two nearest plants. Three other plants showed signs of spider mite damage on multiple branches, and the stippling effect had appeared on an additional two plants. I considered stopping the experiment early but decided to wait a few more days (bad call on my part!).
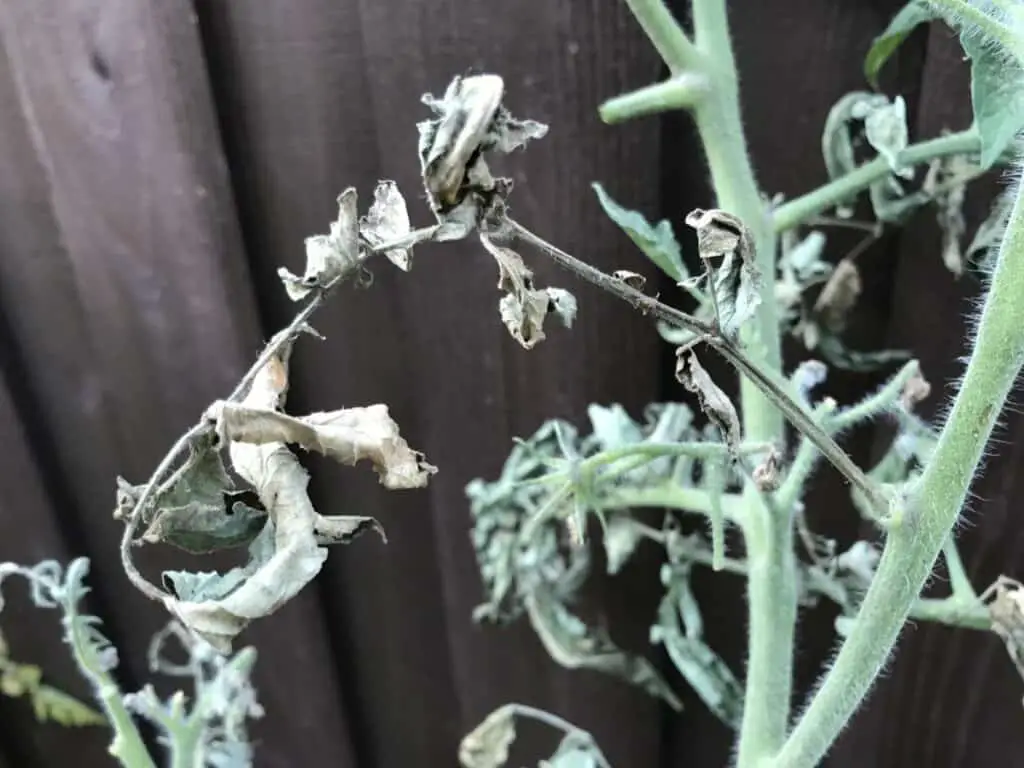
June 15: At this point in time, all 12 of the tomato plants in the experimental group showed signs of spider mite infestation. The Purple Russian was drying up and dying, 4 others had extensive leaf curl and foliage decay, and light to moderate stippling and brown patches could be seen on the remaining 8 tomato plants.
(Surprisingly enough, I saw no signs of spider mites on the three pepper plants that were intermingled with the tomato plants.)
What concerned me most–and what caused me to immediately end the experiment and begin remediation efforts–was what I saw on three tomato plants that were on the other side of my garage, completely separated from the plants in the experimental group. I could see stippling on all 3 plants, which meant that the spider mites had somehow migrated–via my clothes, tools, or their wispy webs–from one side of my garage to the opposite side, the side that faced the rest of my garden.
This was alarming because, for the first time, I realized that my casual experiment might have endangered not just a few plants but everything I was growing that year. At that point, I began aggressive remediation efforts, primarily using a combination of insecticidal soap spray and neem oil spray.
Despite my best efforts at remediation, I couldn’t stop the spread of spider mites among my tomato plants. On June 21, they still showed signs of infestation, likely due to the extend of the decay and leaf curl, which likely provided a protective barrier against my soap and neem oil sprays.
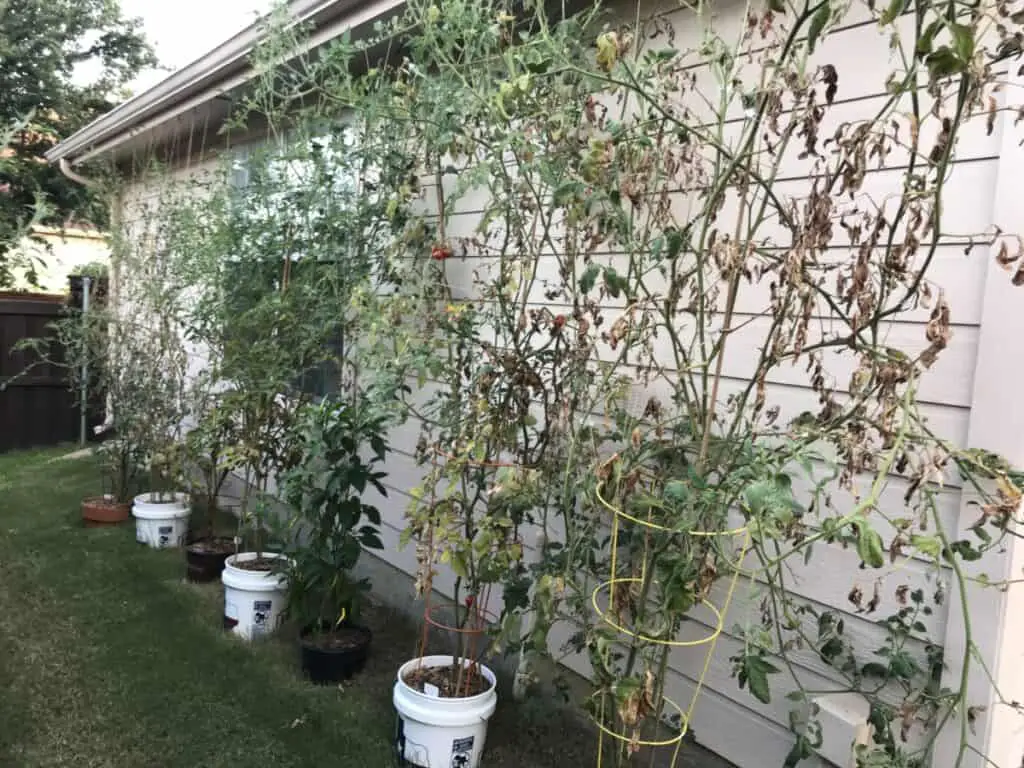
By July 5, my side yard was a mess. All of my tomato plants showed signs of advanced spider mite infestation, and we had had a very rainy May and June, so several of my plants were hit by both early blight and spider mites. Many of them were practically dead. Others were dried up and dying. When I began the experiment, I anticipated losing, at most, 2-3 of the tomato plants in the experimental group. I had no idea that I’d lose most of the plants behind my garage.
How Did I Finally Stop Spider Mites from Spreading?
If I had a dollar for every time I’ve heard gardeners ask about stopping spider mites, I’d be eating out much more often. Because here’s the problem: There isn’t a single 100% failsafe method to stop spider mites from spreading because your garden is a unique ecosystem and thus potentially very different from gardens in other parts of your city and region (even your own neighborhood!).
What you’ll read below is what worked for me during this particular season. If you’d more information about spider mite identification and control, take a look at my other posts on the subject:
- What Do Spider Mites Look Like on Plants? (Photos + Video)
- Where Do Spider Mites Come From? What Science Has to Say
- Are Spider Mites Spiders? How to Identify These Garden Pests
In the wake of my backyard experiment, I kept up my remediation efforts for several weeks, but I eventually realized that the plants behind my garage were too far gone. On July 30, I ripped out the dead plants and cut off 50% or more of the foliage from most others. I made sure to trash the infested plant material (since spider mites can overwinter in compost) and kept up the aggressive remediation efforts on the remaining plants.
Here’s the method I used that finally stopped the spider mites from spreading:
- As noted above, I began by cutting the infested foliage back. This automatically reduced the spider mite population by more than 50% and ensured that the remaining foliage didn’t provide ongoing protection against my remediation efforts.
- I pulled out my two-gallon sprayer and filled it with an insecticidal soap solution. The particular brand of soap I used–a product sold by Safer Brand–required more concentrate than other soaps I’ve used in the past: 5 tablespoons per gallon. I’d recommend following the instructions when it comes to insecticidal soaps since you’ll see many different recipes posted online.
- Using my sprayer, I sprayed my plants completely–on both the topside and the underside of all leaves–in the early evening once each day. I did so in the evenings since I didn’t want to accidentally harm my plants or active pollinators.
- In a one-gallon sprayer, I made a soapy neem oil spray. I mixed 1 tablespoon neem oil with 2 tablespoons of insecticidal soap to ensure that the oil and water mixed well. I sprayed the plants thoroughly with this solution once every 4 days.
By the end of 16 days, I had applied the insecticidal soap spray 12 times and the neem oil spray 4 times, and I saw no further signs of spider mites.
Looking back, I probably could have been a bit less aggressive with the sprays, but after my experiment spiraled out of control, I wasn’t going to take any chances with the remaining spider mites.
If my experiment taught me anything about spider mites, it’s this: If left unchecked, they will spread rapidly throughout your garden, far faster than you might expect.
But if you know what to look for–and if you have the proper tools on hand to fight spider mites–you’ll be okay as long as you act quickly, consistently, and aggressively.