9 Tips to Ensure Proper Drainage in Raised Garden Beds
I love gardening, but sometimes the physical work can be quite demanding. Instead of attempting to dig into the thick clay soil that’s everywhere on my property, I’ve incorporated raised garden beds into my backyard garden area.
Although my raised beds provide me with ample space to plant my veggies, drainage is an issue since I’ve got so much thick clay underneath the beds. And inadequate drainage will keep the soil overly soaked and thereby hinder my plants’ growth.
If you’re building or installing raised garden beds on your property, you might have faced something similar. After lots of trial and error, here’s what I’ve learned.
To ensure proper drainage in raised garden beds, be sure to add soil amendments such as perlite, vermiculite, and compost. Raised garden beds should be leveled before filling them with soil, especially if the ground is sloped, since unlevel beds will result in water runoff and irregular drainage.
If your property has relatively level soil, then you’ve got less work to do. But if, like me, you’ve got slopes all around your yard, you’ll have to account for the slopes to ensure that your raised garden beds are leveled before you begin planting.
However, the most important way to guarantee proper drainage in your raised garden beds is to make sure you’re filling them with soil that’s neither too dense nor too sandy.
But here’s the good news: No matter what kind of soil you’ve got on your property or whatever brand you’ve picked up at your local garden center, you can amend the soil so that it’s guaranteed to drain well over time.
What I’ll share below are several strategies that I’ve adopted over the years when it comes to building quality raised beds with rich, fertile soil, ones that’ll retain water during hotter months while also draining well.
Whether you’ve got clay soil, sandy soil, loamy soil, or some combination of the above, these tips will help you build raised beds that drain properly and have a healthy biome living beneath the soil.

How Can I Make My Raised Garden Beds Drain Better? My Top 9 Tips
Raised garden beds come in all shapes, sizes and price points.
Whether you’re installing high-quality prefabricated beds from Birdies or Vego or building your own beds from wood, concrete blocks, or other materials, the tips you’ll find below will be applicable to any kind of raised garden bed since the key to proper drainage isn’t the bed itself but what you put inside the bed.
1. Consider the Native Soil
I live in a suburban area of North Texas, and the native soil in my backyard is nothing but thick, hard-packed clay covered in Bermuda grass. On top of that, my yard slopes in practically all directions, so there’s very little level ground in the backyard.
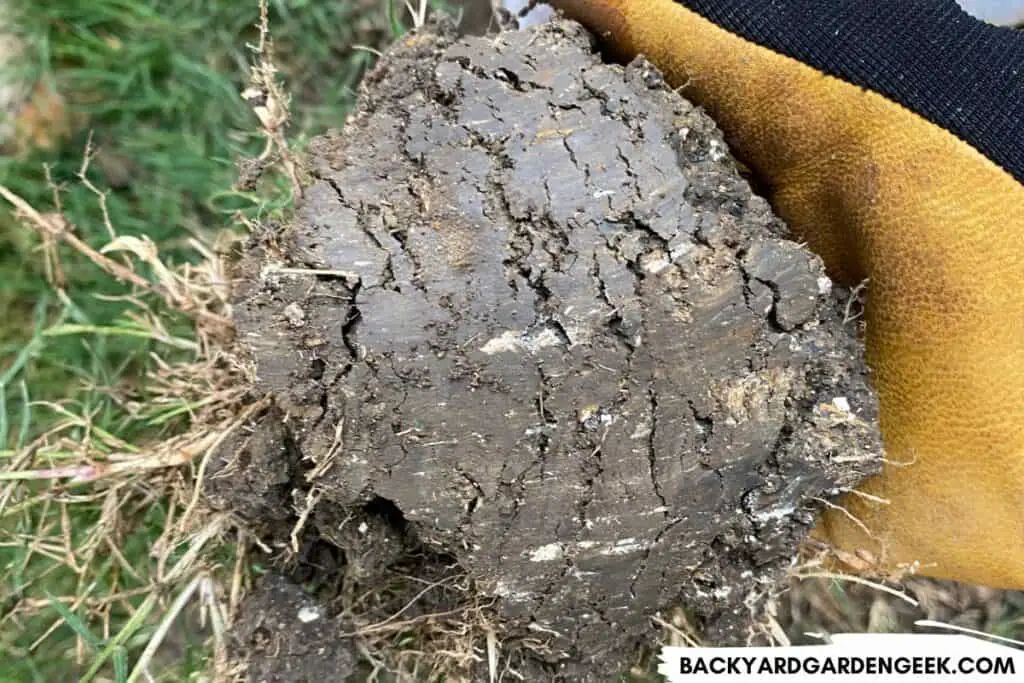
In other words, this is definitely not the ideal soil for a thriving garden.
Over the years, I’ve done a few things that have taken into account the native soil while allowing my plants to thrive.
First, I experimented with growing tomato plants in containers to see what effect the clay soil would have on their root systems. I took several 5-gallon paint buckets, cut large openings in the bottom of them using a 2-inch hole saw, dug up 2-3 inches of clay, and placed each bucket into the shallow circular holes.
This was the plan: I would fill each bucket with high-quality soil yet leave openings at the bottom for my plants’ roots to extend into the native soil while also encouraging the worms in the native soil to travel up and into each bucket from below.
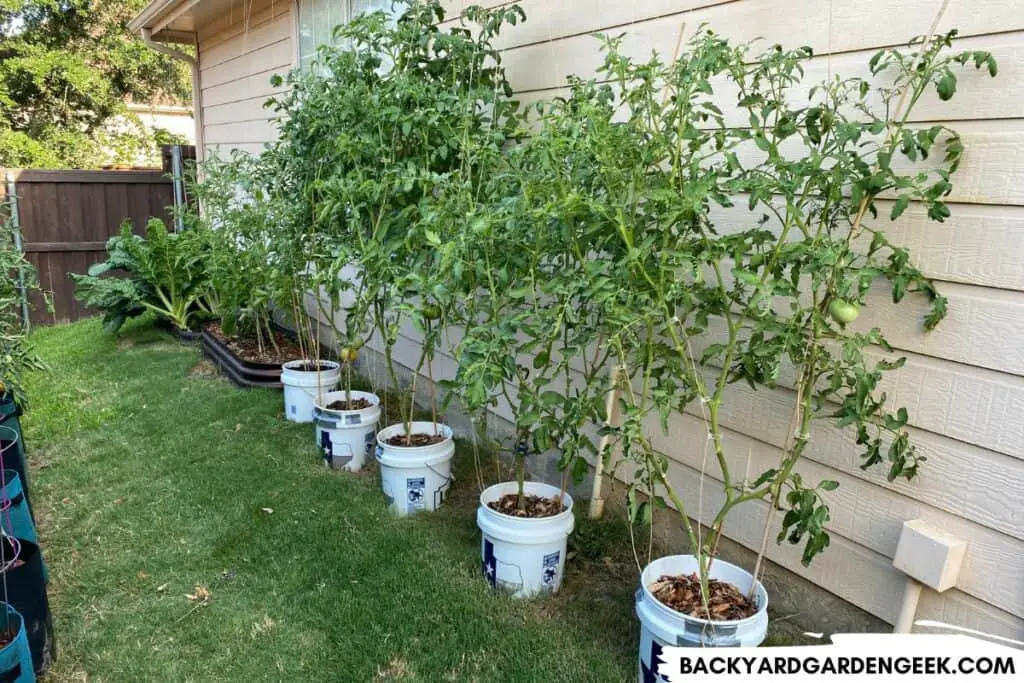
I wasn’t sure how things would work out, but to my great joy, the plants took off. They seemed to love the soil I planted them in, and at the end of the season, when it came time to rip them out of the ground, I could see that their root systems had extended to some degree through the bucket and down into the native soil.
Long story short, with the boost they got from the added soil, the plants did great, and the containers drained exactly as I hoped they would.
2. Remove or Kill Off Native Grasses
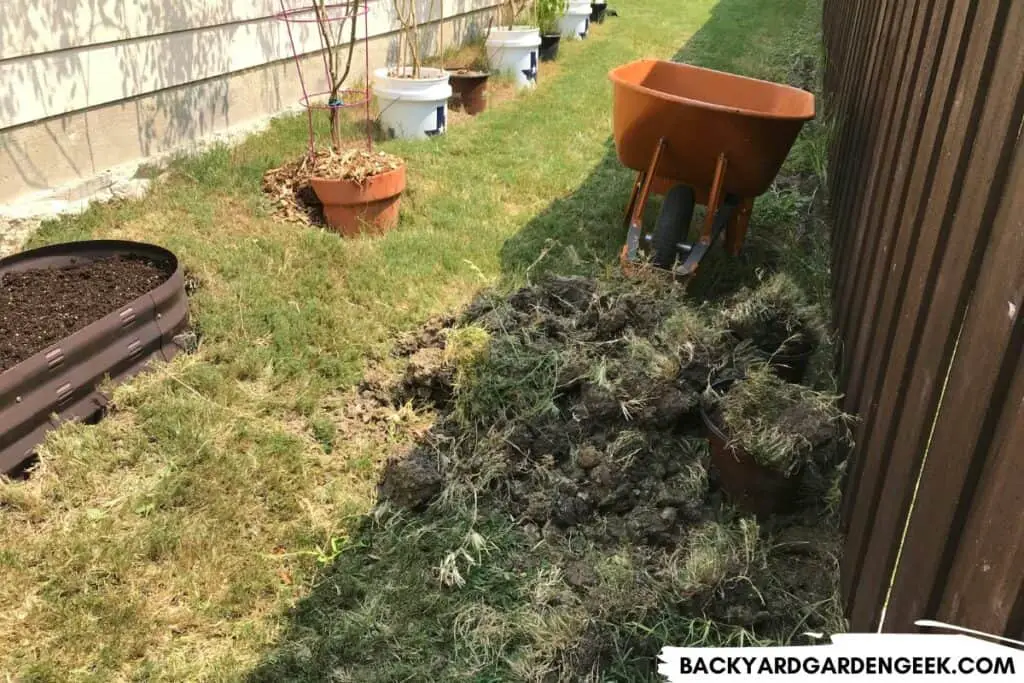
One of the reasons for my success is something that every gardener should keep in mind before installing raised beds: You’ve got to kill off the native grass.
The tomato plants mentioned above benefited from the fact that I’d literally dug up the top layer of clay, including as much bermuda grass as possible.
In removing the grass, I cleared the way for my plants’ root systems as well as made it easier overall for water to drain through the containers and down into the soil.
In another part of my garden, I thought I’d see what would happen if I didn’t dig out the Bermuda grass. In one area, I left the Bermuda but covered it over with 2 layers of cardboard. In another area, I installed a row of concrete blocks 2 blocks tall and waited to see if that would do a decent job keeping the Bermuda grass at bay.
Not surprisingly, the Bermuda grass covered in cardboard died out fairly quickly while the concrete blocks were overrun with Bermuda a few months later. If you’ve got Bermuda, you’ll have to constantly fight to keep it out of your garden, but if you kill it off to begin with, you’ll be much better off in the long run.
Why do I mention this in an article on drainage in raised beds? Here’s why: If you’ve got raised beds, you don’t want your native grasses to expand into the bed and slowly take it over.
They’ll hog the water that’s otherwise supposed to go to your veggies, and their root systems will compete with your plants’ roots for both water and nutrients.
3. Height Matters
Although raised garden beds don’t necessarily need to be tall, the taller the bed, the more material that’ll exist between the plant and the native soil.
If you don’t mind kneeling or bending over to garden, then raised beds that are 6 to 12 inches tall will typically suffice.
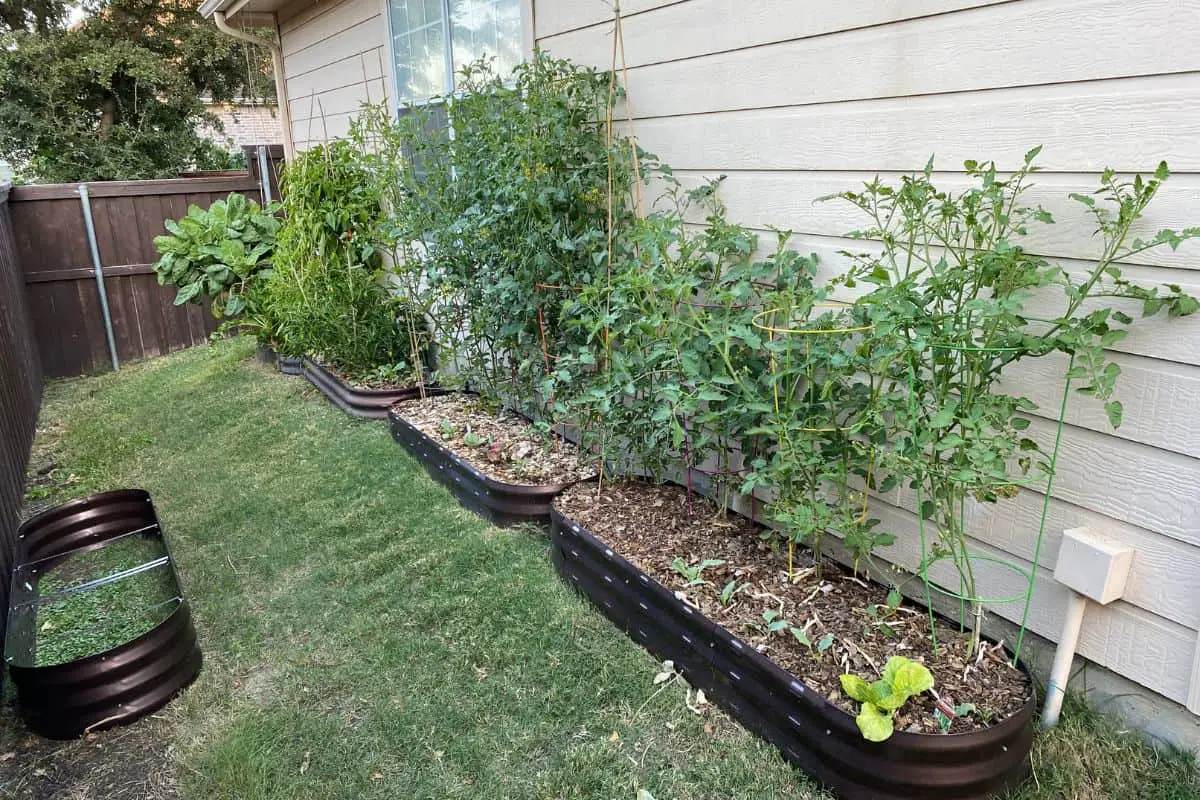
I use these small LuxenHome galvanized raised beds in my backyard since I don’t have a whole lot of space. They’re only around 12 inches tall and 20 inches wide, but I’ve grown all kinds of amazing vegetables in them because I’ve ensured that the soil is amended well and nutrient rich.
But if you’ve got back or joint issues, or if kneeling over will cause chronic pain, then I recommend installing raised beds that are at least 30 inches tall. That way, you’ll be able to garden without too much kneeling or getting on the ground.
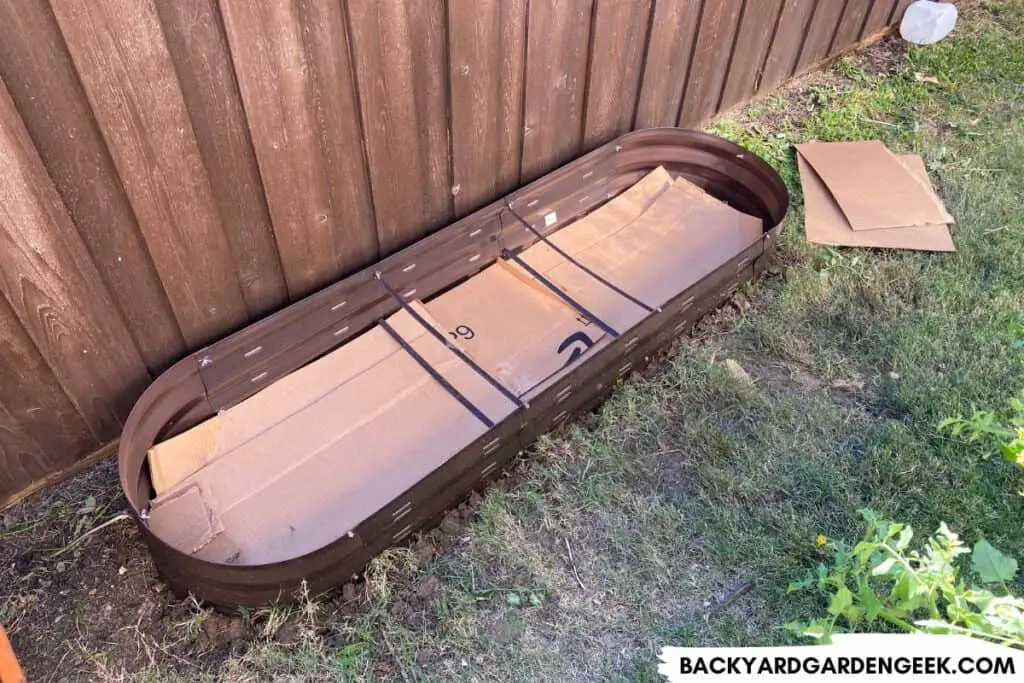
4. Layering Helps
Whether your raised beds are 6 inches, 12 inches, or 30 inches tall, they’ll provide a buffer between the plant and the native soil so that the plant’s roots can get off to a great start before they reach the native soil below.
Personally, I’m not a fan of tilling since doing so upsets the microbial environment that exists below the surface. What I like to do instead is to start off with great soil in my raised garden beds.
To do so, I create soil layers composed of brown materials at the bottom (sticks, branches, logs), followed by green materials (leaves and grass clippings) and plenty of kitchen scraps that I save for that purpose, with amended soil and plenty of compost heaped on top of everything
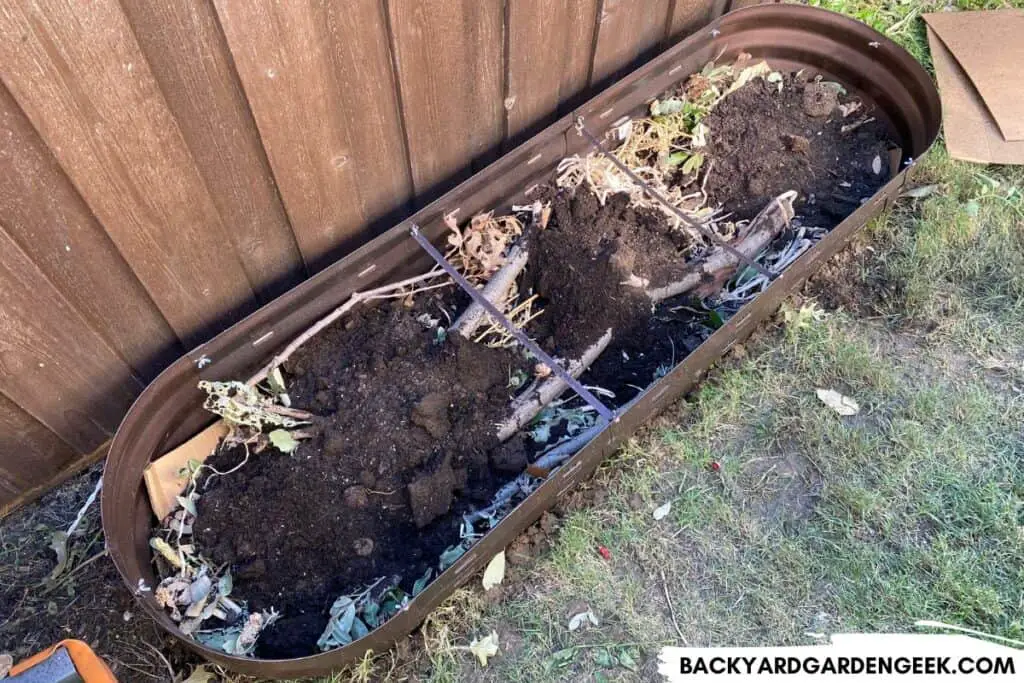
This method is sometimes referred to as hugelkultur or “lasagna” gardening since it involves layering different materials in order to impart vital nutrients into the soil while simultaneously encouraging decomposition and saving money too.
In the first year, your raised beds won’t be filled with much soil, so you’ll want to pick plants with shallow root systems. Those plants will get all the nutrients they need from the soil layers at the top of your raised beds, and over the course of 1-2 years, the materials at the bottom of the bed will decompose and turn into amazing soil at the bottom of your bed.
As this happens, the soil level in your bed will shrink a bit, but you can always top the bed off with more soil, compost, or thick mulch to raise the soil level back to a desired height.
5. Embrace Cover Crops
When I first learned that cover crops could help with soil drainage, I was pretty surprised. When thinking of cover crops, I always thought of the ways they benefit the soil–such as adding nutrients, preventing weeds, or protecting the surface of the soil–but I hadn’t considered what they could do for drainage.
Here’s what happens underneath the soil when you plant good cover crops: The tap roots of those plants burrow down into soil that would have otherwise remained fallow and contribute greatly to soil aeration, keeping your raised bed soil from becoming too compact and dense.
If you’ve got heavy clay soil, you can plant cover crops with deep tap roots like alfalfa or fava beans. If the summer heat is brutal in your area–as it is here in North Texas–you can densely plant cowpeas (also known as “black-eyed peas”) that’ll grow like crazy in hot summer weather.
With cowpeas, the plants will help out with nitrogen levels in your soil while also producing tons of blooms that’ll attract pollinators to your garden. If you’ve got a
Like me if you have heavy clay soil in your garden you can plant cover crops with deep tap roots such as Alfalfa and Fava beans
6. Avoid Overwatering
This might seem obvious, but one of the most important ways to ensure your raised beds are draining properly is to get on a regular watering schedule.
You want to water enough to keep your soil evenly moist while not watering so much that everything gets fully saturated.
When it comes to watering, I prefer using either drip lines or a homemade PVC system that’ll ensure that plants don’t get all of their water at once. If you can create a constant drip or small flow and then let the water slowly enter the soil, you’ll be giving your plants the kind of watering they’re looking for.
You’ll know you’ve been overwatering if you notice the following:
- Soft, yellow, or mushy leaves
- Wilting leaves
- Signs of fungal disease
- Leaves turning brown or falling off
- Slow or stunted growth
You might see mushrooms growing around the base of your plants, but this doesn’t mean that you’ve been watering too much. Mushrooms can often be a sign that you’ve got the makings of a healthy biome below the surface of your soil, so please don’t worry about them. Just knock them over with a tool or your foot.
If you’re afraid that you’ve been overwatering your plants, pick up a cheap moisture meter online or at your local garden center, which will help gauge how much water is in your soil.
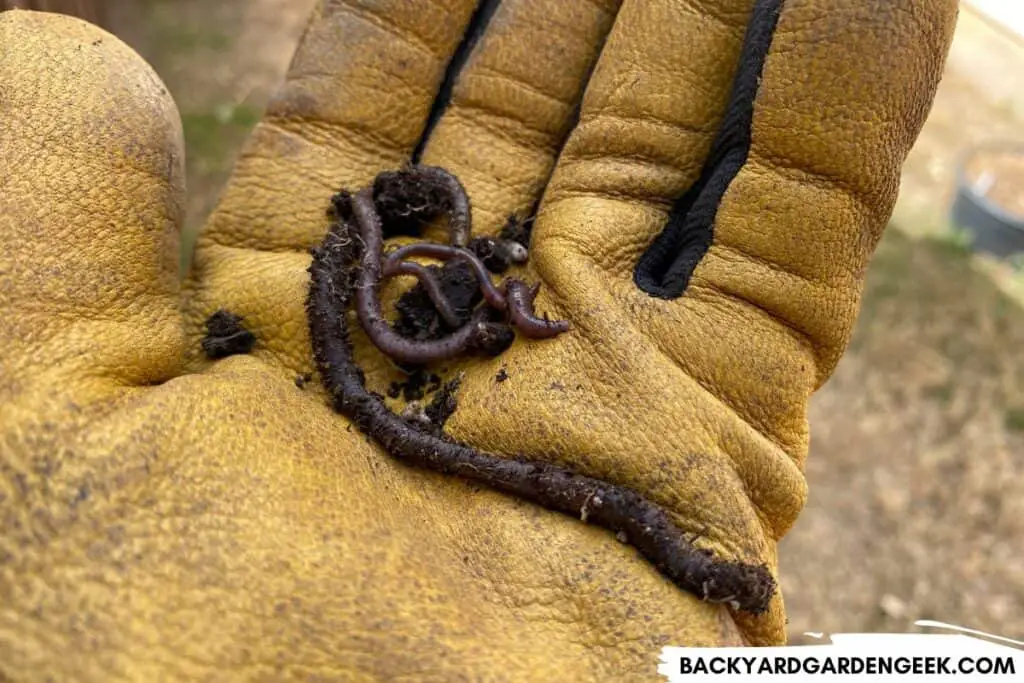
7. Add Worms (Sometimes)
A major factor in how well your soil drains is the kind of aeration that’s taking place underneath the soil.
Some people recommend aerating the soil manually with your hands or tools, but I generally don’t recommend doing so. I prefer to leave the microbial environment alone since disturbing the soil can unintentionally destroy microorganisms who are at work beneath the surface.
What I’ll do instead is design the kinds of raised beds that’ll attract earthworms, pill bugs, and other soil-based organisms.
I’ve seen various folks recommend placing landscape barriers underneath raised beds in order to keep out weeds and unwanted pests. But if you do so, you’ll also keep out the good organisms that would otherwise make their way into your raised beds.
If you do so, you’ll need to purchase earthworms and add them to your raised beds since those beneficial bugs won’t be able to make their way from your native soil into your raised beds.
But if you’ll simply put thick layers of cardboard beneath your raised beds, you’ll simultaneously kill off the native grasses while also allowing good bugs to travel up into your beds and help out with soil aeration (after the cardboard decomposes).
8. Mulch Heavily
Normally when I think about mulching the vegetable beds, it’s usually during the hot weather to help retain water and stop evaporation from the top of the soil.
But over the years, I’ve found that mulch not only helps the top of the soil, but it also affects what happens underneath.
As you water your garden, the mulch will actually help distribute the water evenly across the bed. As time goes on, the mulch will break down and provide a layer of lovely, decomposing top soil. Double win if you ask me!
I did a test this past year to see just how much mulch would help my garden plants. In one raised bed, I added a thick layer of mulch to the top, making sure to cover everything up well. In the second bed, I left the soil exposed to the sun instead of covering the raised bed in mulch.
Within a month or so, the differences were already starkly evident. In the bed with the mulch, the tomato plants were at least 12 inches taller than the bed without the mulch. In fact, the differences were so readily apparent that I was sincerely surprised by how much the simple act of mulching had helped my plants.
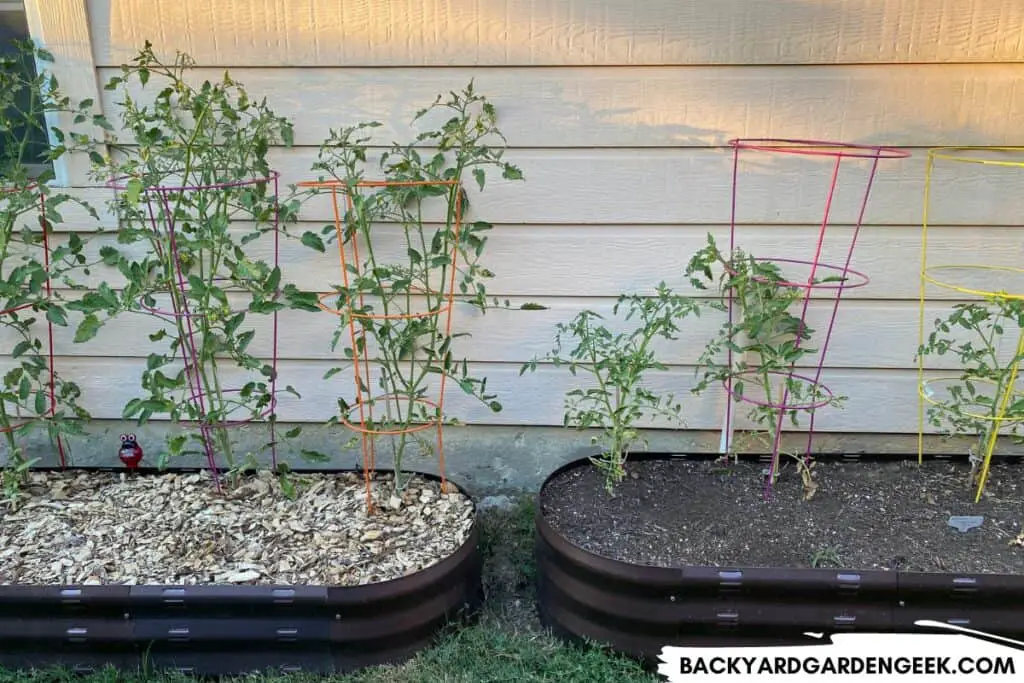
Both beds were filled using the same layering method with the same brown and green materials and the same soil. The plants that were planted there were grown at the same time. There was literally nothing different between the plants in one bed and the plants in the other bed.
The only difference was the addition of mulch.
What this means is that mulch is not simply protecting your raised beds from weeds or dry soil. Mulch is also soaking up water, keeping your beds more evenly moist, and ensuring that water gets dispersed throughout the bed while also draining properly.
9. Amend Soil Annually
When it comes to soil amendments, I usually err on the more conservative side once I’ve created a raised bed that’s got good soil throughout.
My favorite amendment is homemade compost (by far), although adding perlite, vermiculite, and cow or chicken manure as needed can be very helpful too.

Store bought compost is just fine–and it’ll do whenever I need some compost–but it’s not nearly as good (or as cheap) as the stuff I can produce myself.
I don’t have enough room in my backyard for a three-bin compost system, so what I’ve done is create a simple trash can compost bin.
Here’s what you do:
- Get an old plastic trash can (or buy one from the store). The thicker the plastic, the better.
- In the bottom of the trash can, take a hole saw and cut out 2-inch circles from the plastic.
- Around the base of the trash can, take a 1-inch hole saw and cut several circles around the very bottom.
- Take a drill and use a 1/4 drill bit to drill holes all around the outside of the trash can.
- Cut out a hole in your native soil that’s got the same circumference as the bottom of your trash can and that’s at least 2-3 inches deep.
- Take the trash can and place it in the hole. If your backyard is relatively small , whenever you add food scraps from your kitchen, cover them in some kind of brown or green material so that they don’t begin rotting and smelling.
If you’ve got the know-how to do so, you can even cut out a small panel on the front of the trash can, then re-attach it to the can use hinges and screws to create a panel you can open, making it easier to remove decomposing materials that settle at the bottom of the bin.
To be sure, this isn’t the ideal way to create a compost bin. In an ideal world, you’d have enough space to create a 3-bin setup that’s far enough away from your home that you can do just about anything with it.
But if you’ve got limited space, the method above is amazing since, over time, the worms and pill bugs will make their way into your trash can and play an important role in the composting process.
Final Thoughts
Raised beds are a great way to grow amazing veggies, even if you haven’t got a very large property. But you’ll want to pay attention to the design of the raised beds and the quality of the soil you use because that will definitely impact the drainage.
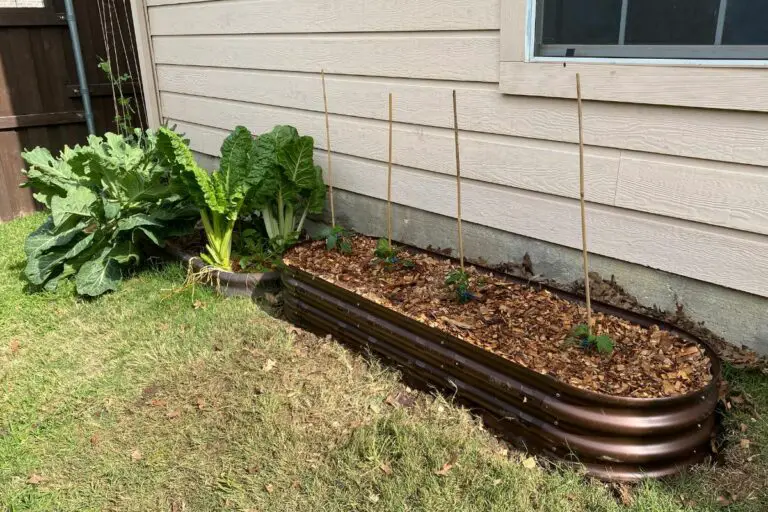
I showed you the “before” photo above, but here’s the “after” photo.
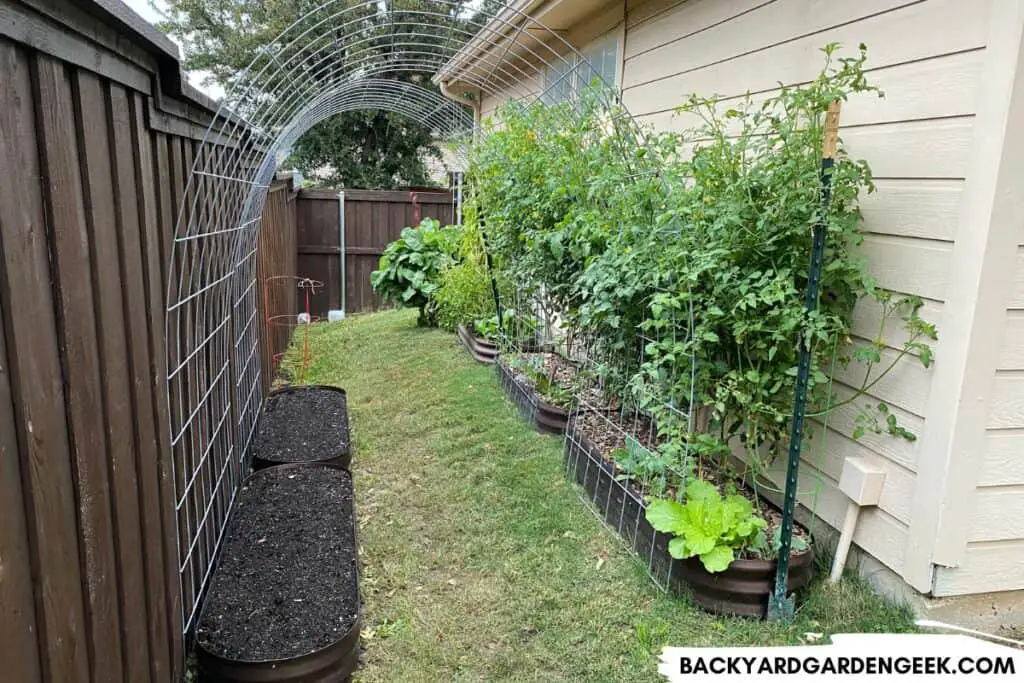
As you can see, I turned a mostly worthless patch of lawn into a garden area that’s produced all kinds of vegetables for me and my family this year, including beans, bok choy, collards, kohlrabi, peppers (3 varieties), tomatoes (7 varieties), and many others.
To sum things up, if you plan things well and pay close attention to both your native soil plus whatever you’re adding to the raised beds, you can transform a small section of property into a highly productive raised garden bed.
Will Rocks and Stones Help Raised Beds Drain Better?
If you’ve got rocks or stones on your property, those are great materials to use in and around your garden, which will save you lots of money in the long run.
You’ll see various bloggers recommend adding layers of rocks to the bottom of raised beds to encourage better drainage, but this is largely unnecessary if you fill your beds with the layering method or use the right kind of soil.
If you place too many rocks underneath your raised beds, you can actually make your water issues worse by creating barriers that keep the water in the soil from draining properly.
It’s far better to focus on soil health than attempting to use rocks to increase water drainage, amending your soil as necessary to ensure that it retains the right amounts of moisture throughout the year.
Further Information
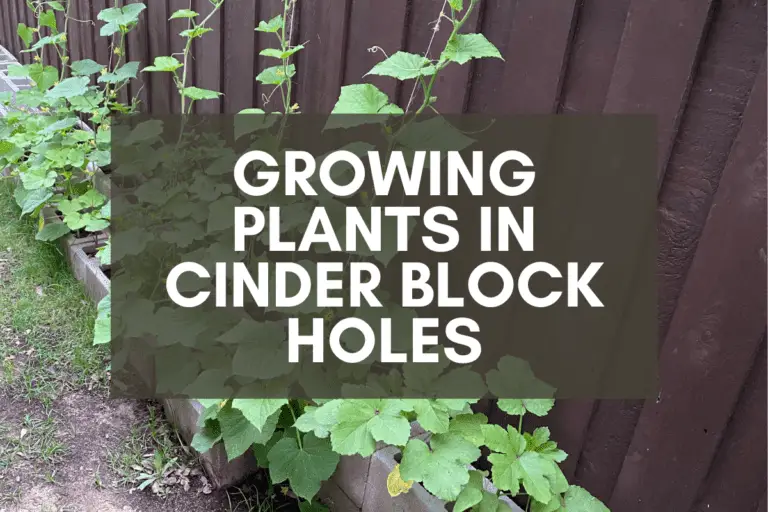
If you’d like to read more about gardening in raised beds, please note that I’ve had lots of success with cinder block gardening, which is a cheap way to try your hand at raised garden beds. You can learn more about that method here:

Thank you. Good information provided.
Thank you for the feedback. I’m glad the article had helpful information. Good luck!