Can Seeds Germinate If They’re 10, 20, or Even 50 Years Old?
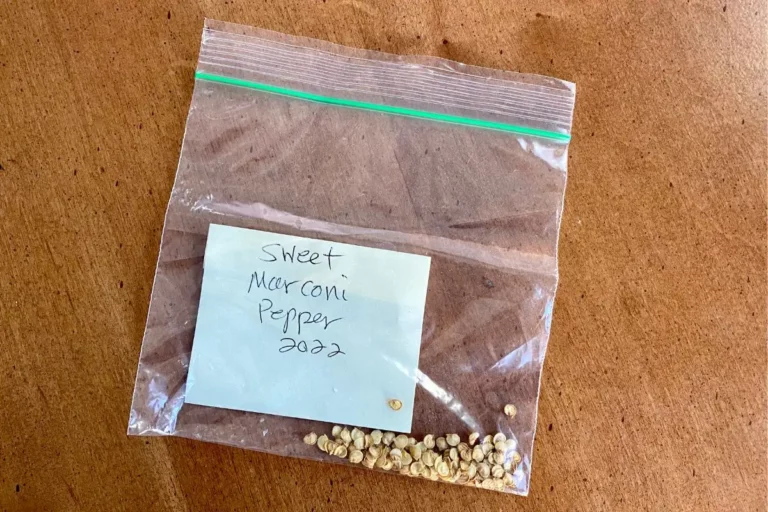
Have you ever found an old package of seeds and wondered if you could get them to grow?
Maybe you’ve been given old seeds by a friend or family member, or maybe you’ve stumbled on an old seed stash when you were clearing out a closet or garage.
If you’ve ever come across old seeds, you might have wondered if it’s possible to grow new plants from them. Will seeds germinate if they’re 10, 20, or even 50+ years old?
Old seeds that have been stored in a dark, dry, and cool environment can remain viable for 10 or more years and sometimes much longer. However, seed viability decreases over time, so seeds should be stored properly and germinated within 3-4 years after they’ve been harvested.
As you’ll see if you keep reading, researchers have successfully germinated seeds that are 50-100 years old (or even older!), but these tend to be outliers. However, given the right storage conditions, seeds stored by everyday gardeners can often remain viable for 5, 10, or even 20+ years.
What I’d like to do in this article is cover several related topics:
- 4 Reasons Why Some Old Seeds Won’t Germinate
- What Science Has to Say About Germinating Old Seeds
- 11 Steps to Germinate Old Seeds
Unfortunately, there’s no guarantee that your old seeds will germinate since they’ve potentially been exposed to years’ worth of environmental stressors.
But with the right care and attention to detail (and with a little luck now and then), you’ll be able to see some success with germination.
Because here’s the thing with old seeds: If you can get at least 1 of them to grow, if the plant that grows is an heirloom plant, and if you can nurture that plant through the entirety of its life cycle, you’ll likely be able to harvest many new seeds from the plant that’ll make up for the challenges you faced germinating much older seeds.
With that being said, let’s take a look at the reasons why old seeds often fail to germinate before turning our attention to several tips you can follow to get the best germination rates possible!
4 Reasons Why Some Old Seeds Won’t Germinate
When it comes to old seeds, there’s no way to tell whether those seeds are viable or not until you attempt to germinate them yourself.
But we know that certain environmental factors can cause seeds to lose their viability, so check out each of those reasons below, which are backed up by research from Iowa State, PennState, and the University of Maryland.
1. Too Much Humidity or Moisture
The key to proper seed storage is making sure that your seeds don’t get exposed, in any way, to excess moisture.
This means that seeds shouldn’t be stored in areas where humidity levels can rise, from bathroom closets and garages to outdoor storage sheds and greenhouses.
If you expose seeds to increased humidity, you’ll increase the likelihood that the seeds won’t be viable when it comes time to plant them since moisture levels might encourage embryonic activity within the seed without providing the right conditions for seed germination.
When that happens, there’s nothing left for future growth, so the seed becomes unviable and incapable of germination.
2. Too Much Light
Something similar could be said of light. When seeds are exposed to light, they’re exposed to an environmental factor that can potentially degrade future embryonic activity.
Simply put, sunlight plus warmth provide necessary components for seed germination, so if your goal is to keep your seeds viable as long as possible, you’ll need to keep them as far away from light and heat sources as possible.
Light sources that also put off heat are by far the worst culprits when it comes to seed degradation. You certainly don’t want to expose your seeds to sunlight since that’ll degrade them quickly.
3. Too Warm
In addition to sunlight, you should also keep your seeds out of the range of incandescent and halogen light bulbs because, in short, heat is a bad thing for seeds and seed storage.
By now, you’re likely noticing a common theme: The ingredients that are good for seed germination are also terrible for seed storage.
The same goes for heat as it does for light. The key is to keep your seeds away from heat sources since heat will decrease the likelihood of germination, especially after periods of long exposure.
4. Too Cold
Storing seeds in cold environments can extend their life and viability, which is why many seed banks keep their seeds in cold storage areas.
But not all cold temperatures are good cold temperatures.
The ideal temperature for the cold storage of seeds is 35-40 F. If kept consistently at this temperature, seeds can maintain embryonic viability for years, even decades.
But things can go wrong quite fast if seeds are stored in temperatures that are below freezing. Sun-freezing temperatures can damage embryonic life since harsh bitter cold poses a danger to cellular viability.
Long story short, storing your seeds in a refrigerator will keep them viable for longer periods of time, but don’t store them in the freezer. You’ll damage seed embryos that way.
What Science Has to Say About Germinating Old Seeds
When it comes to germinating old seeds, you need as much control over the growing environment as possible. The last thing you want are fluctuating humidity, light, or heat levels.
Before I give an overview of some simple tips you can use to germinate old seed, I’d like to share some of the science behind old seed germination in case you’d like to take a deep dive into the science of germinating old seeds.
Of course, just skip below if you’re not interested in the science and just want the tips!
Here’s what some of the research has shown over the past 150 years:

William James Beal (1833-1924)
In 1879, William James Beal, a botanist working at Michigan State University, wanted to understand how long seeds might last given the right environmental conditions. He filled 20 bottles with hundreds of seeds–about 50 seeds each of 20+ species–then buried the bottles upside down below ground to ensure the seeds got no water at all.
This has become known as the Beal seed viability experiment, and scientists are still benefiting from it over 100 years later.
Joseph William Tell Duvel (1873-1946)
In 1902, J. W. T. Duvel, a researcher at Michigan University, was one of the first to suggest that seeds stored in dry climates that don’t experience too many stark temperature fluctuations would store longer than seeds stored in regions that were higher in humidity or experienced great temperature fluctuations between seasons.
He also suggested that the best storage temperatures for seeds were temperatures that were just above freezing and kept as uniform as possible.
Antoine Henri Becquerel (1852-1908)
In 1907, Henri Becquerel was given permission to germinate seeds that had been stored at the Natural History Museum of Paris. He found that 4 seed in particular stood the test of time:
- Astragalus massiliensis (86 years)
- Dioclea pauciflora (93 years)
- Leucaena leucocephala (99 years)
- Cassia bicapsularis (115 years)
Further Research
Over the years, other researchers have come to similar conclusions: that seeds stored in optimum conditions can last for many, many decades.
- In 2002, scientists dug up seeds from the Beal study and were able to successfully germinate 20+ of them.
- In 2008, researchers successfully germinated 110-year-old seeds: Hordeum vulgare (90% germination rate) and Avena sativa (81% germination rate).
- In 2010, another group of scientists successfully germinated 151-year-old seeds from the Acacia shrub species.
Now that we’ve looked at some of the science behind germinating old seeds, let’s focus on how you can best germinate old seeds.
11 Steps to Germinate Old Seeds
If you read a bit of the research above, you’ll notice that the seeds that lasted longest were often seeds gathered from herbs or shrubs.
From what I can tell, seeds gathered from grains, fruits, and vegetables don’t typically have the lasting ability of seeds from shrubs, weeds, and some herbs.
However, old fruit and veggies seeds can still remain viable for decades if stored properly, so if you’ve got some old seeds in your collection–or if someone has given you old seeds–follow these tips whenever it’s time to get your garden going so that you can get as many of them as possible to germinate.
1. Wash Your Hands
The last thing you want to do when attempting to germinate old seeds is to touch them with your fingers.
You have no idea what kind of microscopic particles might be on your hands, so it’s best to wash them thoroughly before handling anything related to old seeds.
If you want to be extra careful, I recommend putting on a new pair of food prep gloves. That way, you won’t accidentally transfer bacteria or mold to your old seeds or seed-germinating equipment.
2. Filter Your Water
You certainly don’t want to germinate old seeds using chlorinated water since chlorine could potentially disrupt the germination process in seeds that are already quite fragile.
I recommend using filtered water (or bottled water in a pinch) since that will ensure that your water is as pure as possible and that you don’t unwittingly damage your seeds.
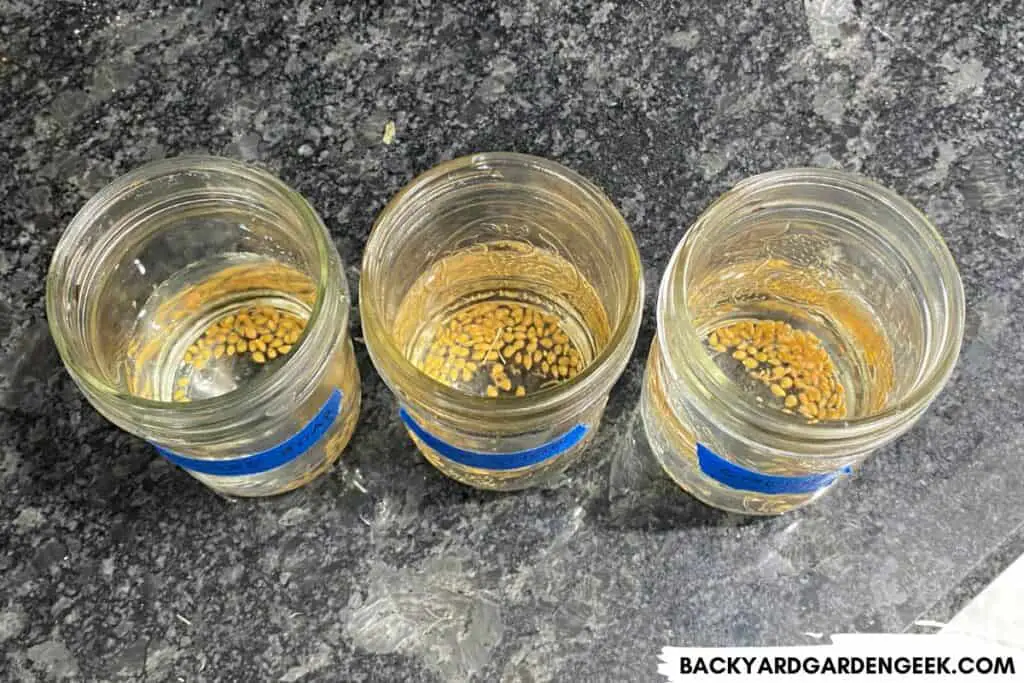
3. Sanitize Your Jars
Your seeds are going to benefit from a light soaking (as I’ll discuss in Step 5 below), but you don’t want to take any risks with your jars.
Depending on how your jars have been stored and handled, bacteria or mold spores could have found their way into them. There’s no sense in taking any risks, so I recommend sanitizing your jars and lids beforehand. You can use either boiling water or isopropyl alcohol.
Again, the goal is cleanliness and bacteria- and mold-free surfaces, so do whatever works best for you.
4. Don’t Touch the Seeds
This might go without saying, but I’ll say it anyway: Don’t touch the seeds with your fingers.
Even if you’ve just washed your hands, you don’t know what microscopic something or other might be on your fingertips somewhere, so just to be safe, put on a brand new pair of food-prep gloves and handle the seeds with care.
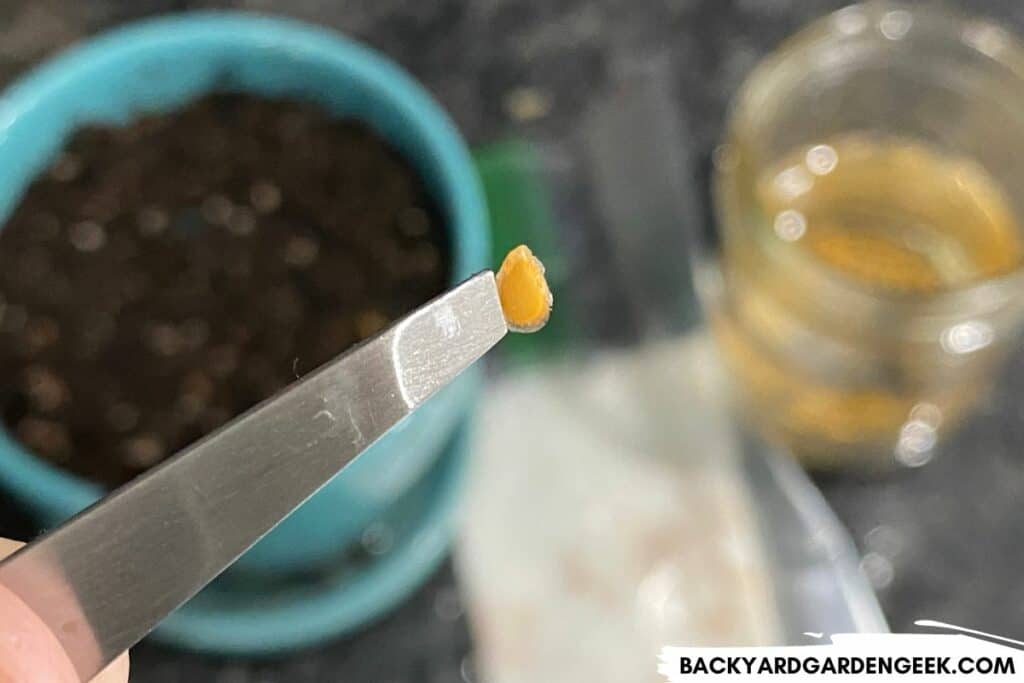
If you want to be extra careful, use tweezers and grab the seeds gently to ensure your hands never come into contact with them.
5. Soak Seeds in Water
Like any dried seeds, old seeds will have tough outer coatings designed to protect the seed’s embryonic cells and thus its future growth potential.
Soaking seeds can help encourage germination since, given enough time, water will help soften up the outer shell, making it easier for the emerging embryonic root (known as the radicle) to emerge from the shell.
In general, the smaller the seed, the shorter the time needed for it to soak.
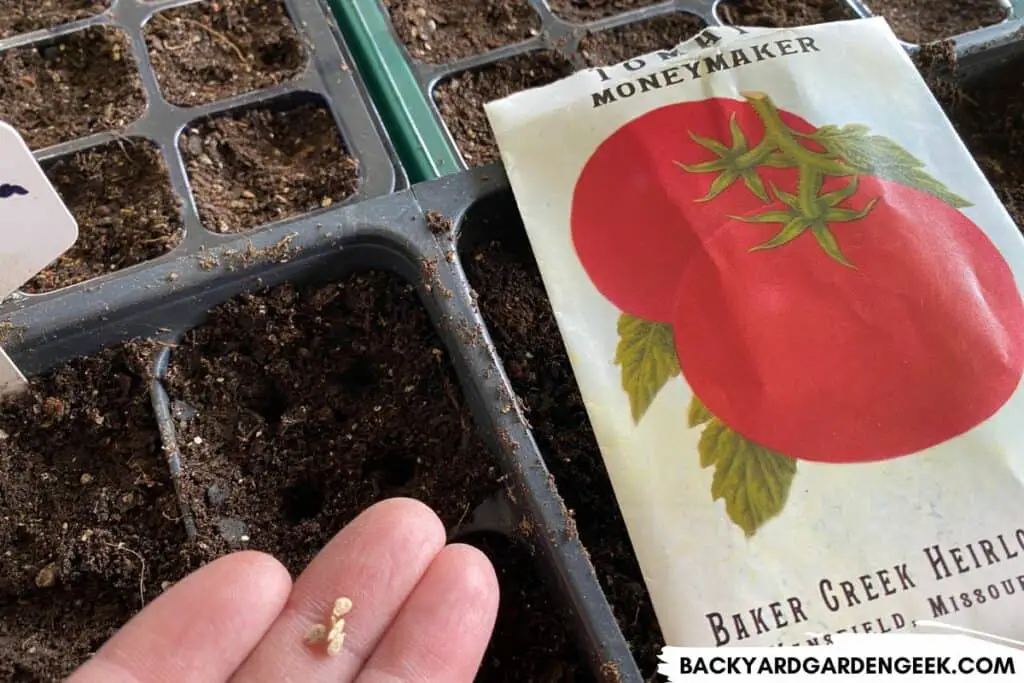
In my experience, small seeds like tomato and pepper seeds don’t usually need to soak, but it certainly won’t hurt to soak them for an hour or so in order to soften up the outer shell.
Larger seeds from beans, melons, or peas can benefit from longer soaking times. When it comes to these seeds, I’ll typically soak them for 8-12 hours. You can even soak them overnight, then remove them from the water in the morning.
I don’t necessarily have a problem with soaking seeds in sugar water–as MIgardener does in the video above–but I don’t think it’s necessary. Also, there’s some research that suggests that sugars aren’t necessarily great for seed and seedling development, so I use regular filtered water for soaking old seeds, no sugar added.
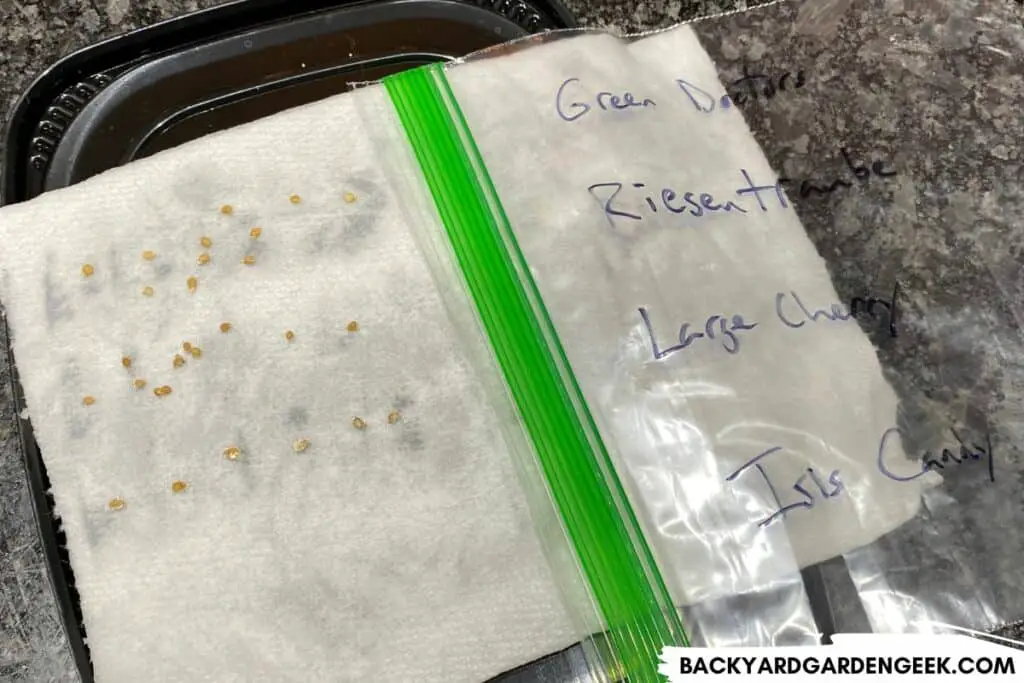
6. Transfer Seeds to Paper Towels and Plastic Bags
When it comes to germinating old seeds, I’ve had the best luck using the paper towel method.
Here’s what you do:
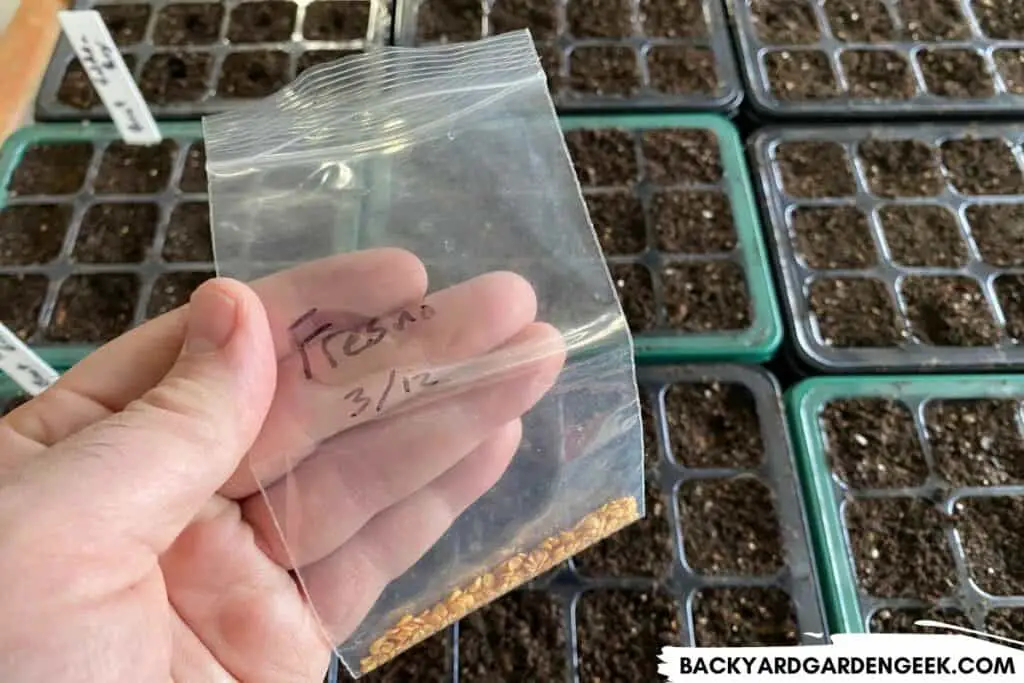
- Grab some Ziploc bags, one for each different kind of seed variety. Use the ones that have a zipper seal of some kind to guarantee that moisture doesn’t leave the bag.
- Moisten a paper towel. Don’t soak it, just moisten it. If you add too much water, simply wring out all you can.
- Place seeds carefully in paper towels, making sure there’s a little separation between each seed.
- Fold paper towels in half to cover the seeds, then add them to the bags, squeeze out the air, and seal the bags.
7. Take Advantage of Heat Mats
Heat sends a signal to the seeds that it’s time for them to sprout–since it mimics the natural spring environment–so be sure to keep your plastic bags inside when doing this experiment.
If you’ve got to do things in the garage or detached shed, I recommend using heat mats to keep things from getting too cool. Place seed trays atop the heat mats, then add the Ziploc bags to the seeds trays. The ambient heat from the heat mats will ever-so-slightly heat up the seed trays, which will ever-so-slightly heat up your plastic bags.
I wouldn’t place plastic bags directly atop heat mats unless you pay close attention to the heat levels since you might unintentionally heat things up a bit too much.
8. Inspect Every 24 Hours
When you’re germinating old seeds–or any seeds actually!–be sure to check your plastic bags once every 24 hours. If you wait 2-3 days to check, you might find that seeds have sprouted and started growing inside the bag.
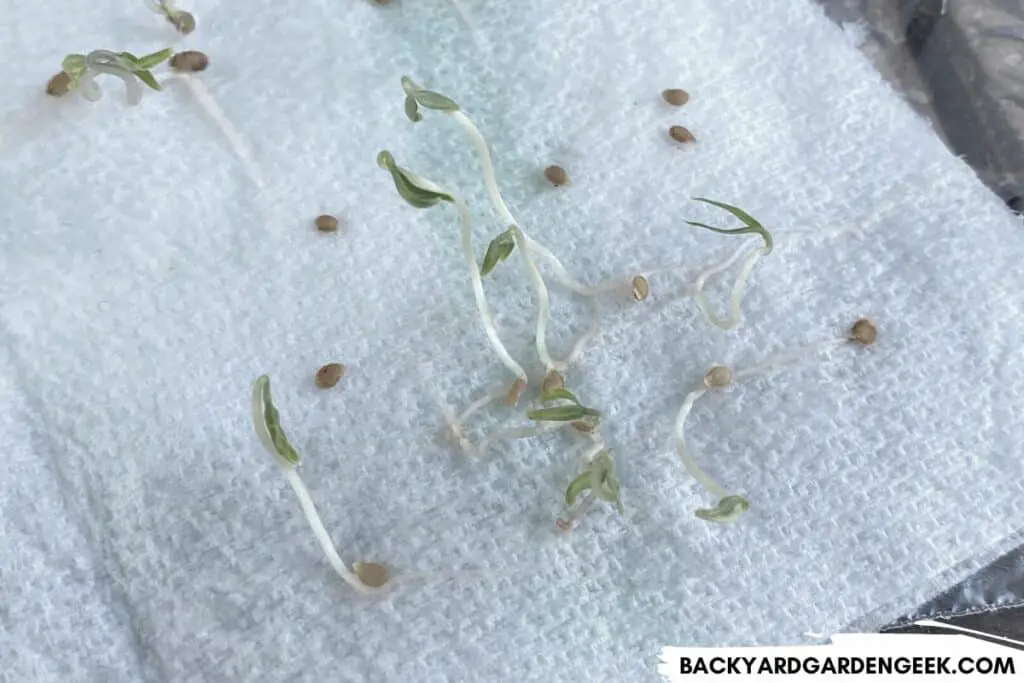
That’s not necessarily a bad thing, but if they’ve had too much time to develop inside the bag, the radicle (the seed’s first root) will attach itself to the paper towel, and you’ll have to carefully detach it using tweezers.
I’ve done this successfully, but it’s very easy to damage seeds in the process, so check them more often and remove any that have sprouted.
9. Prepare Your Seedling Soil
While you’re waiting for seeds to germinate, go ahead and prep your seedling soil.
I recommend using a bag of Promix for seedlings. It’s one of my new favorite products since it provides just the right environment that a developing seedling needs to grow.
It’s light but not too light yet dense enough to retain water well. All in all, it’s a great growing medium, and it’s not that expensive if, like me, you’re growing 100-150 plants at a time.
If you’re a commercial farmer, then you’re probably using amended soil anyway, but if you’re a backyard gardener, you’re not growing plants at that scale so Promix is a great option.
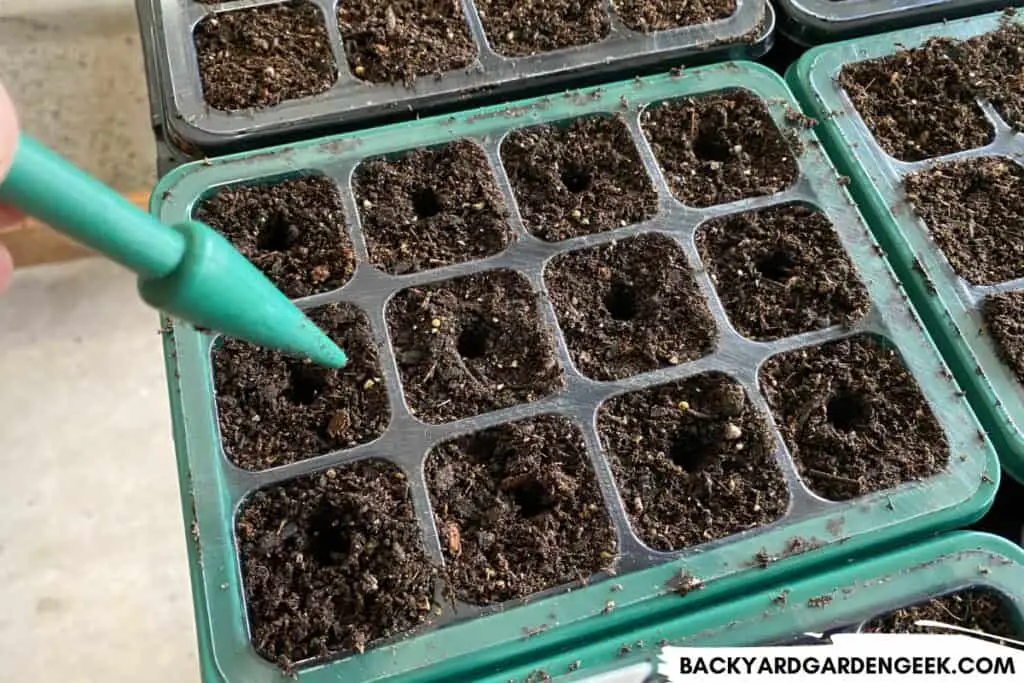
10. Plant Germinated Seeds Carefully
I’ve shared quite a few planting tips in a recent article on transplanting tomato seedlings, but simply put, if you’ve managed to germinate very old seeds, you’ll want to take good care of your young seedlings.
I use tweezers to transfer the newly germinated seedlings from their paper towels to my seed trays so as not to damage them or possibly transfer any bacteria or mold spores onto them before planting.
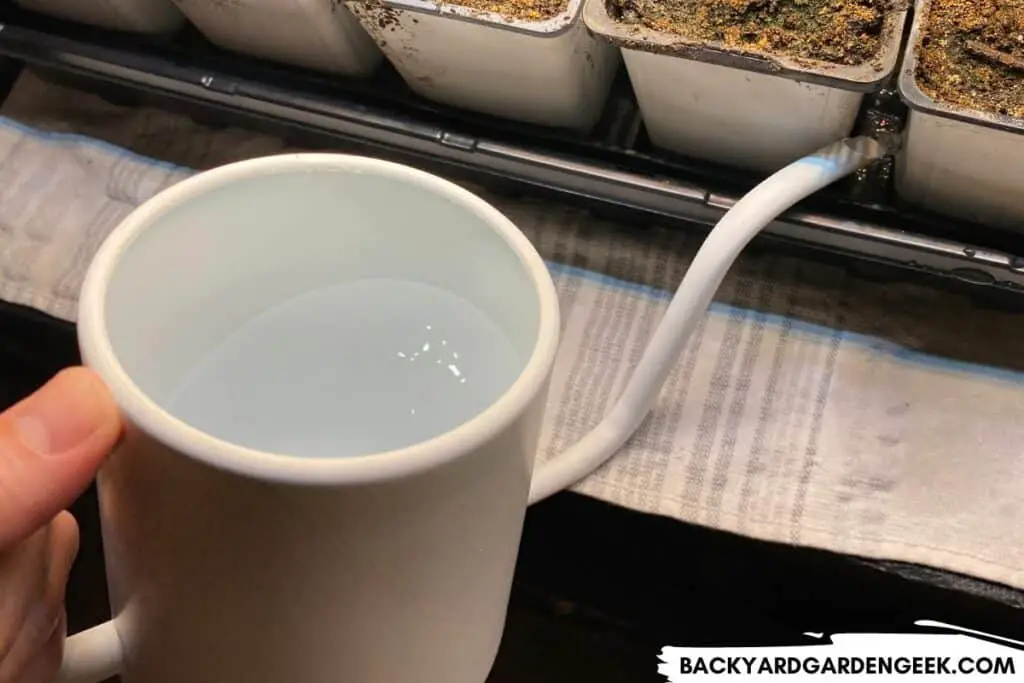
Once I’ve carefully placed them in the seed trays, I’ll cover them light with soil, place them under grow lights, and bottom water the trays to keep the soil as evenly moist as possible.
11. Use Grow Lights
Grow lights are key to nurturing young seedlings since they need protection from the elements but also plenty of light.
You’ll want to put your lights as close to the soil as possible, usually 1 inch or so (2.5 cm). As soon as you notice your plants emerging from the soil, raise the grow lights as necessary so that you don’t accidentally damage the young seedlings.
If you position your grow lights too far above your plants, you’ll end up with long, leggy seedlings after a few weeks, which isn’t ideal since you’re trying to cultivate hardy young plants that’ll withstand both the weather and outdoor pests once you transplant them into your garden.
Additional Tips
Whether you’re growing old seeds or ones you’ve newly purchased from an online retailer or your local garden center, here are some additional things to consider as you learn the ins and outs of germinating seeds and growing your own plants.
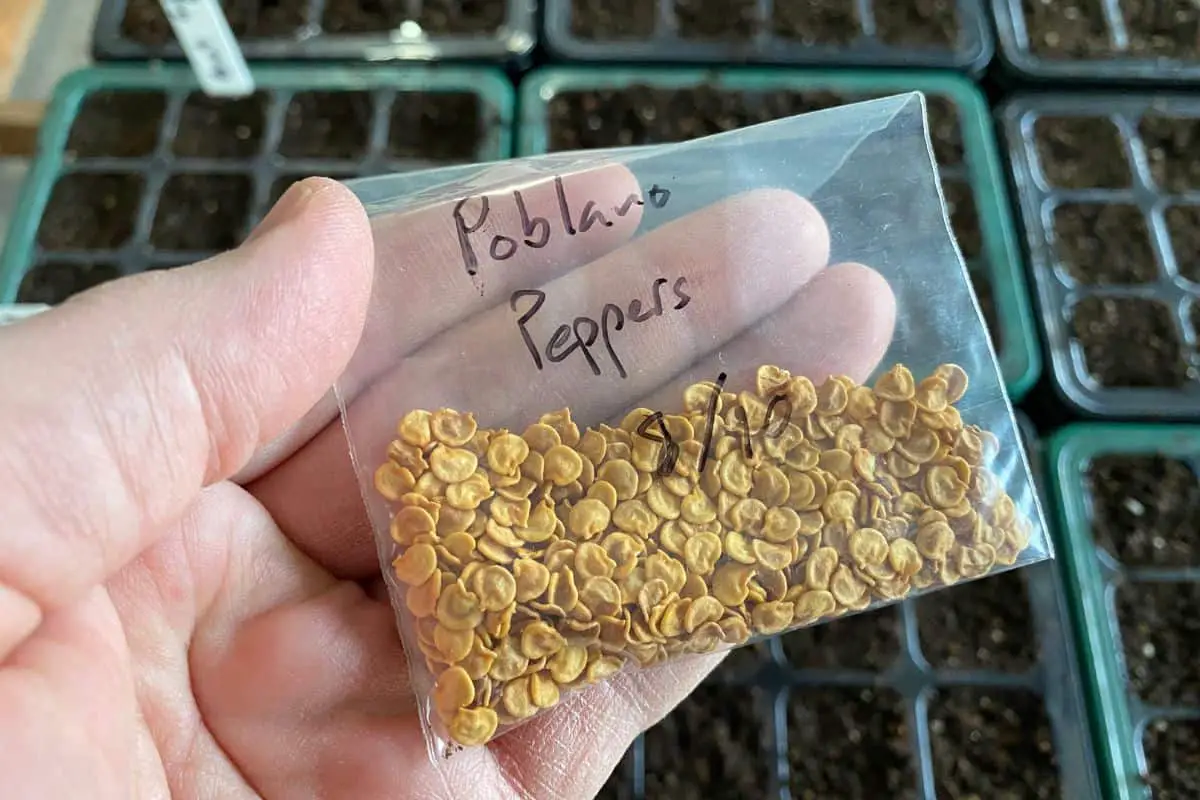
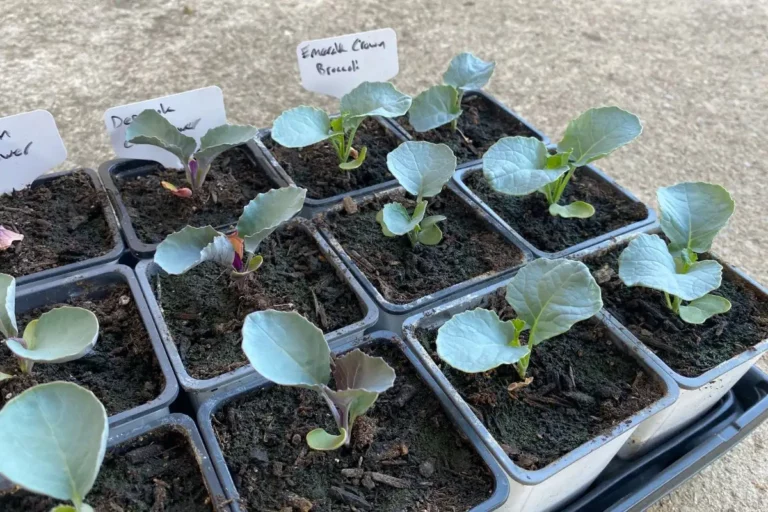
- The more plant varieties you grow from seed, the more you’ll learn what seeds look like, both before and after they’ve germinated. If you ever come across a packet of old, unlabeled seeds (as I have), you’ll have a better chance of figuring out what seeds you’ve got on your hands.
- You can germinate seeds in water, but I generally don’t recommend it. I much prefer the paper towel method. However, I like soaking my seeds in water for a bit to loosen up the outer shell. Just be careful not to leave them in there too long, you might have issues with rot.
- I sometimes take veggies that have either fallen off the vine or chewed on by a squirrel or rat and push them underground to let them compost naturally. I’ve actually grown a few plants by planting whole fruits and veggies, but it’s certainly not something I’d recommend doing if your goal is to grow plants from seed.
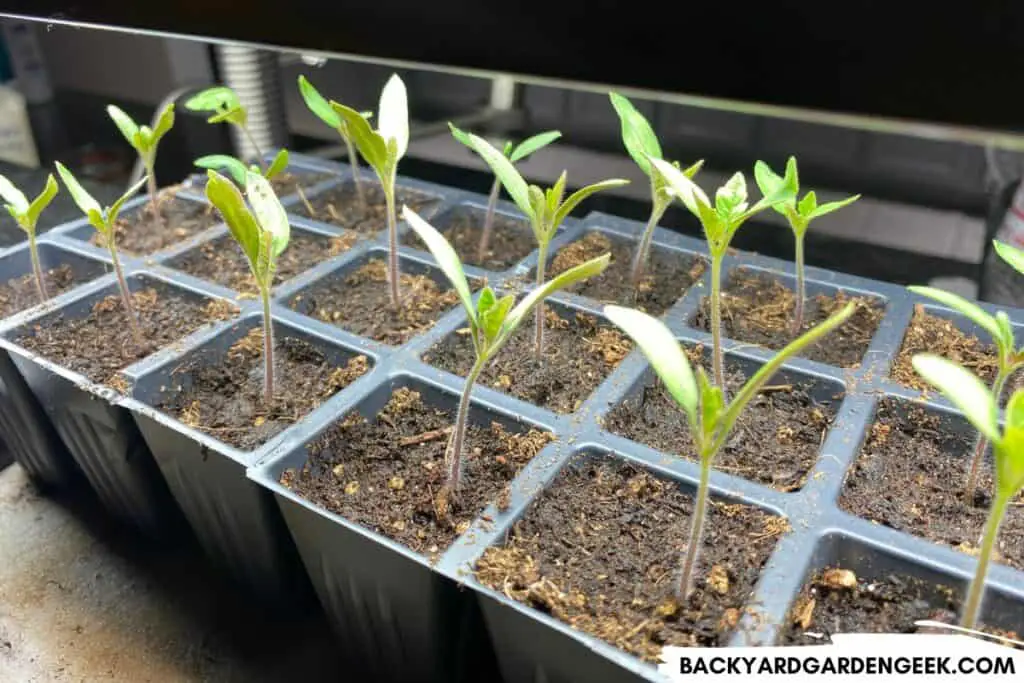
- Tomato plants are some of my favorites to grow from seed. I’ve written about 7 easy steps you can follow to germinate tomato seeds this coming season.
- It’s easy to overwater seeds, so follow these 6 tips to water your seeds and seedlings properly.
- Covering your seed trays can be useful, but if you’re not careful, you can cause yourself additional headaches. Here are several suggestions for when, how, and how long to cover newly planted seeds.
Further Reading
If you like reading all about seeds, you might be interested in the articles below. I’ve been growing tomato plants from seed for years, so in these articles, I share all that I’ve learned along the way:
Btw: the seeds I found are at least 40 years old
Wow. 40-year-old seeds. Such a rare find!
I found this article after I discovered a bunch of McKenzie and Buckerfield seeds in my Grandmother’s old buffet that I inherited. I placed a bunch of seed varieties on a paper towel on a plate and watered them. I didn’t take any of the precautions you mentioned in your article but I will on my next attempt. It’s been 2 days and it looks like a couple of the beet seeds might be popping. Unfortunately I don’t get enough sun in my yard to plant a garden but I might give them to someone who does if I can grow them in starter cups.
Oh my goodness. What an amazing find! If you have any seeds left over, you might consider giving them out here and there to any interested local gardeners to see if anyone can get them to grow. I had some 10-year-old seeds this past year that looked dead, but I was able to get one of them to germinate. I now have a pepper plant that I intend to harvest seeds from this year to replenish that old stock!