Should You Remove Grass Under Raised Beds?
If you’ve been looking at your yard and thinking that you’d like to build or install some new raised garden beds, have you wondered what to do about the grass?
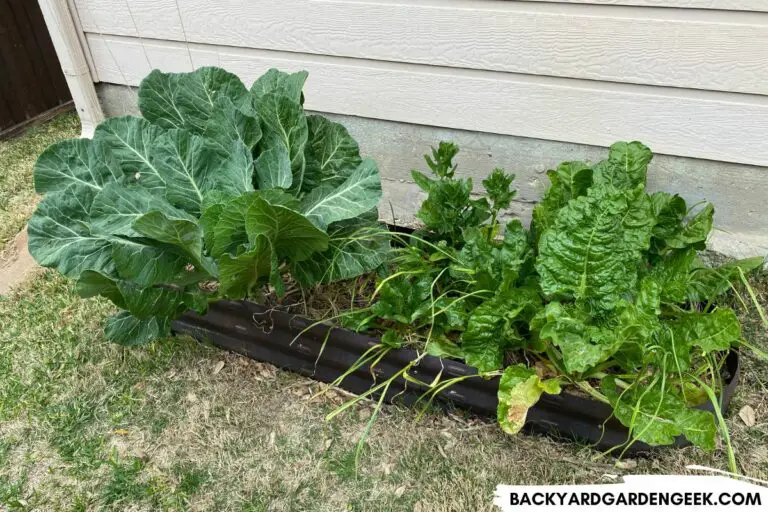
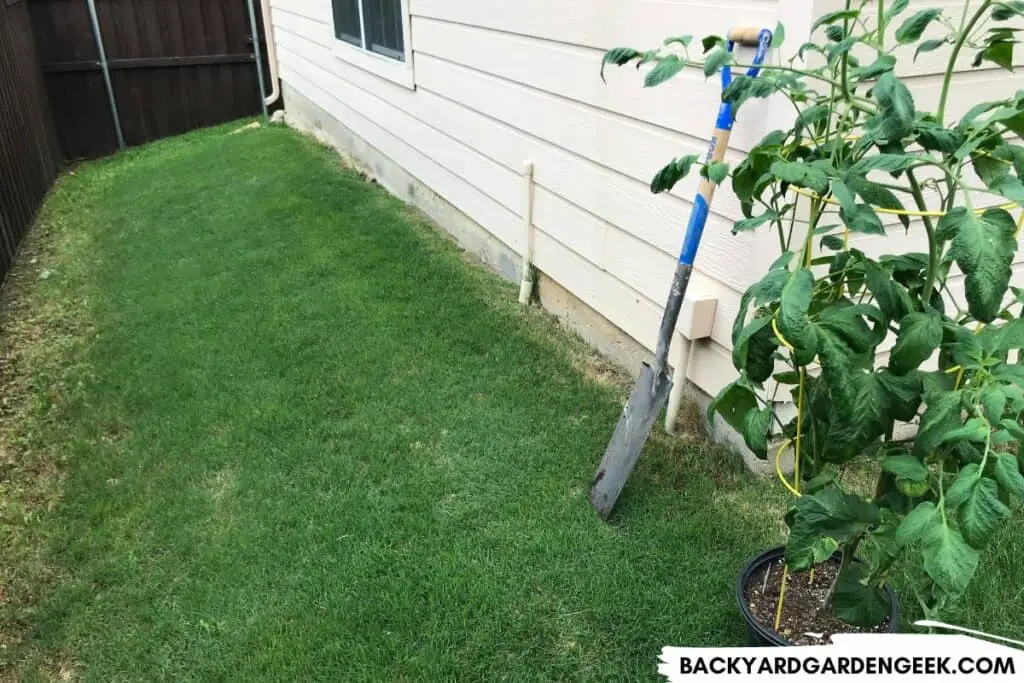
I’ve got a small grassy area behind an attached garage, and I had this very thought when I decided to fill the space with raised beds.
Should I leave the grass in place, or would it be best to remove the grass that would otherwise be underneath the raised beds?
Grass does not need to be removed when installing new raised beds. Instead, lay several thick layers of cardboard on top of the grass, then place the new bed atop the cardboard. The cardboard will kill off the grass, but it’ll also decompose over time, releasing carbon into the soil.
There are a few exceptions to this general rule, which I’ll discuss in more detail below.
But in most cases, there’s no need to dig out or remove grass before installing raised garden beds as long as you’ve got a sufficiently deep bed and you first put down material that’ll kill off whatever’s currently growing there.
In this article, I’ll cover the following important topics:
- 4 important questions to ask before putting raised beds atop grass
- 8 easy steps for removing grass and setting up your new raised beds
I’ll also address the exceptions mentioned above and provide an easy, step-by-step guide for anyone wanting to remove grass and fill up new raised beds with the best, most affordable materials possible.
Because if you’re not careful with this entire process, you might waste a lot of time and money along the way.
With that being said, let’s take a look at some things to keep in mind before you put down new raised beds.
Putting Raised Beds Over Grassy Areas: 4 Things to Consider
So you’ve decided to put raised beds on your property, and you’ve chosen a good place for them. What do you do about that grass?
Before doing anything, ask yourself these questions:
1. What Kind of Grass Is Growing in Your Lawn?
To install new raised beds on top of grass, you don’t necessarily have to know what kind of grass you’ve got in your yard, but if you can figure it out by calling an expert or using an app, I recommend doing so.
Here’s why: Some grasses are generally harder to manage than others.
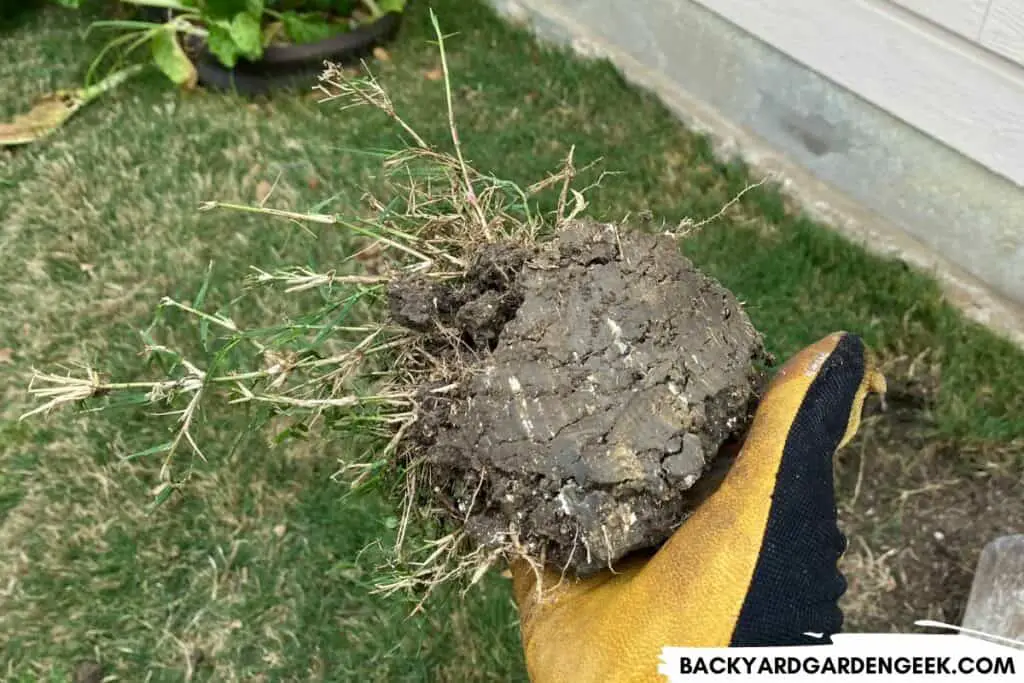
Take Bermuda grass, for example.
If, like me, you’re unlucky enough to have Bermuda grass growing in your yard, you need to be extra aggressive when it comes to laying down cardboard, removing the grass manually, or doing both to kill as much of it as possible.
Bermuda grass has two parts: the stolons (the parts that grow above ground) and the rhizomes (the parts that grow below ground).
If any part of the stolon or rhizome gets into your new raised garden bed, it’ll produce new Bermuda grass, and that new grass will produce even more grass. And it’ll never stop unless you pull out every last piece.
This is why Bermuda grass is almost impossible to destroy once it gets established in a yard or garden bed.
Or take nutsedge (also known as nutgrass). Once nutsedge gets going, it’s hard to stop because it can reproduce itself unless you pull out every little nutlet that’s growing beneath the surface.
If you’ve got rhizomatic or other pesky grasses in your yard, you’ll want to be extra aggressive with the suggestions I share below because you’ll need to kill off as much grass as possible so that it doesn’t invade your new raised beds.
2. How Deep Is Your Raised Bed?
When it comes to putting raised garden beds on top of grassy areas, depth matters. The deeper the raised bed, the more likely it is to hinder grass development underneath.
You’d be wise to learn from a mistake I made a few years back. Here’s what happened.
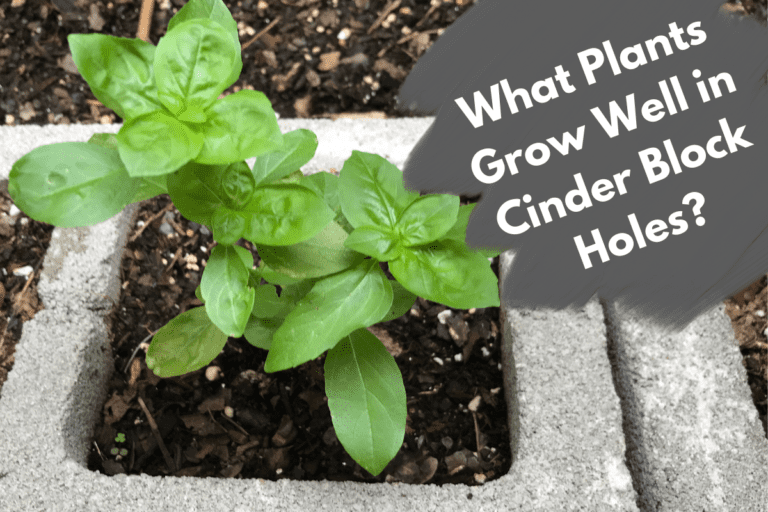
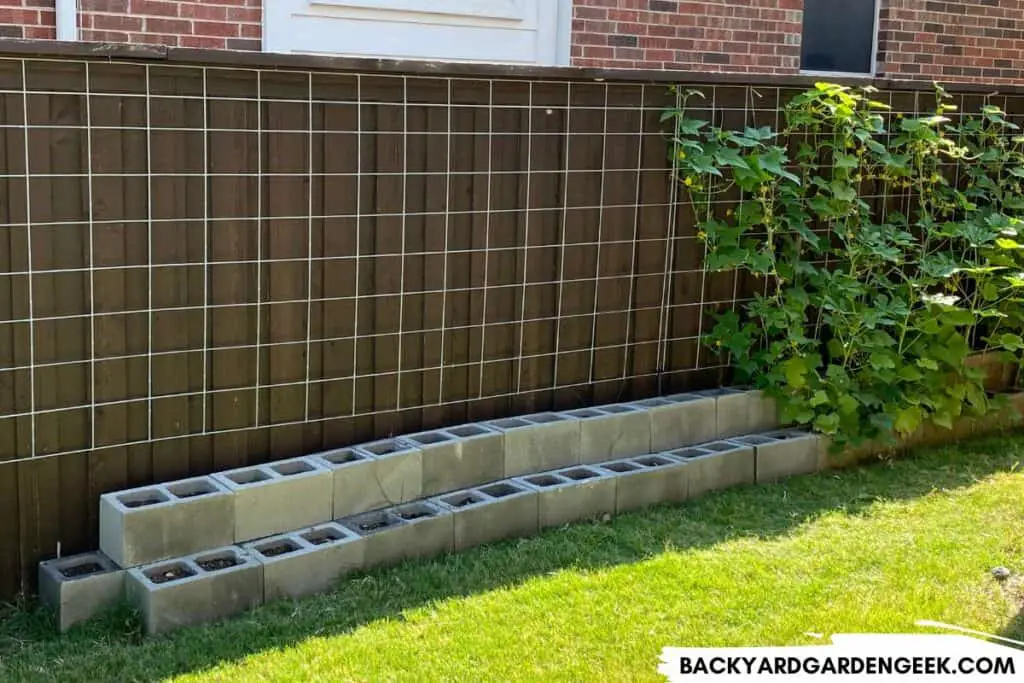
I was building a raised cinder block bed in my backyard along a fence line. I wasn’t thinking that day, and I placed all of the cinder blocks and filled them with soil before realizing that I hadn’t put any cardboard underneath them.
I should’ve removed everything, put down several layers of cardboard, then put everything back, but I figured it wasn’t a big deal because there wasn’t much grass over there anyway.
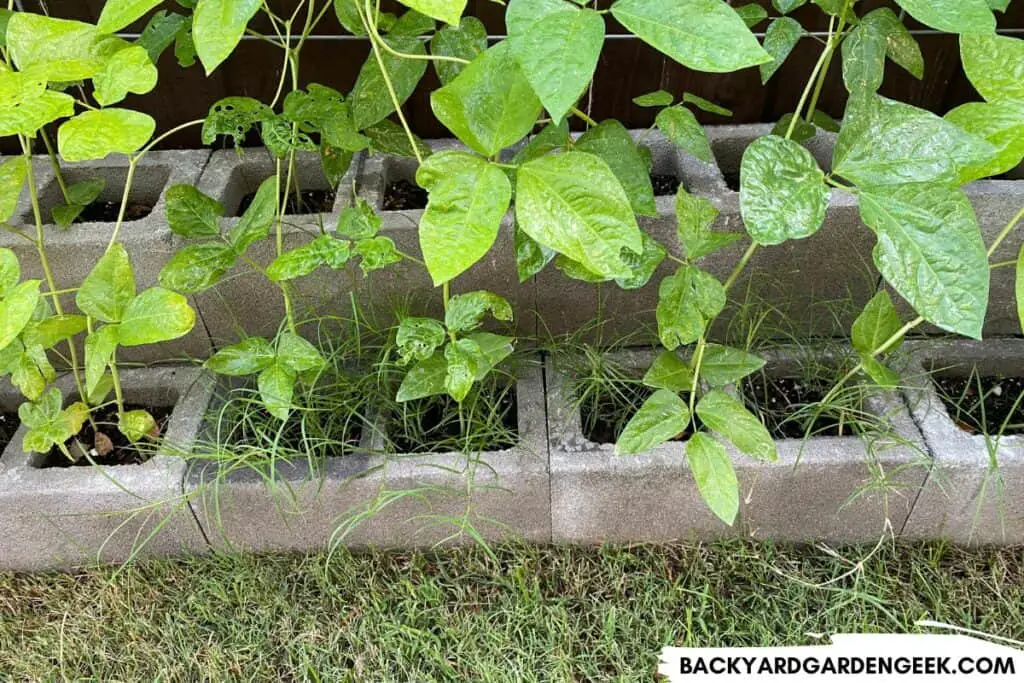
Well, I was wrong. I realized a few months later that both the Bermuda grass and nutsedge had made their way into my cinder blocks.
The problem got so bad that I ended up redoing the beds the following year because the grass was unstoppable.
I learned from that experience to never underestimate the destructive power of grass. You can’t ignore it. You’ve got to kill it off.
3. Is the Ground Level or Sloped?
As I noted above, I generally don’t dig out the grass underneath my garden beds because cardboard kills it off so effectively when it’s laid in thick layers.
But I make a major exception to this general rule when I’m installing raised beds on sloped ground.
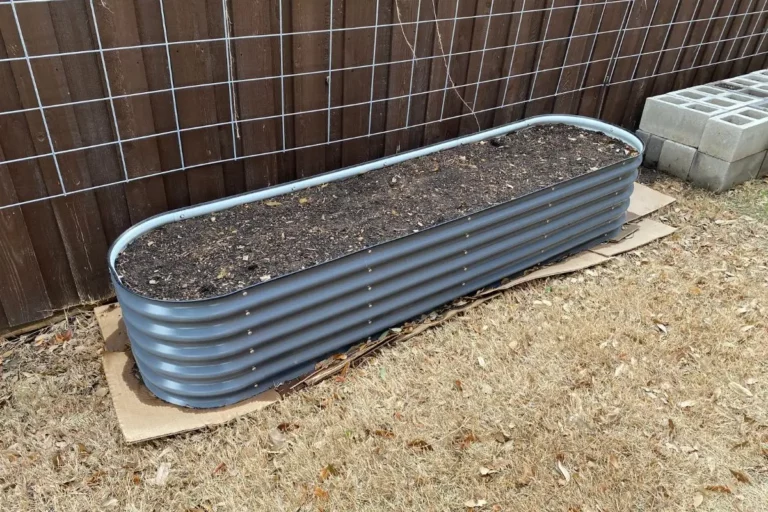
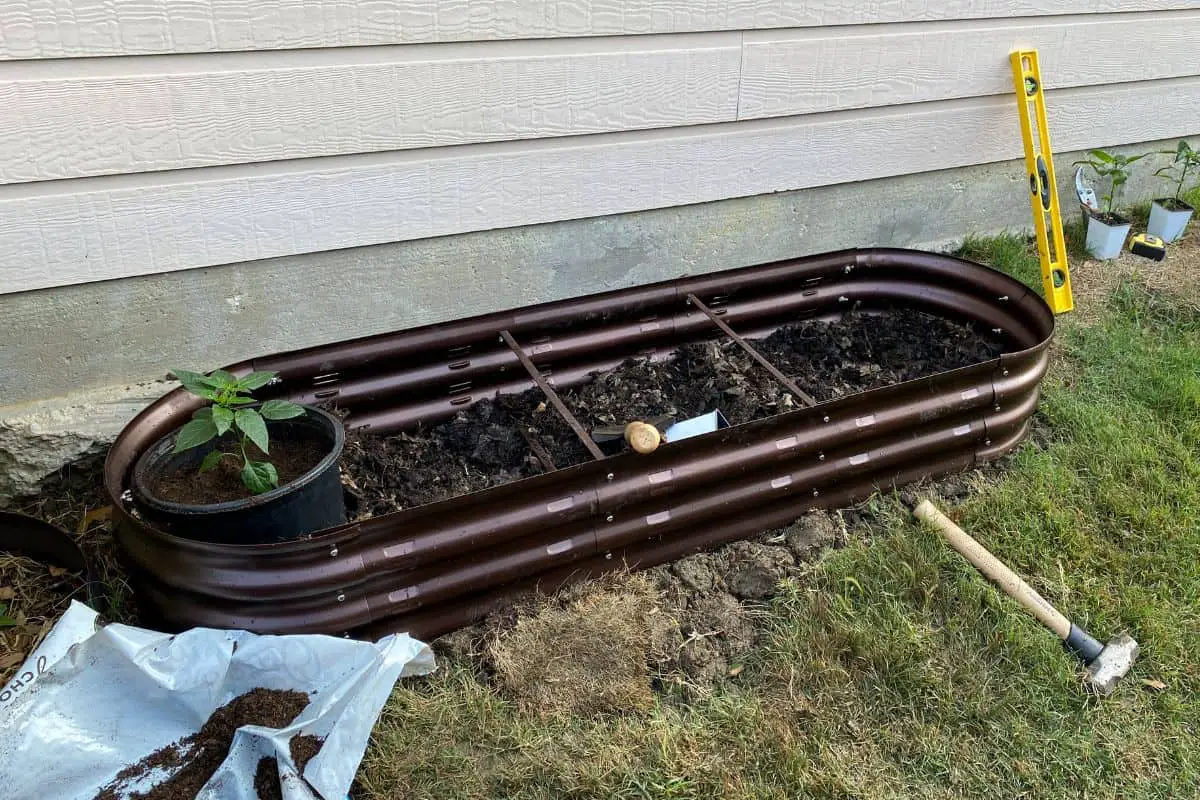
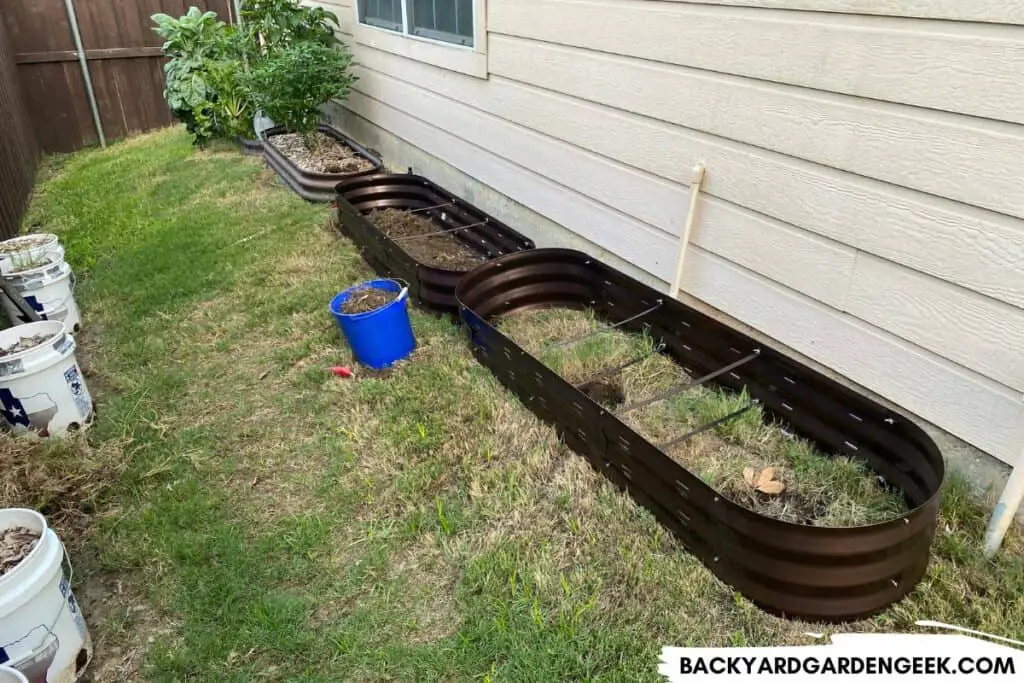
Last year, I installed 6 raised beds behind my garage in an area of my yard that’s sloped.
I definitely didn’t want my raised beds to end up at an angle, so I completely dug out the area so as to level the ground. In the process, I ended up digging out all the grass.
But I made yet another mistake. I assumed that because all the grass was gone, I didn’t need to use cardboard. Boy, was I wrong!
There must’ve been Bermuda grass rhizomes that I missed because after a few months, Bermuda grass was sprouting up in my raised beds.
Thankfully, I’ve mulched my beds heavily, and I’ve kept the Bermuda grass from taking over, but after digging out the grass, I really should’ve put down thick layers of cardboard before filling the beds.
4. Do You Have Any Burrowing Critters in Your Yard?
I think it’s worth mentioning burrowing animals because my father has had tons of problems with moles in his garden.
If you see any evidence of burrowing critters in your yard, you’ll want to put down thick layers of cardboard atop your grass, as you might expect.
But you’ll also want to put a layer of hardware cloth on top of the cardboard.
The cardboard will eventually disintegrate, but the hardware cloth will remain in place and keep any burrowing animals from tunneling through the grass and soil up into your garden bed.
The good news is that the hardware cloth will allow worms and other microorganisms to travel from the native soil into your raised bed, which will help the decomposition process.
Removing Grass & Placing Cardboard in 8 Easy Steps
Now that we’ve covered some of the basics, I’d like to share some step-by-step instructions for removing grass (for those of you who want to do so) as well as putting down cardboard underneath your raised beds.
If you don’t need to remove any grass from your yard, just start at Step 4 and go from there:
Step 1: Consider the Sunlight
Before you get started, you’ll need to keep this in mind: Do you know exactly how much sunlight your chosen space will get in spring, summer, fall, and winter?
Ideally, do you want to place your raised beds in a location that will get at least 4 hours of sunlight throughout the year.
I’ve done this with a raised bed on my patio. I wish it got more sunlight, but with 4 full hours of light, I can still grow all kinds of plants in it.
I’ve got a small backyard, so I have to make use of all of it. This means that I’ve placed a few raised beds in locations (like along a fence line) that get plenty of sunlight during the summer but little to no sunlight during the winter.
Before I placed the beds, I tracked the sunlight over the course of a year, and I knew that I’d still get great plant growth during spring, summer, and early fall, so I thought it was worth it.
Unfortunately, the sun dips in the winter a bit, and the beds no longer get any sunlight. That’s obviously not ideal, but you have to do the best with what you’ve got!
Step 2: Gather Your Tools
You can remove grass using only a shovel, which is something I’ve done in the past, but believe me, it’s no fun at all. You’ll have a much better experience if you use a few dedicated tools for that task.
If you’ve got a sod cutter, go for it! But I didn’t have one of those, so I had to rely on a few hand tools.
All you need to get the job done is a metal spading fork and a shovel.
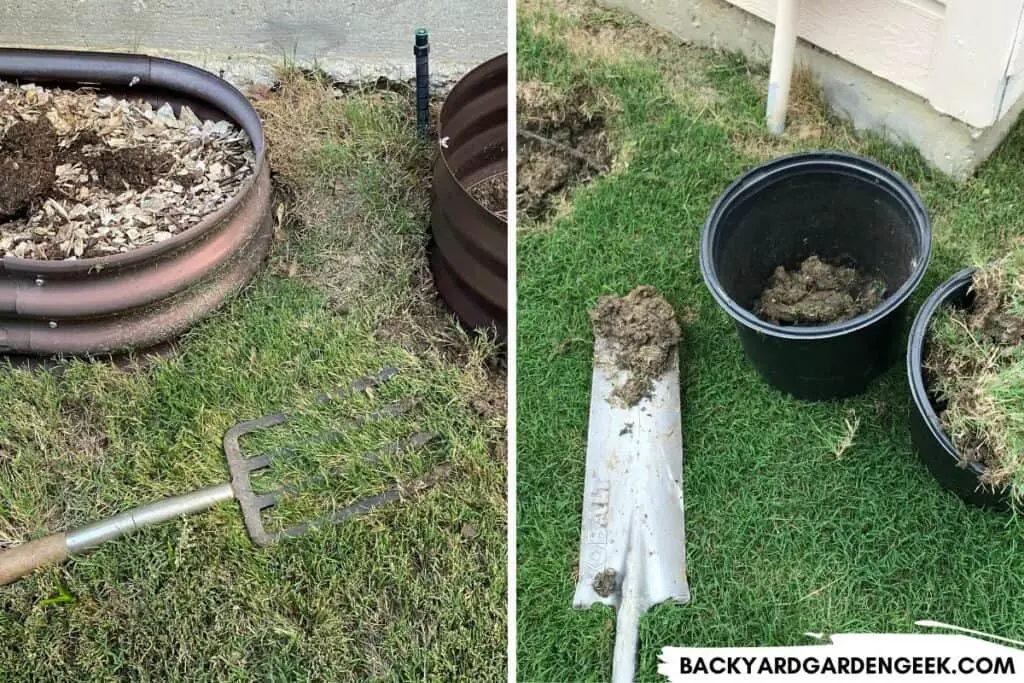
Don’t use a pitchfork because they’re too flimsy. The spading fork will rip up grass roots easily, allowing you to use the shovel more effectively.
Step 3: Mark the Outline of the Raised Bed
Before you do any digging, lay the raised bed where you want it to go (or at least mark out the perimeter of the bed in some way).
Using your spading fork or shovel, chop around the perimeter of the bed. You want to cut up the ground enough so that you can see the outline of your work once you remove the raised bed and get it out of the way.
Step 4: Cut Out and Remove the Grass
If you attempt to cut out grass without using a garden spade, you might end up having some pretty hard work on your hands.
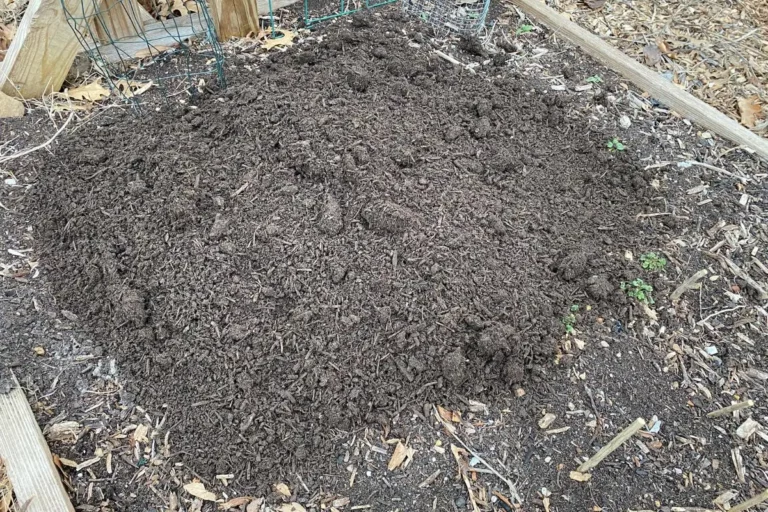
My native soil is hard-packed clay, and before I bought a garden spade, I had to place my shovel at the right angle, then hit it with a mini sledgehammer to get the shovel to penetrate through the grass and clay.
Once I started using a garden spade, the work got much easier. The spade’s tongs penetrated the soil, then I wiggled the spade back and forth to loosen up the ground.
After loosening everything up, the shovel went just fine, and I was able to dig out thick chunks of clay. I was actually amazed at how hard-packed it was. It had the consistency of semi dried glue!
Step 5: Lay Down Thick Layers of Cardboard
Even if you dig up all the grass in the area where you plan to place your raised bed, you still need to lay down several thick layers of cardboard.
You’ll never know if you removed all of the grass or not, but if you left any in place, especially with rhizomatic grasses, there’s a good chance that grass will start growing in your raised beds if you don’t smother it with cardboard.
I recommend putting down 2-4 layers of cardboard, making sure the cardboard extends beyond the perimeter of your garden bed by a few inches on each side.
It might look a little goofy at first, but over the coming months, it’ll help kill off additional grass that might try to creep into the bed, and it’ll decompose over time and just disappear.
Step 6: Lay Down Hardware Cloth (if necessary)
If you haven’t had any trouble with ground, squirrels, moles, gophers, or any other burrowing critters, you don’t need hardware cloth.
But if you’ve seen evidence of these pests in your yard, you’ll need to put a barrier at the bottom of your raised bed. That’ll keep them from destroying your plants.
I don’t recommend landscape fabric because that’ll put a semi-permanent barrier between the soil in your bed and the native soil in your yard, which hinders earthworms and other beneficial bugs from enriching the soil in the raised beds.
But hardware cloth is different. It’ll keep out the larger critters while allowing worms and microorganisms to move into your raised beds.
Long-term, this will be a huge benefit since soil health is key to growing great plants.
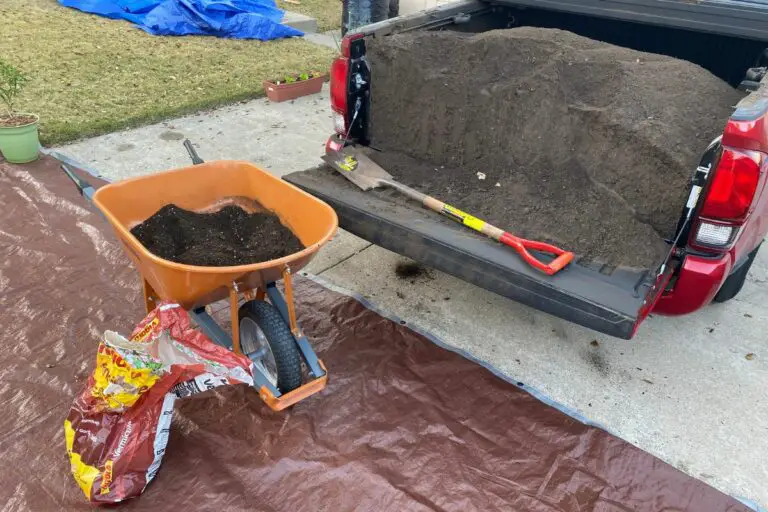
Step 7: Layer the Bottom 50%, Then Add Soil
In my article on best materials to put in the bottom of raised beds, I provide lots of information about why layering is the best, cheapest way to fill a raised bed for the first time.
If you decide to fill your raised bed entirely with soil, you’re going to waste money.
What you should do instead is to think of your raised beds in terms of layers:
- The bottom 25% of the bed is Layer 1.
- The lower middle 25% of the bed is Layer 2.
- The upper middle 25% of the bed is Layer 3.
- The top 25% of the bed is Layer 4.
For Layers 3 and 4, I reserve them entirely for mature compost, garden soil, and mulch because I usually want to begin growing plants immediately in my new bed.
As long as I give the plants at least 6 inches of good soil, there’s enough soil there for shallow-rooted plants to do just fine.
Just know that plants with deeper roots shouldn’t be planted that first year if you’ve only put 6 inches of soil in the top of your raised bed.
The good news is that you’ll only have this problem for 10-12 months. After that, the material in the lower layers of the bed will have undergone plenty of decomposition, and you’ll then be able to plant whatever you want in those raised beds.
If you’ve got deeper beds to start off with, you’ve got more options.
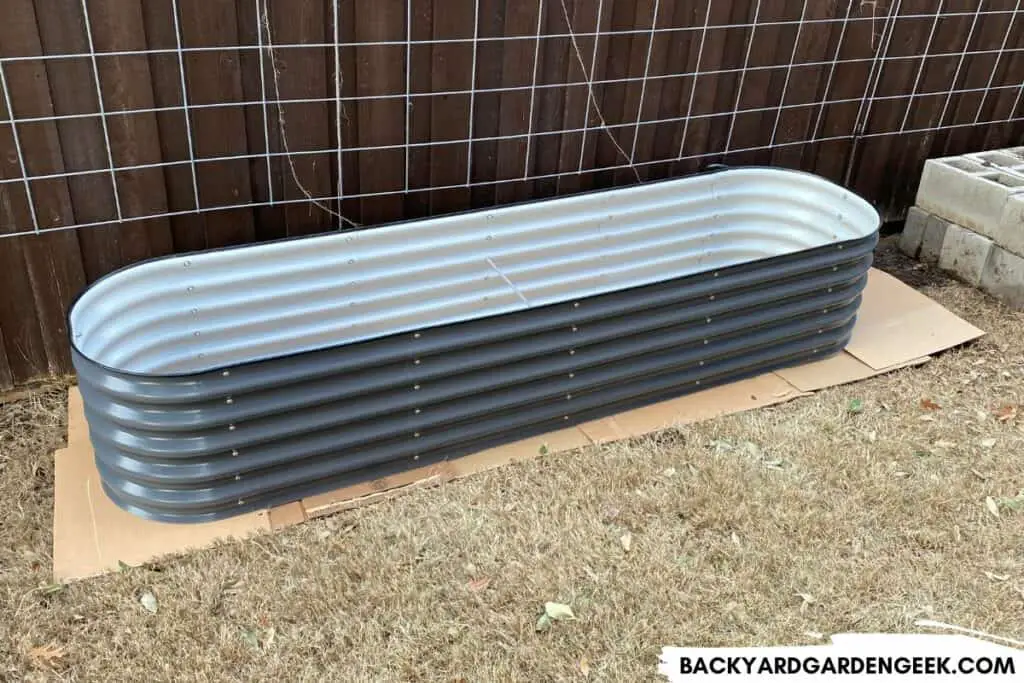
Let’s say you’ve got a 17-inch deep bed (like the one I put against a fence recently). If I fill the top 2 layers with soil, that means I’ve got 8 inches or so for gardening. I’ll still plant shallow-rooted plants that first year, but they’ll have more room to thrive below the surface.
Check out my article on raised bed layering if you want to see a detailed explanation of what I put in Layers 1 and 2, but here’s a quick breakdown.
For Layer 1, I’ll put these materials in the bottom of the raised bed but on top of the cardboard:
- Branches
- Grass Clippings (untreated and without seed heads, never rhizomatic varieties)
- Logs
- Wood Chips
For Layers 2 and 3, I’ll place these materials on top of the stuff I’ve placed in Layer 1:
- Banana Peels
- Compost
- Eggshells
- Fish Scraps
- Coffee Grounds
- Flowers
- Kitchen Scraps (anything compostable)
- Leaves
- Livestock Manure (chicken, cow, goat, horse, llama, sheep)
- Old Mulch (preferably non-dyed kinds)
- Newsprint (black and white, no colors)
- Pine Needles
- Potting Soil (used in last year’s containers)
- Vines
Here’s a visual breakdown of how I layer my new raised garden beds, beginning with what goes at the very top of the bed and ending with what goes in the very bottom:
| Layer # | Layer % | Material |
|---|---|---|
| Layer 4 | Top 25% | Mulch (1-2 inches) |
| Layer 4 | Top 25% | Soil (6-8 inches) |
| Layer 3 | Upper Middle 25% | Compost |
| Layer 3 | Upper Middle 25% | Kitchen Scraps |
| Layer 3 | Upper Middle 25% | Banana Peels |
| Layer 3 | Upper Middle 25% | Eggshells |
| Layer 3 | Upper Middle 25% | Flowers |
| Layer 3 | Upper Middle 25% | Newsprint |
| Layer 3 | Upper Middle 25% | Fish Scraps |
| Layer 3 | Upper Middle 25% | Coffee Grounds |
| Layer 2 | Lower Middle 25% | Livestock Manure |
| Layer 2 | Lower Middle 25% | Grass Clippings |
| Layer 2 | Lower Middle 25% | Old Mulch |
| Layer 2 | Lower Middle 25% | Leaves |
| Layer 2 | Lower Middle 25% | Pine Needles |
| Layer 1 | Bottom 25% | Vines |
| Layer 1 | Bottom 25% | Small Branches |
| Layer 1 | Bottom 25% | Large Branches |
| Layer 1 | Bottom 25% | Logs |
| Layer 1 | Bottom 25% | Cardboard |
Of course, anything in Layers 2 and 3 can be used in Layer 1, but larger or tougher materials (logs, large branches, and vines) need to be put in Layer 1 since they’ll need more time to decompose.
Step 8: Leave Room at Top for Mulch or Wood Chips
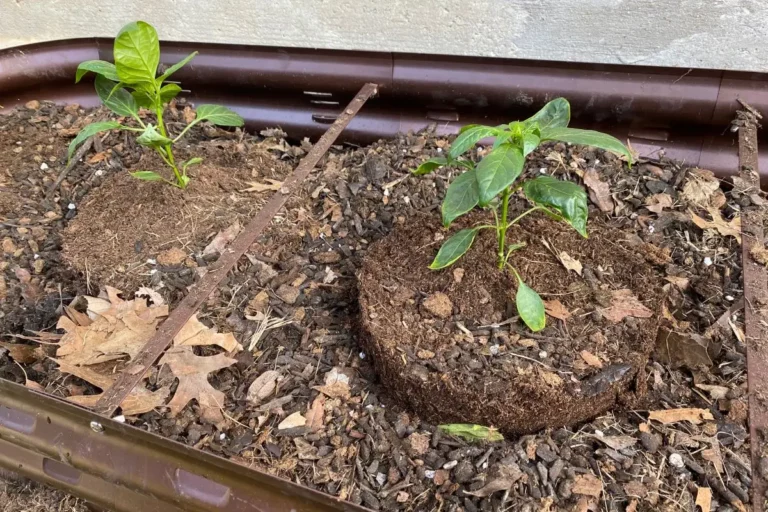
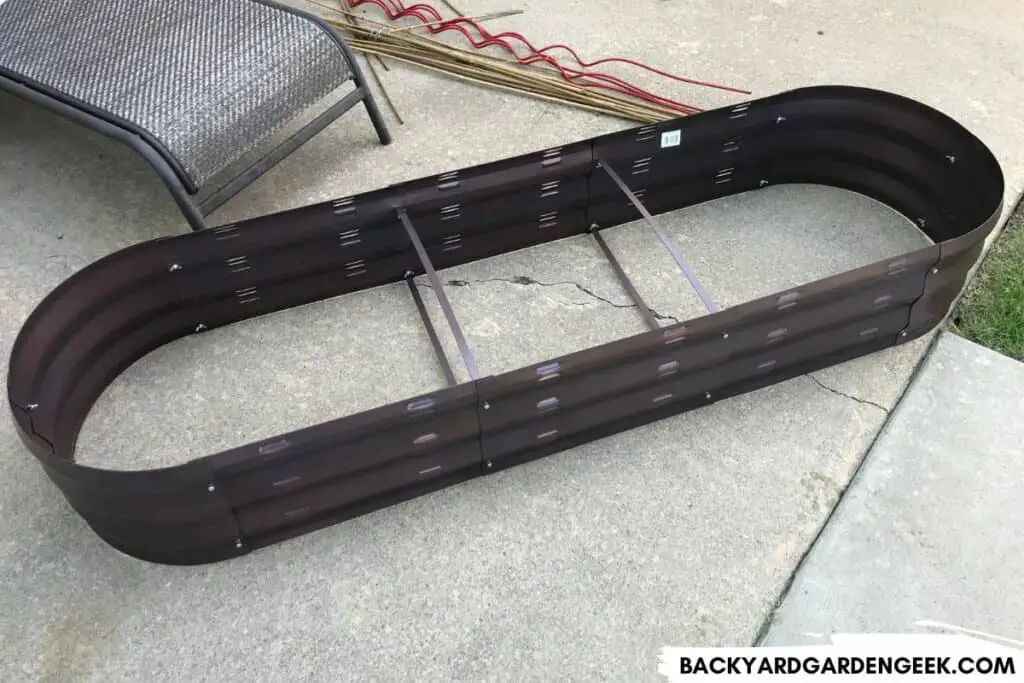
I installed 2 raise beds behind my garage this past year, and when I did so, I ran a simple experiment.
In one raised bed, I filled it up, but I didn’t add a layer of mulch atop the soil. In the other raised bed, I filled it up almost exactly the same way, but I put in less soil at the very top so I could add 2 inches of wood chips to cover everything.
Using a hack that I discuss in this article on the best materials to use in raised beds, I planted tomato plants in both raised beds, and I waited to see what would happen.
Would the plants all grow the same? Or would the plants in one bed outperform the plants in the other?
After the plants had been growing for 5-6 weeks, I had a clear winner: the bed with the mulch.
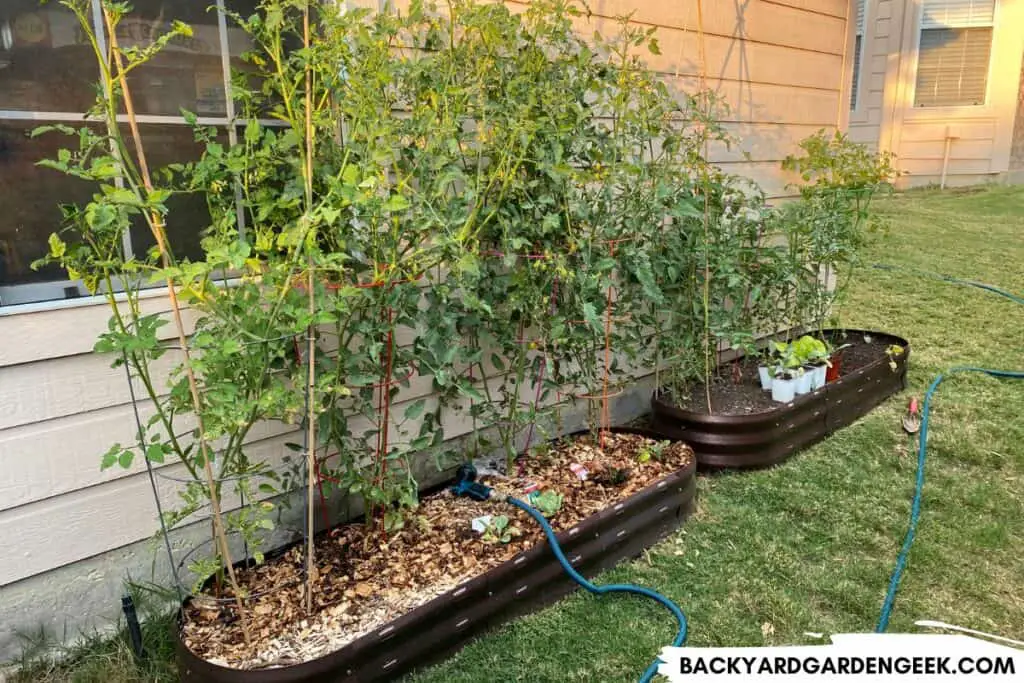
Even though I had built both beds exactly the same and even though both beds received the same amount of sunlight and water, the tomato plants that were planted in the bed with lots of mulch were easily 30-40% taller than the tomato plants in the other bed.
This goes to show just how important a layer of mulch can be when you’re installing new raised beds.
Long story short, whether or not you decide to remove the grass from your planting area, you absolutely need to put down lots of cardboard, then fill your bed with all kinds of materials that’ll decompose over time.
To top it all off, add lots of mulch to the beds. This means you shouldn’t fill your raised beds all the way with compostable materials and soil. You need to leave 2-3 inches of space at the top so that you can add 1-2 inches of wood chips or mulch.
And don’t fill your raised beds all the way to the very top of the bed. Leave an inch or so at the top so that things don’t overflow when you’re watering.
If you follow these steps, your new raised beds will be ready to go and your plants will likely have all they need to grow and thrive throughout the year.
Further Reading
Interested in learning more about raised bed gardening?
I’ve written quite a bit about the subject since I love my raised beds, so check out these related articles if you want to learn more: