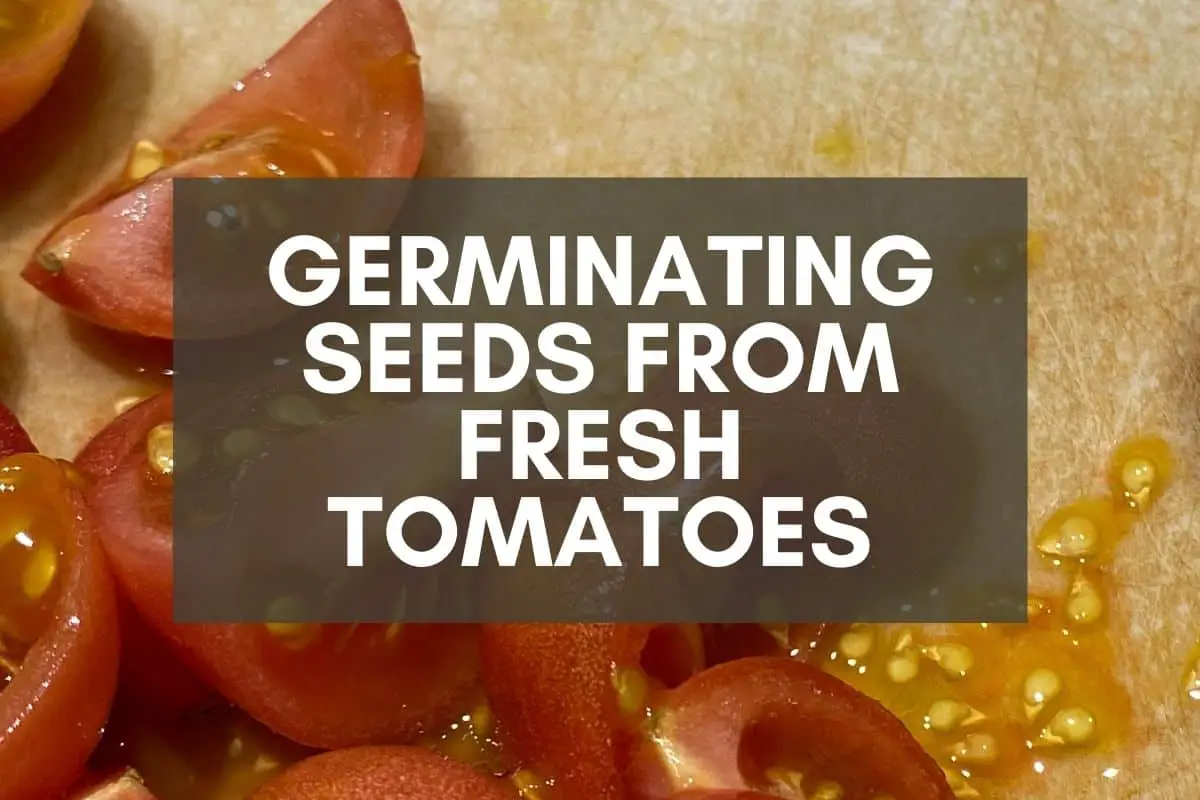
Germinating Seeds from Fresh Tomatoes in 7 Easy Steps
I love growing my tomatoes from seed, but when I was a novice gardener, I didn’t really know what to do. Should I buy seeds from my local garden center? Or purchase seeds from an online seed supplier?
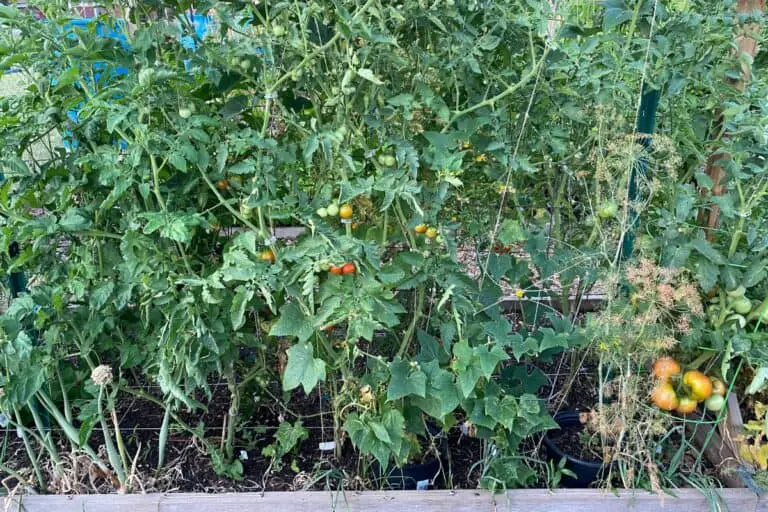
One day, after a trip to the local farm market, I was prepping some fresh tomatoes for dinner. As I removed the seeds, I remember wondering if I needed to buy seeds at all. Could I simply plant the seeds from my farm market tomatoes? If so, would they germinate?
To get the best germination rates from fresh tomato seeds, rinse the seeds well to remove the gel, then soak in water overnight and plant immediately in a light, moist soil mixture. Heating mats are a helpful addition since tomato seeds will germinate best in soil that’s 65-85℉ (18-29℃).
I’ll outline my process in more detail below, but I’ve got one quick word of warning: Care should be taken when determining which seeds you plant to harvest and plant.
Heirloom tomato seeds will reproduce the traits of the original plant, but seeds from hybrid tomatoes (including most store-bought tomatoes) will produce a genetic variant of the original plant.
Maybe you’ll get lucky and grow a plant that produces beautiful, flavorful fruit. Or maybe you’ll grow a plant that produces bland, tasteless tomatoes, as I experienced firsthand when I harvested seeds from hybrid tomatoes a few years ago.
Whatever you decide to do, one of the things I love most about growing tomatoes this way is how easy and cost-effective it can be when done right. Unfortunately, it’s also easy to do it wrong, which means you’ll have lackluster germination rates and few tomato seedlings to show for your efforts.
I hope you’ll take the time to read the entire article, but if you’d like to skip ahead, here’s what I’ll be covering:
- Step 1: Selecting the Seeds
- Step 2: Evaluating Germination Options
- Step 3: Preparing the Soil
- Step 4: Planting the Seeds
- Step 5: Keeping the Soil Moist
- Step 6: Keeping the Soil Warm
- Step 7: Separating New Seedlings
My goal in this article is to provide a step-by-step overview of my seed germination process. That way, you can learn from my mistakes and get exceptional germination rates out of your seeds.
How to Germinate Tomato Seeds from Fresh Tomatoes
Just so I’m clear, this article isn’t designed to explain the entire tomato growing process from start to finish. What I’m going to detail here is one of the most important steps of the process: getting your tomato seeds to germinate.
Because guess what happens if you don’t get good germination rates this year? You’ll have wasted 1-2 weeks of valuable growing time, and you won’t have many (or any!) plants to show for it.
Growing tomatoes from seed is an excellent way to save money and try tomato varieties that you could never in your life find in stores, but that’s only if your seeds germinate. If they don’t, you’ll be out of luck.
With that in mind, here are the steps I take to ensure that my tomato seed germination rates are as high as possible.
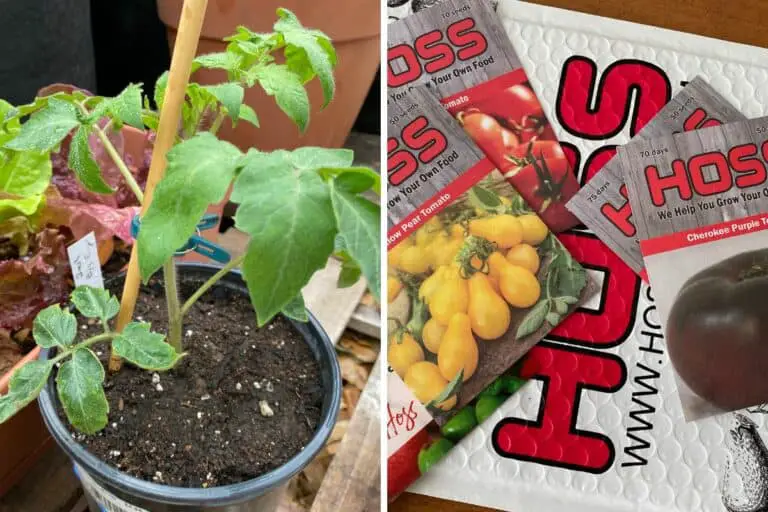
Step 1: Selecting the Seeds
You might not think so at first, but I’ve come to believe that seed selection is one of the most important parts of the tomato growing process. Let me explain why.
When it comes to fresh tomatoes, this might seem like a no-brainer. Simply scoop out the seeds you want and use those to grow new plants.
Unfortunately, most store-bought tomatoes are hybrids that have been bred to maintain their appearance during transport and look best on grocery store shelves. These tomatoes typically aren’t as tasty as the varieties you can grow yourself because they’ve been bred for durability and appearance, not flavor.
You can use hybrid tomato seeds to grow tomatoes, but if you do, you might be in for a bit of a surprise since the plants you grow won’t be genetically identical to the tomato you purchased at the store. This is why I typically don’t use the seeds from store-bought tomatoes unless I know for sure that I’m purchasing an heirloom variety of some kind since those seeds will produce a plant that’s true to the original.
When you visit your local garden center or home improvement store, you’re undoubtedly going to see a stand of some kind that holds tons of different seed packets. But the thing you should know is that these seeds are often the same kinds of seeds that are sold at similar stores in other growing regions.
In other words, the seeds you’re looking at are not necessarily the varieties that grow best in your corner of the word. This doesn’t mean that the seeds won’t grow just fine in your area because many of them will. What this means is that the seed companies have simply selected popular varieties to stock their shelves with.
Unfortunately, those varieties may not be ideal for your growing zone. They also don’t represent the fabulous options that are out there if you’re willing to do a little extra searching.
When it comes to tomato seeds in particular, my advice is this: If possible, join a local gardening group, whether that’s in person or using Facebook or some other online platform. Those groups are great since members share personal experiences with different tomato varieties–some you’ve probably heard of, many you likely haven’t.
Second, browse the sites of reputable online seed suppliers and check out their available options. I think you’ll be surprised by the number of different tomato varieties out there.
Just remember that not every variety is well-suited for your region. I grew incredible Rutgers tomato plants when I lived in New Jersey. After moving to Texas, I tried to grow one of those plants, and it was a sad failure of an experiment. The plant simply couldn’t handle the heat in Texas.
But there are plenty of tomato varieties that can, which is why I urge you to choose your seeds carefully. When gardening, there’s nothing more frustrating than growing a plant from seed only to realize, often months later, that it’s not going to produce much of anything.
Best to avoid that disappointment by selecting seeds that are going to give you healthy, productive plants this year.
Just be sure to keep everything labeled properly throughout this process. If you don’t, you’ll need to know how to identify your tomato seeds and seedlings so that everything gets planted in the right spot.
Step 2: Evaluating Germination Options
As you can see if you go down the Google rabbit hole, there’s all kinds of advice when it comes to germinating tomato seeds.
What I want to do here is to give you a simple overview of 3 particularly popular ways to germinate tomato seeds, then give you additional insights about the method I use when growing my plants from seed.
Here are the 3 ways that most people use to germinate tomato seeds:
- Planting Seeds Directly in Soil
- Adding Seeds to Moist Paper Towels
- Dropping Seeds in Water
Let’s take a quick look at each of these methods so you can figure out which one works best for you.
Planting Seeds Directly in Soil
Generally speaking, this is my preferred option. Once you’ve got your seeds and soil ready to go, you simply plant your seeds 1/8 to 1/4 inch deep (4-6mm, cover lightly with soil, and keep warm and moist for a week or so.
Using this method, you won’t need to transplant any seeds. Once they germinate, they’ll start growing. More on this method below.
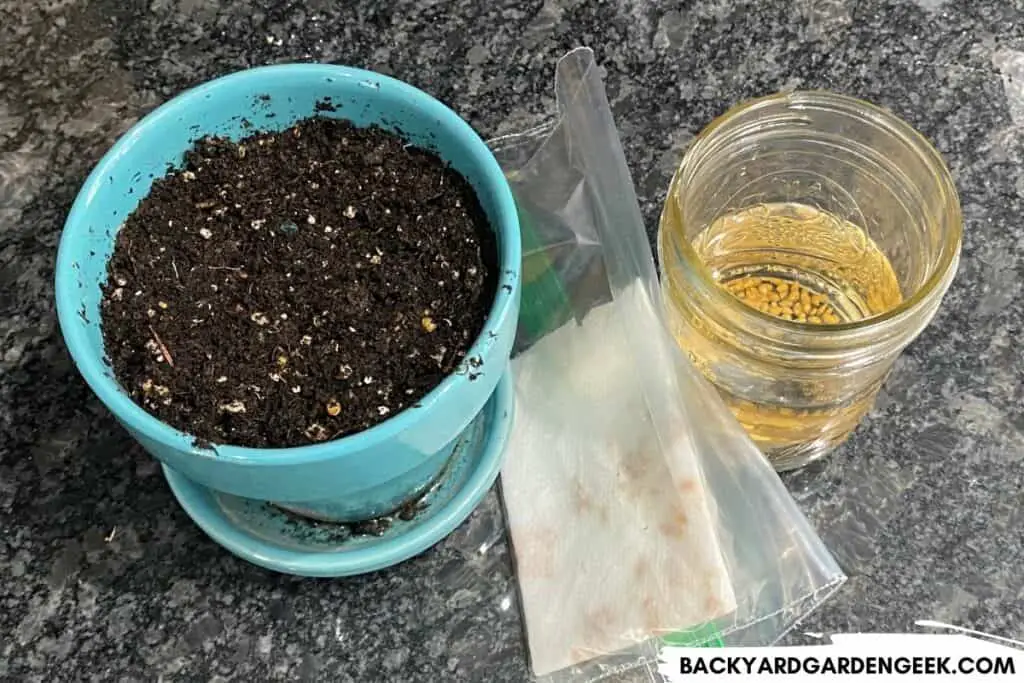
Adding Seeds to Moist Paper Towels
One of the things I like most about this method is the fact that you can see exactly which seeds are germinating and which seats aren’t. When you plant seeds in soil, you play a waiting game, hoping to see a germinated seed in 7 to 10 days. With a paper towel method, all you need to do is grab a Ziploc bag, moisten a paper towel, add several seeds to the moistened paper towel, fold the paper towel a couple times, and zip it up inside the Ziploc bag. In 45 days, you can pull out the paper towel and check to see if any seeds of germinated. If they have, that’s fantastic, and all you need to do is transfer them to a pot with soil. If they haven’t yet germinated, simply place the paper towel back in a Ziploc bag and check once each day for germination.
This might sound obvious, but if you’re planning to use the paper towel method, you should use different baggies for different tomato plant varieties. Don’t put several varieties in the same bag because you’ll inevitably forget which seed is which. Instead, use different bags and label them clearly with a sharpie marker. That way, you’ll know exactly which bags contain which seeds.
Dropping Seeds in Water
This is, by far, the least time intensive method of germinating tomato seeds, but before you can try germinating your seeds in water, you’ll need to ferment the tomato seeds to remove the gel that surrounds them and that keeps them from germinating.
Simply leave your seeds in water for 2-3 days, then pour everything into a metal strainer and gently push the seeds around until you’ve separated the gel from the seeds.
If you’re attempting to germinate seeds in water, you’ll need to pour a new glass and place the seeds back into the water for another 2-3 days, paying close attention to see when the first tiny root (also known as a radicle) begins to emerge from the softened shell.
I’ve successfully germinated tomato seeds in water, but I don’t particularly like this method because it’s easy to leave seeds in the water for too long, increasing the likelihood of rot. But if you’re never germinated seeds in water, you should give it a try and see if it works for you.
Step 3: Preparing the Soil
Whether you’re planning to plant your fresh tomato seeds directly and soil or to germinate them beforehand using either moist towels or water, soil preparation is key to the seed growing process.
A few years back, I used unamended soil from my garden in one seed tray in an attempt to save time, and the results were dismal with germination rates around 30%. In a second seed tray, I used quality seed starting soil and had germination rates that were closer to 90%.
If you’re looking to save time, my recommendation is to buy new seed-starting soil each year, preferably something that’s light and airy because it’s got coconut coir or peat moss in it.
But you can also make your own seed-starting soil using this recipe:
- 1 part soil from your garden (or store-bought soil)
- 1 part vermiculite
- 1 part coconut coir or peat moss
- 1 part compost
- Optional: ¼ part perlite (if soil seems too dense)
- Optional: ¼ part dolomite (to add calcium to your mix)
I use the word “part” instead of giving an exact measurement because I have no idea how much seed starting mix you’ll need to create. As long as you keep to those ratios, you’ll have some nice soil to start your seeds in.
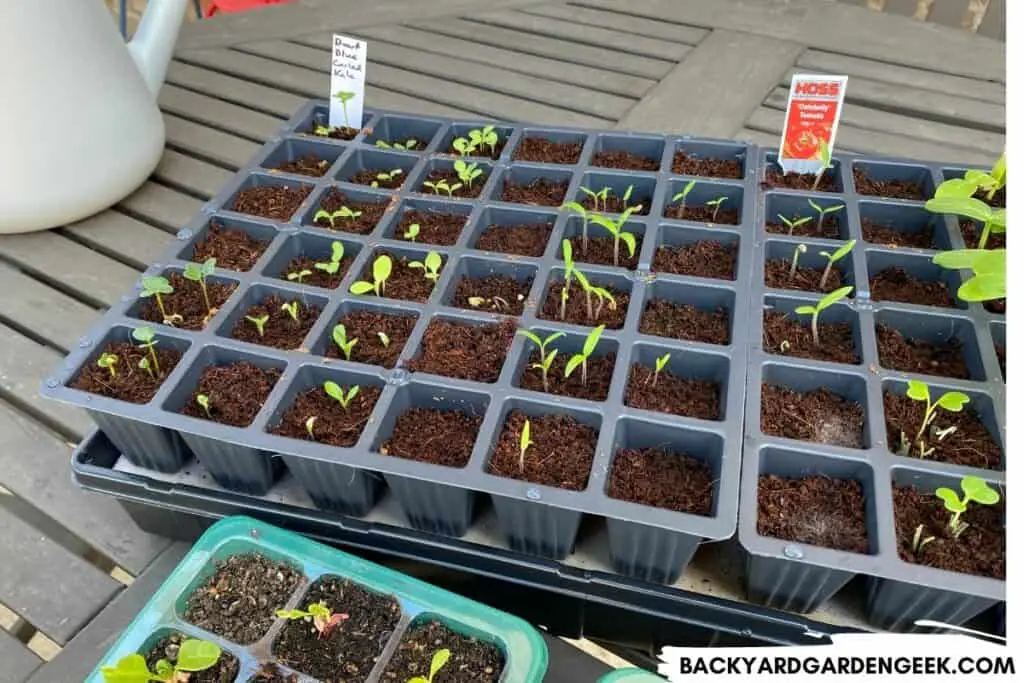
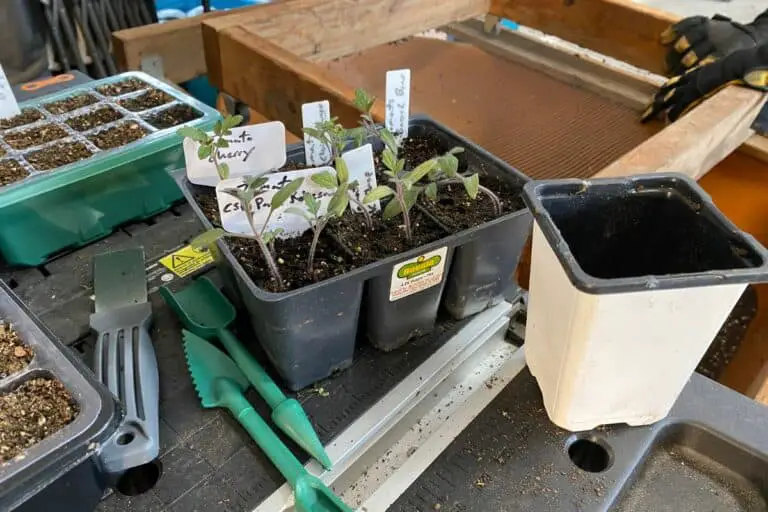
Step 4: Planting the Seeds
Here’s where you’ve got some choices to make. Do you start your seeds in small cells, then transplant them into larger containers after they’re a few weeks old? Or do you start off in larger pots to begin with so that you don’t have to do any transplanting?
I think the answer depends on how many plants you plan to grow this year.
If you’re thinking about growing up to 24 plants, skip the smaller planting cells and plant your seeds directly in 4-inch pots. That way, you’ll save time since you won’t have to transplant from smaller cells into larger containers.
But if you’re planting more than 24 plants, I’d encourage you to use a seed starting tray with small-ish cells. Just be careful what you buy. I purchased several trays last year on Amazon, and I soon found out just how awful they were. The plastic was cheap and thick, and the holes in the bottom of the tray were so small I had trouble removing the seedlings when it came time to transplant.
As I noted above, the Burpee Self-Watering Seed System is a little pricey, but it’s so incredibly easy to use, which is why it’s one of my favorites. If you purchase one of the super cheap seed trays, I’d encourage you to consider purchasing 2 of them. Use the first one as a base, then cut the second one into single cells and place each single cell in the one you’re using as a base.
I recommend this because the cheap trays can be rather clunky, making it difficult to remove your seedlings once you’re ready to transplant them. If you’ve cut single cells from one tray and have placed them in another, you can easily pull out individual seedling cells instead of tipping over the entire tray.
Once you’ve determined what kind of seed-starting system you’re going to use, simply place your tomato seeds about ⅛ to ¼ inch (4-6mm) deep in the soil and make sure your soil stays moist for the next week or so (more on that below).
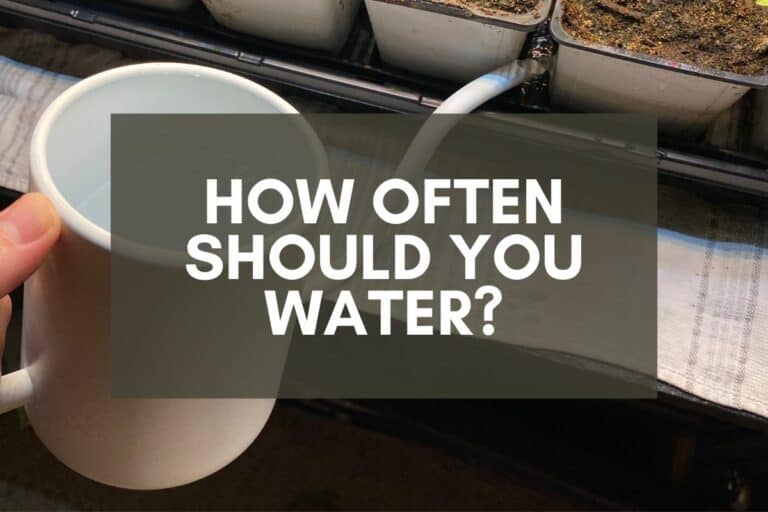
Step 5: Keeping the Soil Moist
Here’s the most important thing to understand about seed-starting soil: You need to keep it moist but not wet.
Wet soil will encourage seed rot since the seed’s outer shell (the testa) will have no access to air of any kind. Dry soil will have the opposite effect since the testa won’t get enough moisture to soften up and allow the seed’s first root (the radicle) to emerge.
Moist soil provides the best of both worlds. The soil is wet enough to soften the testa yet no so wet that it causes the seed to rot prematurely.
This is why most people prefer to bottom water their seedlings. Instead of watering the top of your seed trays, which will end up dousing your seeds in water, you should instead pour water into a tray of some kind, then place your seedling containers in the tray so that their soil can suck up water from below.
Most seedling containers have holes at the bottom to allow for bottom watering, but if you’re using Solo cups or other containers that don’t, simply poke or drill small holes in the bottom of each container, allowing them to pull moisture from the tray into the soil.
If you’re using a self-watering system like the Burpee product I’ve mentioned a few times in this article, the process is even simpler. All you need to do is make sure your bottom tray always has water in it. The towels will soak up the water, then the plants will wick up whatever water they need from the towels.
The advantage to a system like this is you’ll never have to worry about oversaturating your plants. They’ll always have all the water they need to remain moist.
Step 6: Keeping the Soil Warm
Unfortunately, moist soil alone won’t get you the best tomato seed germination rates since the soil needs to be somewhat warm as well.
To put it simply, seeds are genetically programmed to wait until warm weather arrives before sprouting. This is why you don’t see tomato seedlings sprouting in winter since doing so would lead to the immediate death of the plant.
But you can cajole seeds into germinating on your timeline (and not Mother Nature’s) by artificially heating the soil that they’re planted in, which signals to the seed that it’s time to germinate and grow.
I’ve seen some gardeners who’ll leave seed trays near sunlit windows so that the sunlight will help them germinate. But this isn’t the most effective method since what you’re looking for is consistently warm soil temperatures.
To get the best germination rates, I place my seed trays atop heat mats since the mats will heat the trays just enough to warm the water and soil to a temperature that’s ideal for tomato seed germination.
One word of warning: You’ll want to lift up your heat mats and clean underneath them every now and then. I’ve found that my heat mats will occasionally trap water that I’ve inadvertently spilled while filling up my seed trays. Just lift them up once a week and clean up any moisture that might have gotten trapped beneath them.
Step 7: Separating New Seedlings
Would you like to potentially double the number of seedlings you’ve got this year? How would you feel if you could do without adding much to your gardening workload?
Over the past few years, I’ve found that the best way to increase my seedling count is to separate my plants strategically. Here’s what I mean:
I almost always have more tomato seeds than I need, so in order to increase my germination rates to nearly 100%, I plant 2 seeds per seed cell. That way, I double my chances of at least 1 seed germinating in each cell.
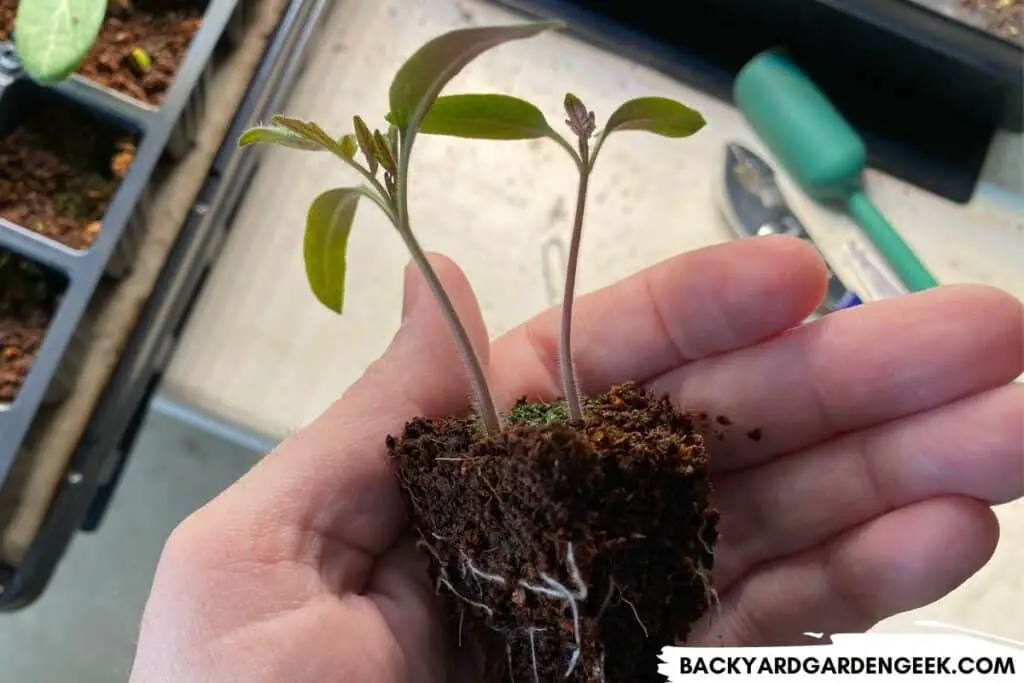
Seed cells are typically quite small–around 1 inch wide and 2 inches deep (2.5 by 5 cm)–so if both seeds germinate, you’ve got a choice to make. You can attempt to separate them, but I often simply clip the smallest seedling and let the other one grow and take its place.
But I do something very different when planting seeds directly into 4-inch pots (10 cm). When I grow in larger containers, I place 2 seeds per pot, planting the seeds in opposite corners of the container. If only 1 seed germinates, that’s just fine. The plant will have all the room it needs to grow into a nice-sized seedling.
If both seeds germinate, I grow even more excited. After the seedlings develop their first 3-4 real leaves, I push a small putty knife between them, then turn the container on its side and slowly slide 1 seedling plus half the soil. I’ll then place that seedling in a new container and fill it with additional soil. I’ll do the same for the original container.
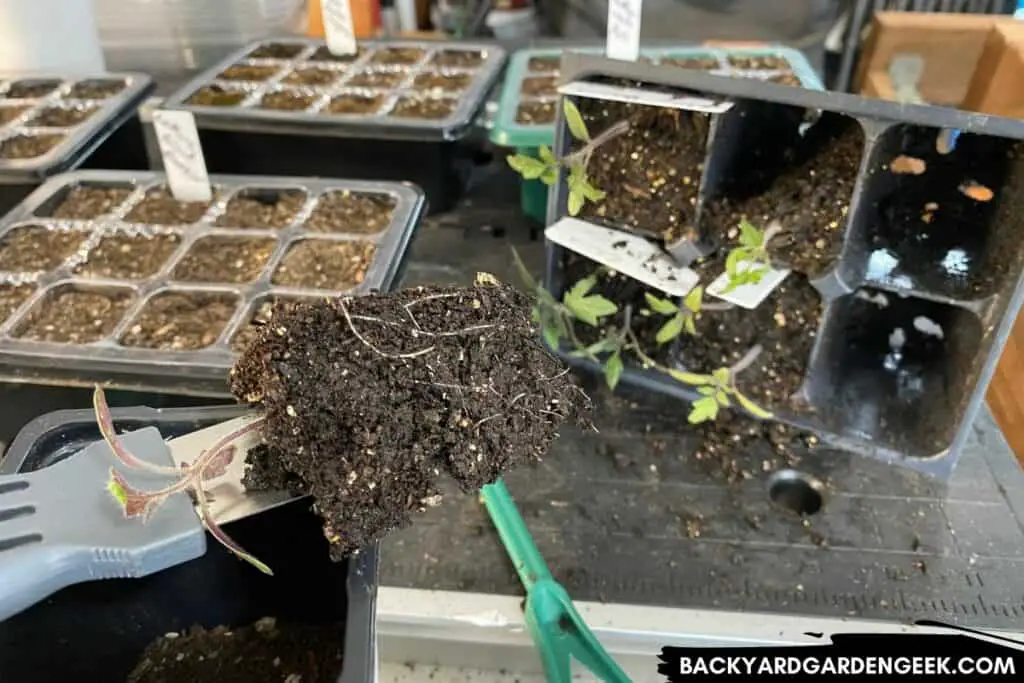
This means that I’m able to nurture 2 seedlings per 4-inch pot, which means more plants for my garden. The downside is that 4-inch pots take up more space in your growing area. The upside is you’ll do less transplanting if you germinate tomato seeds directly in larger pots.
More Information
The thing I like most about this 7-step method is how easy it is to follow once you get the hang of it.
Of course, you’ll likely experience some frustrations and hiccups the first time you try growing your own tomato plants from seed. But believe me, you’re going to get better each time you try, and if you keep working at it, you’ll start seeing successful germination rates in no time at all!
If you’d like to learn more about growing the best tomatoes possible, check out these related articles: