Separating Tomato Seedlings: A Step-by-Step Guide
If you’ve ever grown tomatoes from seed, you know how much fun it can be. You select the exact varieties you want to grow, you put the seeds in the soil, and you wait for those tiny seedlings to emerge.
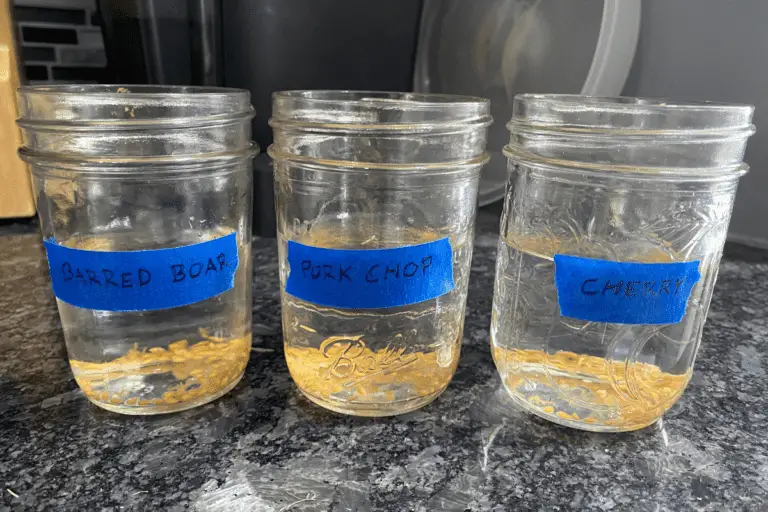
Unfortunately, some seeds won’t germinate no matter how hard you try, so in order to avoid that, I plant a few seeds in every seed container, increasing the odds that at least 1 of them will germinate and grow.
But what do you do when multiple seedlings start growing in the same container? How do you separate tomato seedlings without killing them?
Tomato seedlings should be carefully separated when they’re at least 3 inches tall and have 4-6 true leaves, keeping roots as intact as possible. Dividing smaller tomato seedlings can kill them since their stems are fragile, and separating much larger, more mature plants can cause root damage.
Here’s what I love most about separating tomato seedlings: You can literally double your seedling output if you divide them successfully. You can also avoid the frustrations that arise if you plant only 1 tomato seed per container and realize after a week or two that it never germinated.
So here’s what I want to focus on in this article:
- why you should separate your tomato seedlings
- when you should separate your tomato seedlings
- how you should separate your title seedlings
By focusing on the why’s, when’s, and how’s, you can learn all you need to know to separate your seedlings successfully every single time.
I’ll also discuss several reasons why you may not want to separate your seedlings but thin them out instead.
Finally, if you’re interested in learning more about the germination process–since that’s essential to growing healthy tomato seedlings–check out my articles on germinating tomato seeds, germinating refrigerated seeds, germinating hybrid tomato seeds, and germinating tomato seeds in water.
Should I Separate My Tomato Seedlings?
Before we discuss the when’s and how’s of separating tomato seedlings, let’s first look at the question of whether you should do so because it’s not always an easy decision.
When it comes to dividing up tomato seedlings, my decision generally depends on the answers to 2 specific questions:
- What size are the containers that my seedlings are growing in?
- How many tomato seedlings are growing in a single container?
And just to clarify, when I use the word “container,” I’m referring to anything you’re growing your tomato seedlings in, whether that’s a seed tray or seedling pots or small containers…or whatever!
The size of the container is important when it comes to deciding whether or not to divide your seedlings.
If you have a small or smallish container, you’re taking a risk if you decide to separate your seedlings because there’s not much soil to begin with, which means there’s a greater chance of doing damage to the plants’ existing root structures.
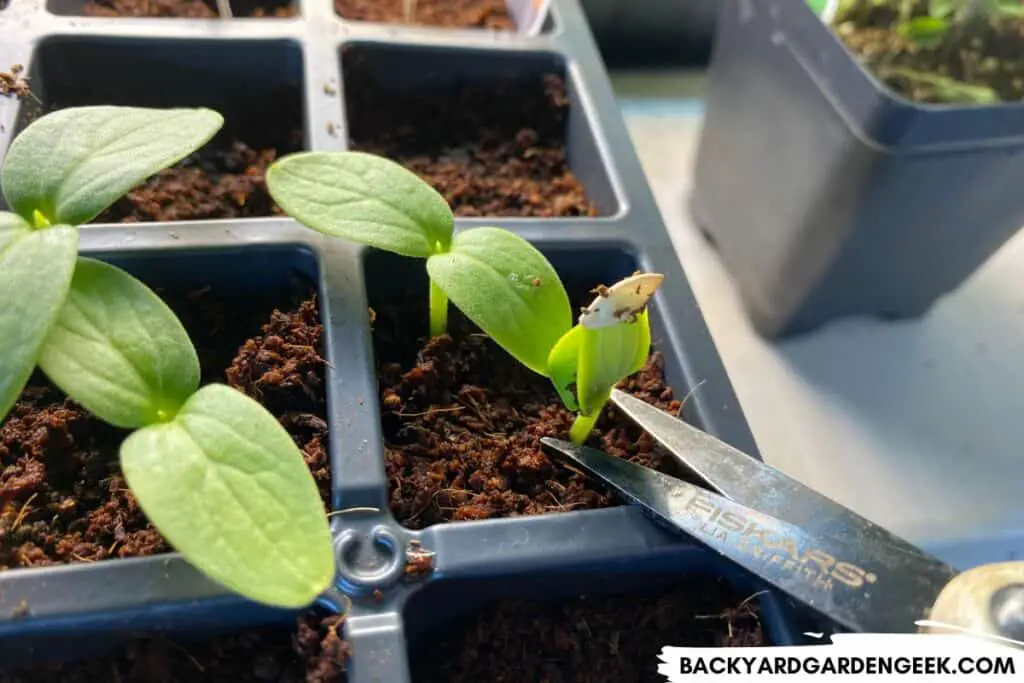
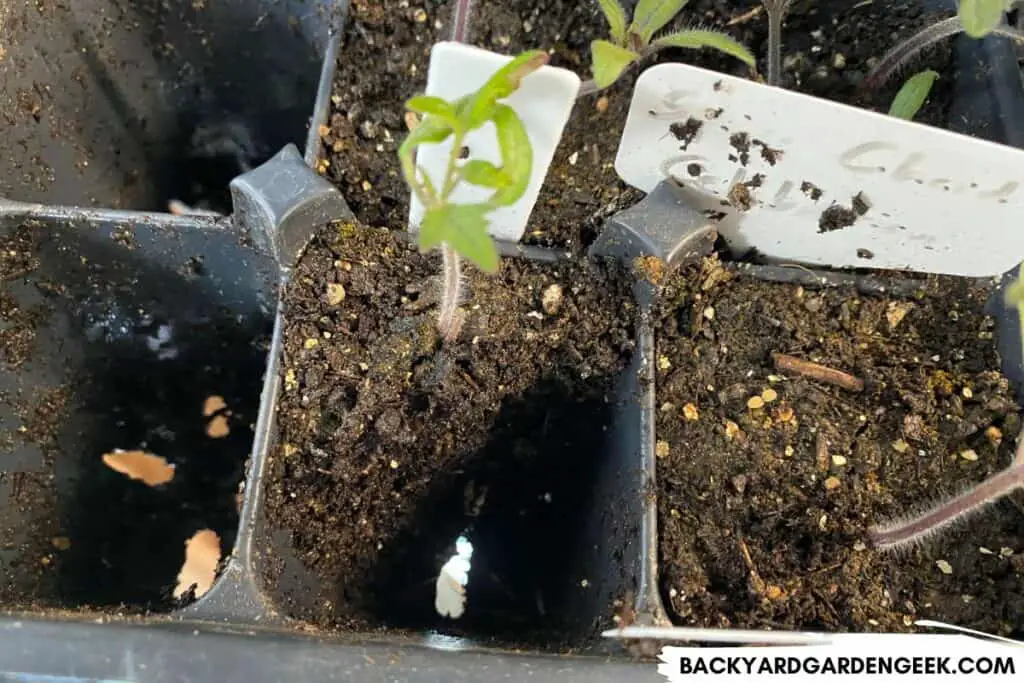
I see this most often with 36-cell and 72-cell seed trays.
For example, I love this 72-cell Burpee Seed Watering System. It’s a little pricey up front, but it makes up for in convenience and results, And I have seen some pretty amazing germination rates using it. But here’s the thing: Those seed cells are very small, only 1×2 inches (25-50 mm). That means there’s only 2 square inches of soil in each cell.
When I grow tomato seedlings in cells like these, I never attempt to divide them. By the time the seedlings are 3 inches (76 mm) tall, their roots will be very intertwined, with little in the way of soil, and dividing them might damage one or both plants.
It’s possible to do so, of course, because tomatoes are fairly hardy plants that have the ability to put out new roots from their stems, but I simply prefer not to take that risk, so I snip them instead. I do this with most plants that I grow in small seed cells.
On the other hand, whenever I’m growing my tomato seedlings in 4-inch containers, I always separate them. In fact, I purposefully plant the seeds in the containers in a very specific way that makes dividing them at a later time incredibly easy (more on that below).
When Do I Divide Tomato Seedlings?
As I noted above, if your seedlings are tiny, anywhere from 1/2 inch to 2 inches tall (12-50mm), I’d postpone separating them.
Tomato seedlings should be divided when they’re at least 3 inches tall (76 mm). Plants that size should have 4-6 true leaves and main stems that are nearly 1/4 inch in diameter (6 mm). Separate plants as gently as possible, pulling the roots apart and planting immediately.
I’ll explain my step-by-step process below, but if your seedlings have gotten far too large, I’d avoid separating them since the roots are going to be so enmeshed that they’ve basically become a single ball of roots. In those instances, you have two choices.
First, you can leave the plants as they are and plant them in the ground. You won’t get the fruit production from either plant that you would have gotten if those plants were properly separated, but with the right care and attention, the plants themselves will be just fine.
Second, you can go ahead and separate them. You’ll want to moisten the soil, then tug them apart as carefully as possible. You’ll damage their roots, but if you bury them as deep as possible and water and fertilize them properly, they’ll likely recover and grow like normal after a short recovery period.
Whenever you decide to separate your tomato seedlings, I would advise against dividing them and immediately planting them in your garden. Instead, I’d recommend separating them, then planting each in its own container and letting them adjust for a week or two. After that, it’ll be fine to plant them in the garden.
How to Separate Seedlings for Maximum Production: 6 Easy Steps
Before I go through the steps I use to separate tomato seedlings, I’d like to explain what I do when multiple tomato plants germinate in one of those small seed cells found in 36-cell and 72-cell trays.
As I noted earlier, there’s just not much soil in those small cells, so I generally don’t attempt to separate plants if multiple seedlings are growing in a single cell. They’re fine for one plant, but you’d never want to allow 2 plants to grow in them.
My solution to this problem is a simple one: I take a small pair of pruning snips, choose the smaller or weaker-looking of the two seedlings, and clip its stem.
Do I lose a potential seedling? Yes. But does this allow the remaining seedling to grow into a strong, healthy plant? Absolutely.
Now that I’ve explained what I do to seedlings that grow in small cells, let me explain my preferred approach to growing tomato seedlings.
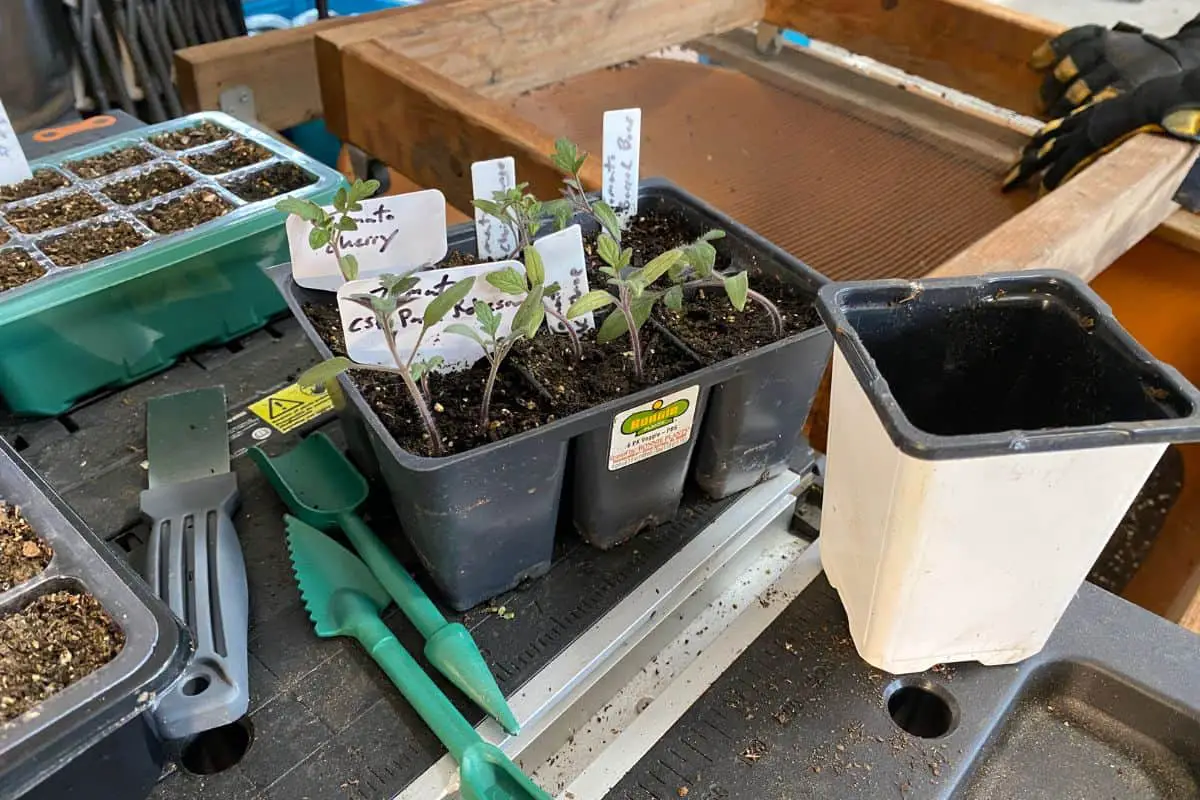
Generally speaking, I prefer to start my tomato plants in extra large 6-cell seed trays or 4-inch seedling pots. I like this approach for several reasons.
First, I plant multiple seeds per pot, so even if once it doesn’t germinate, the other one almost always does.
(Side note: Be sure to get your seeds from a reputable source. I prefer to use these online seed suppliers instead of picking up packets at the local home improvement store.)
Second, if only one seed germinates, that’s not a problem since that plant will be able to grow and thrive all by itself until it’s time to put it in the garden. You’ll need a grow light handy, not for germination since tomato seeds don’t need light to germinate. You’ll instead need that extra light once your seedling breaks the soil.
If you grow your plants in smaller seed cells, you’ll need to pot them up at some point. But if you grow in larger 4-inch pots, there’ll be no need to plant up into a larger pot along the way.
Third, if both seeds germinate, I use a cheap putty knife to do a simple, easy separation. Unlike small seed cells, the larger 6-cell trays or the 4-inch seedling pots allow you to spread out the seeds a bit so that the seedlings don’t grow right next to each other. Since there’s more soil to work with overall, this makes the tomato seedling separation process a simple one.
Using this method, I’ve separated my tomato seedlings successfully 100% of the time so far.
That being said, let me walk you through this process step-by-step so that you understand exactly what I do when I plant seeds and divide my tomato seedlings.
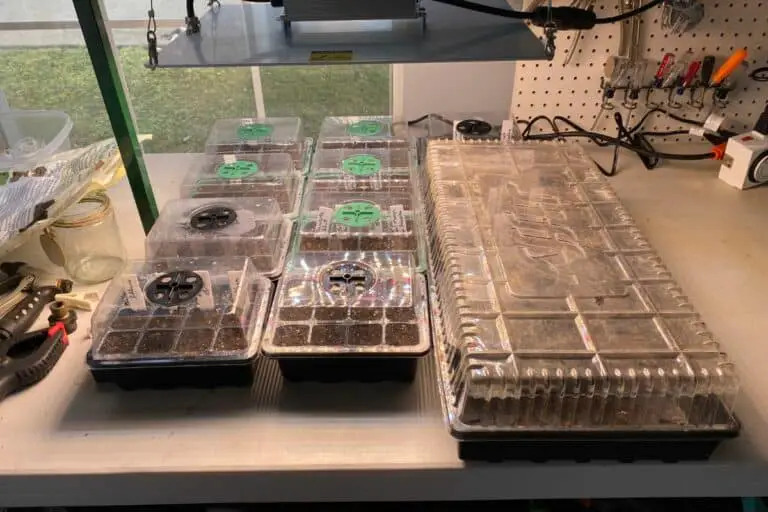
Step 1: Put Seed Pots in Seed Tray, Fill with Soil
There are many ways to germinate and grow seedlings, but I prefer 3 approaches in particular: 72-cell seed trays, extra large 6-cell starter trays, and 4-inch seed pots.
Let’s start with the seed tray. As I explained above, I used Burpee’s 72-cell Seed Watering System for the first time last year and loved it. My germination rates were very high, and I only had to add water to the tray itself, which meant fewer spills and messes to clean up.
It’s a bit expensive up front, but you can buy your own seed-starting soil later on, which means that one-time up-front cost is one I’m willing to pay to reuse the trays year after year.
Of course, you don’t have to buy this Burpee model since there are plenty of options out there. But stay away from any that are made out of less pliable plastics. I bought a few of those off Amazon last year, and I’ve found it’s very hard to get my seedlings out of them without messing up either the seed tray or the seedling (or both).
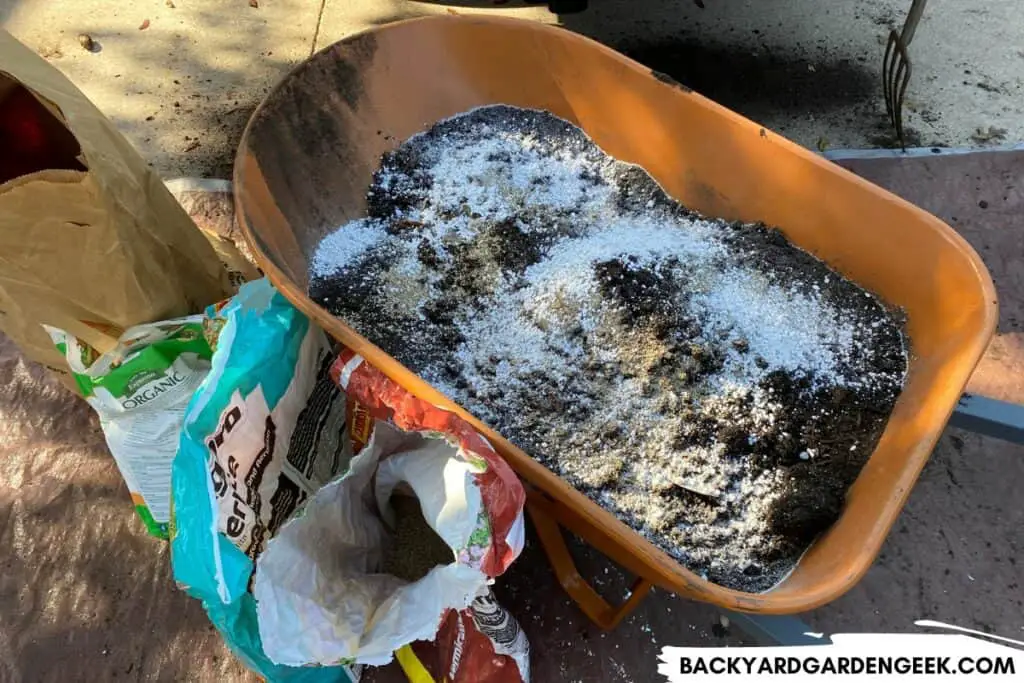
For the overall process to work, you need good seed-starting soil to plant your seeds in. You can purchase seed-starting soil at the store, or you can make your own. Here’s the recipe I use to make mine:
- 3 parts coconut coir or peat moss
- 2 parts compost
- 1 part soil from my garden
- 1/2 part perlite
- 1/4 part vermiculite
- A little blood meal or Tomato-tone, following package directions
If you’re planning to use a seed tray with small cells to grow your plants, go ahead and skip to Step 3. But if you’re interested in my use of 6-cell trays or 4-inch pots to increase seedling production, keep reading.
Step 2: Put Two Seeds Per Pot, Opposite Corners
I use the 72-cell seed system for most of my plants. I’ve also made soil blocks before, and that’s a great approach as well, assuming you’re willing to buy a quality soil block maker (since the cheap ones aren’t that great).
But when it comes to tomatoes, I prefer planting them directly in either 6-cell trays or 4-inch plastic seed pots. If you plan to use 6-cell trays or 4-inch pots like I do, I suggest that you start collecting them whenever you buy plants from your local garden center. I’ve gotten quite a few over the years, and I keep them every time I do.
If you don’t have any of your own, you can buy 6-cell trays or 4-inch pots on Amazon or look for them at your local garden center.
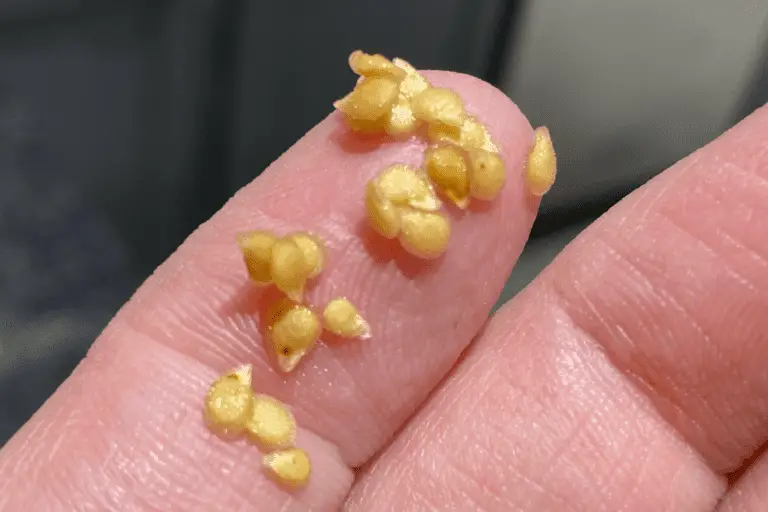
When it’s time to plant my seeds, I put 2 seeds per pot to increase the likelihood that at least 1 of them will germinate. But here’s my trick: I put the seeds in opposite corners of the container from each other. This gives them maximum distance from one another, which means that, assuming both seeds germinate, it’ll be easy to separate them when the time comes without causing too much damage to their root systems.
Step 3: Bottom Water, Either Directly or Indirectly
Once everything’s ready to go, I recommend bottom watering your seed trays since you’ll avoid flooding the cells and pots with excess water. Remember: You want the soil to be moist, not wet.
The Burpee system makes this super easy since it relies on moisture wicking material to deliver the moisture to the growing cells. But if you’ve got a seed starting tray–both the tray for the seed cells and the water-catching tray that goes underneath it–then all you’ll need to do is to make sure the lower tray always has some water in it.
Just don’t fill the lower tray too high or you’ll push too much water up into the seed containers above, making them much soggier than they should be.
Step 4: Lower and Raise Grow Light as Necessary
One of the biggest mistakes people make with growing plants from seed is not providing enough direct light as soon as the seedlings pop out of the soil.
If you have your seed trays near a window–or if you have grow lights, but they’re 2-3 feet above the trays–your seedlings will stretch toward the light as they attempt to get as much of it as possible.
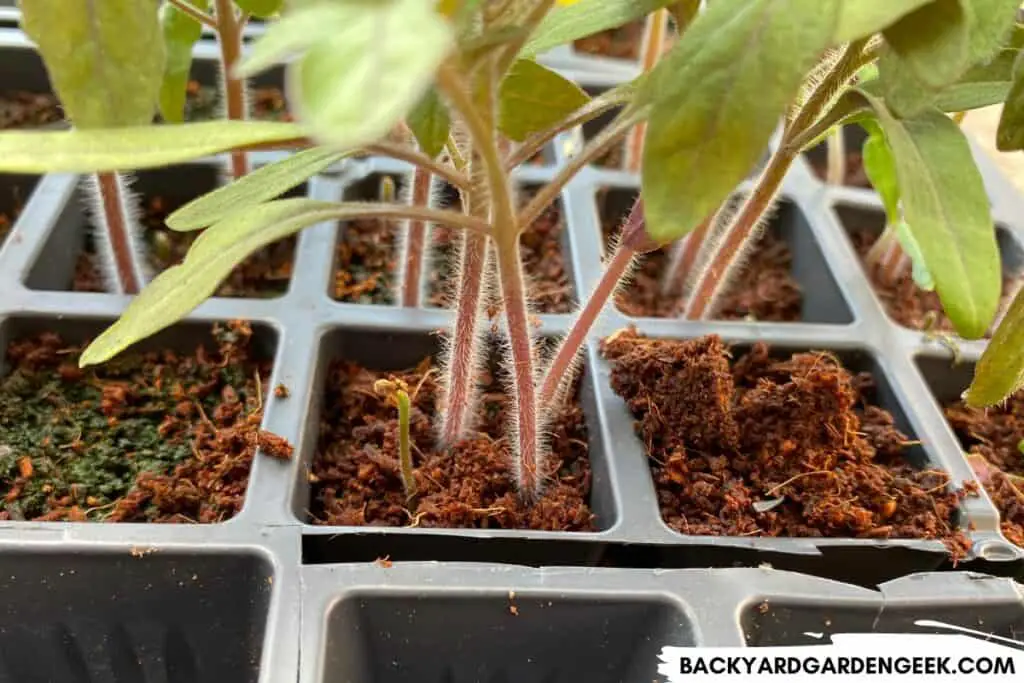
Unfortunately, this will cause their main stems to stretch, and what you’ll have on your hands are seedlings referred to as “leggy” because they’ve got long-thin main stems instead of shorter, thicker ones. You don’t want leggy seedlings, so be sure to position your grow light 1-2 inches above the soil. That way, when the seedlings emerge, they’ll have all the light they need, and they won’t stretch themselves thin to get more.
Pro tip: Tomatoes are unique plants in that every little hair on their main stem is capable of becoming a root. If you end up with leggy seedlings, don’t worry. Simply transplant the seedlings into larger pots, but when you do so, be sure to cut off the bottom few leaves and plant them as deeply as possible. This is an almost immediate fix to leggy tomato seedlings.
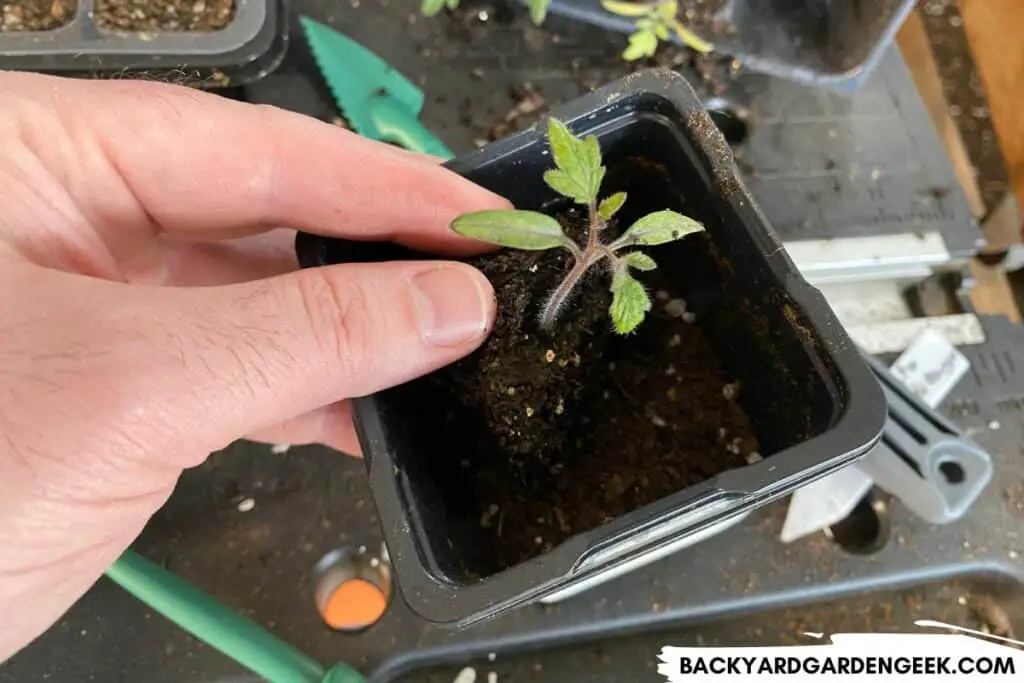
Step 5: Use Putty Knife to Separate Seedlings
Here’s my favorite part when it comes to dividing tomato seedlings that you’re growing in large 6-cell trays or 4-inch pots.
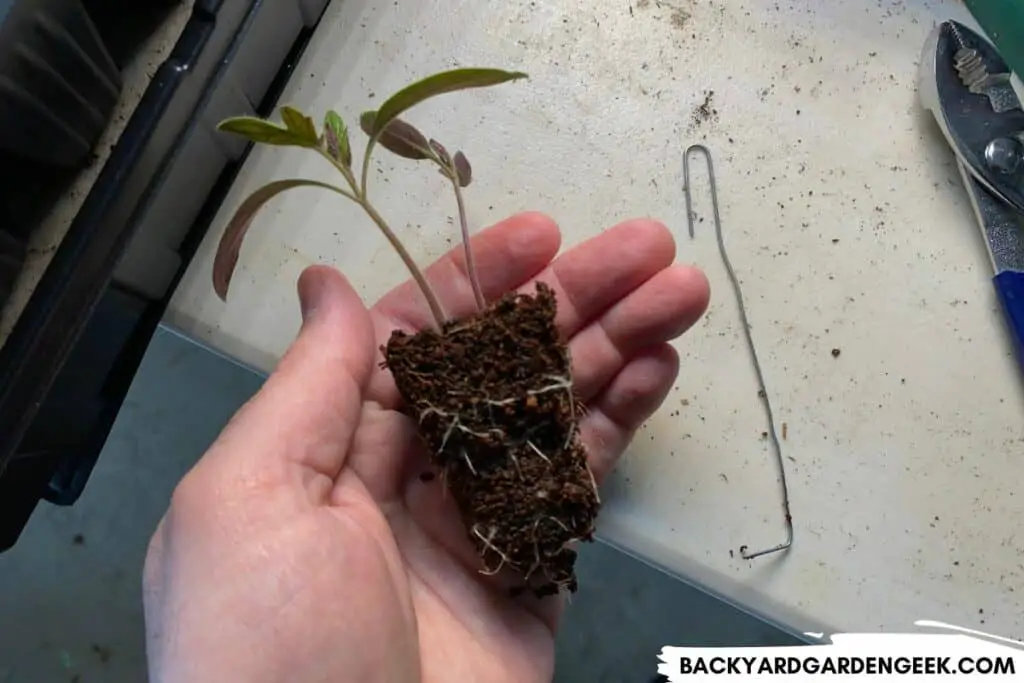
There’s no need to remove the seedlings entirely from the plastic pots since you planted your seeds on opposite corners of the pot. Do this instead: Picture an imaginary line that runs diagonally across the pot and between the seedlings. Turn the pot on its side and insert the putty knife in between the seedings.
At this point, carefully wiggle and then pull out the putty knife, removing one of the seedlings and half of the soil from the pot.
Now that you’ve separated your seedlings and have 1 of them sitting there on your putty knife, let’s move to the final step of my process.
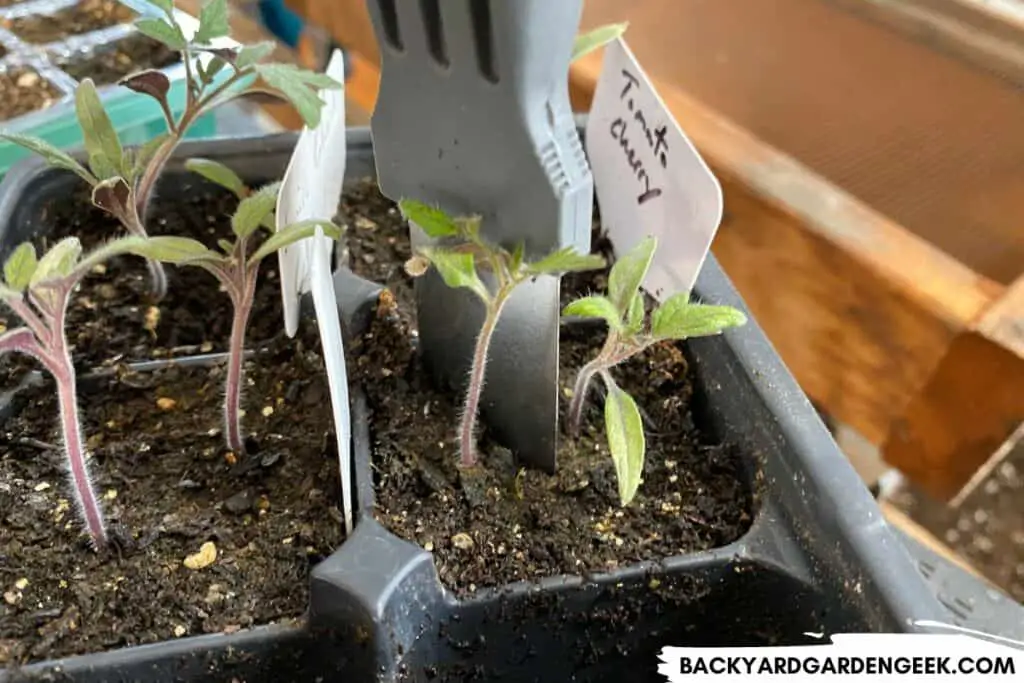
Step 6: Add to Pot and Fill with Soil
At this point, you’ll want to grab a new 4-inch pot, hold it sideways, and place the putty knife and seedling into the new pot.
Holding the putty knife in place, or using your fingers to keep the seedling where you want it, raise the pot a bit and fill up the other 50% of it with new soil, then place the pot upright, gently push the soil down and add additional soil as necessary.
I’ve found this to be incredibly easy if I use a small spade or cup to scoop up the soil and pour it into my new pot. I’ve tried doing so with my hands, but it’s not as efficient. For the additional soil, you can use the same seed-starting mix that you used to germinate your seeds or even regular potting soil.
Once you’ve made sure your new pot has all the soil it needs, do the same with the pot you just removed a seedling from. After you’ve done so, you’ll have 2 seedlings total, with 1 plant in each 4-inch pot.
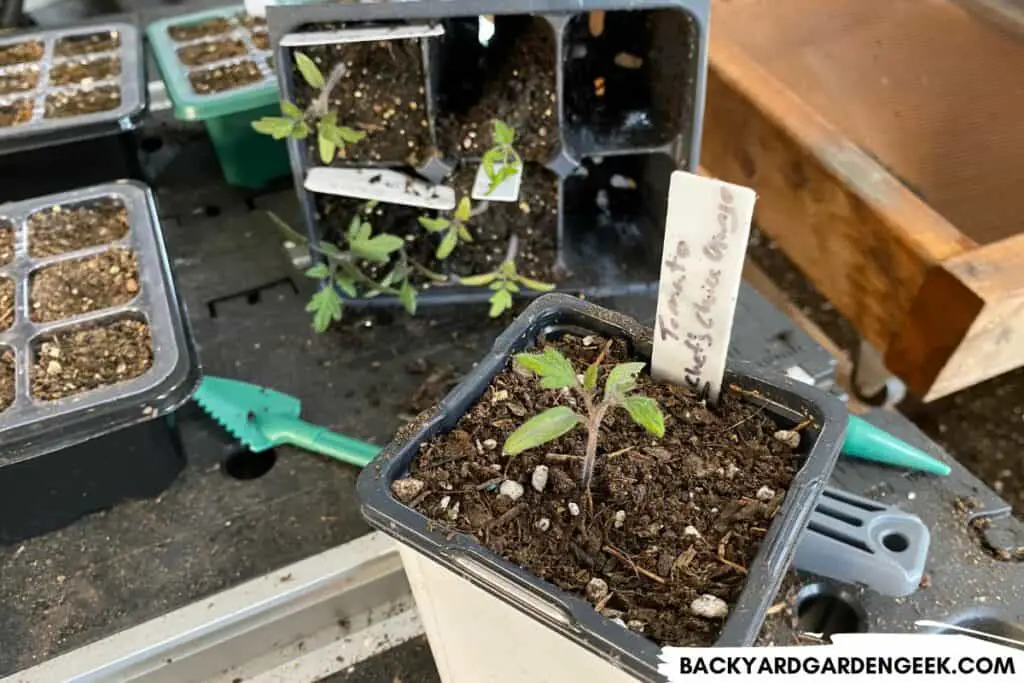
What’s nice about this process is that you can plant 2 seeds per pot to increase your chances at germination while also getting 2 plants for your efforts if both seeds happen to germinate. Simply put, this is both a cost-effective way to germinate and grow tomato seedlings. It also makes separating the seedlings that much easier since you don’t have to worry about ridiculously intertwined root systems.
Additional Reading
I hope you’ve enjoyed learning more about how I divide my tomato seedlings for maximum plant production. If you’d like to learn more about tomato seeds and seedling care, I recommend checking out these related articles: